About a year after the original exploration, I decided to go ahead and replace
the 12V battery that was by now 4 years old.  A worthwhile option had appeared
in the form of the "e Learn Aid" kit designed to adapt an Optima Yellow Top to
the Prius electrical system.  The kit with the battery and connecting hardware
was probably about the same price as I would pay a dealer for a new stock
Prius battery but would give me a much better unit that's also truly AGM.  So
I re-checked Darell's page for some reassurance and placed the order.
On this page, small pictures are linked to larger copies.
A nice solid box with plenty of tape on it.
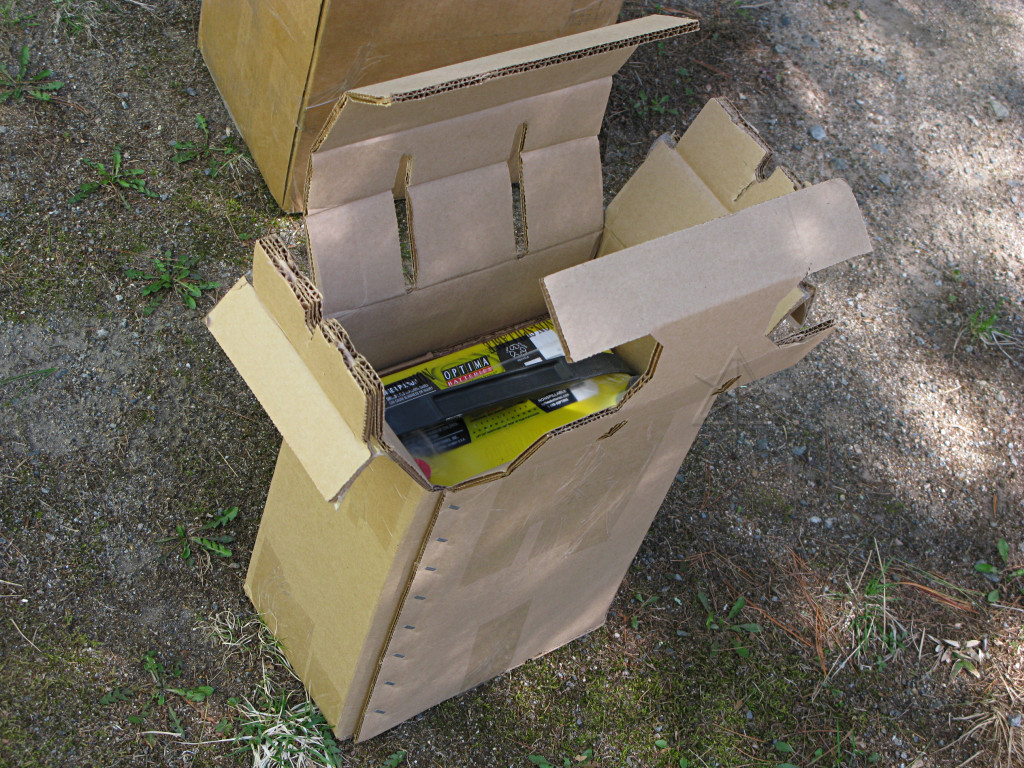
Inside is another sub-box containing the battery itself -- a somewhat strangely
folded one, but that pads the battery in plenty of extra double-wall cardboard.
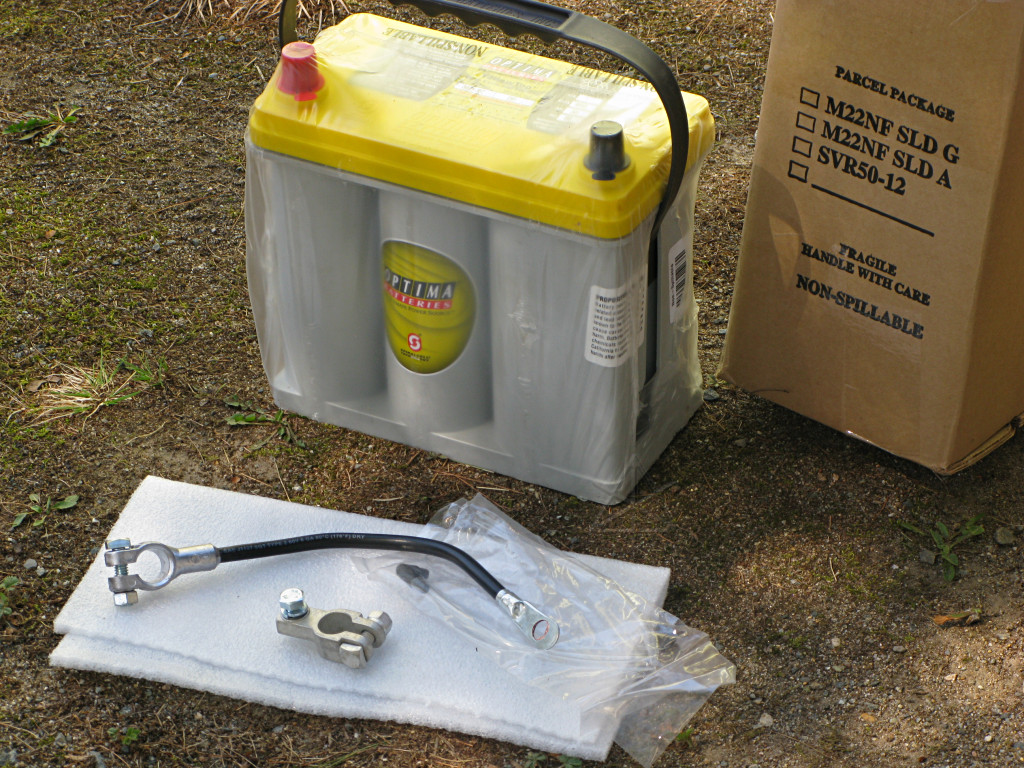
The kit parts: battery, replacement terminals, and fittings for the vent hose.
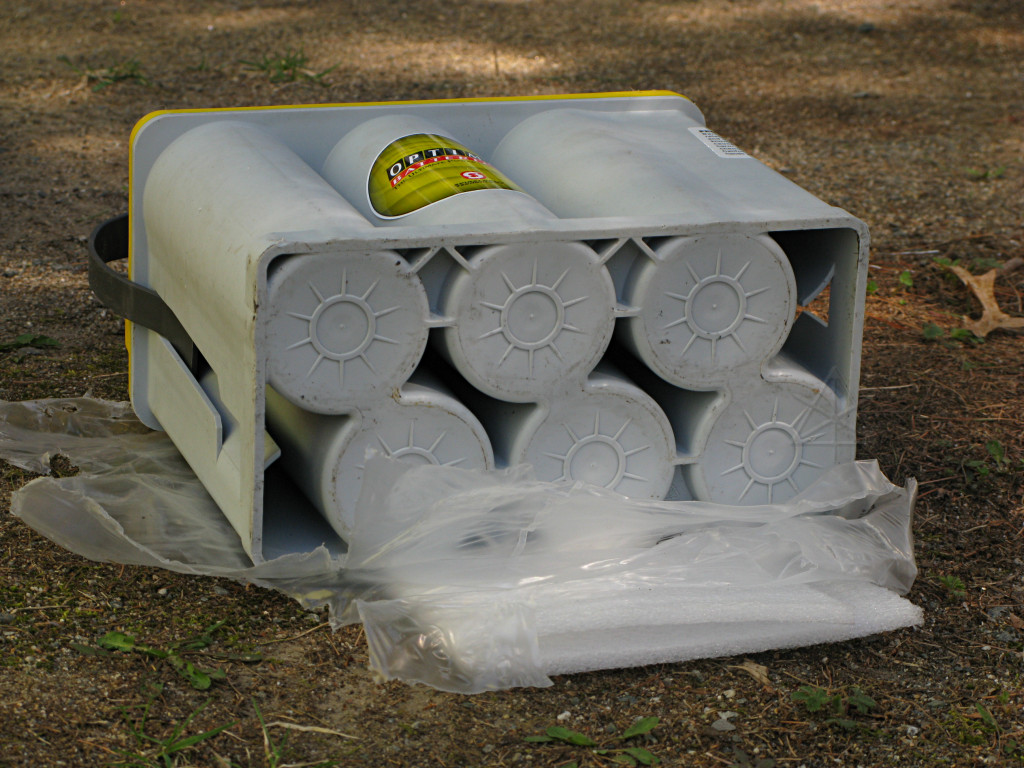
The bottom of the battery has an interesting open structure unlike the
traditional wet type, clearly showing the cylindrical cell layout.
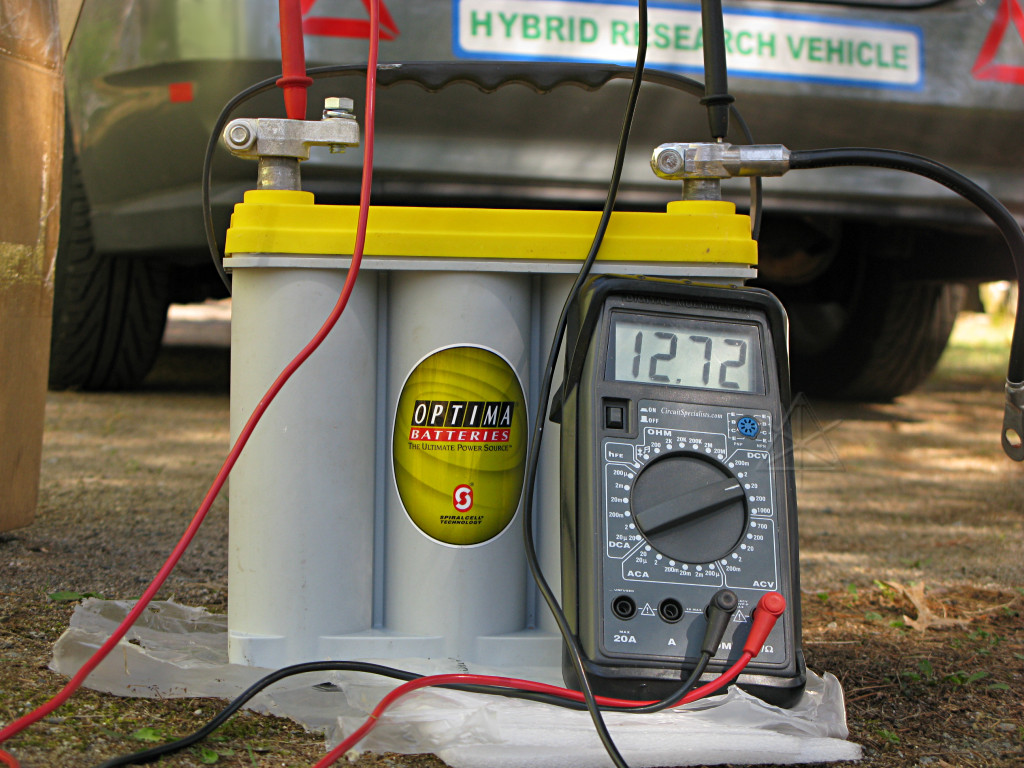
With my purchase I seem to have received almost a baker's dozen volts at open
circuit, showing pretty much a fully charged unit.
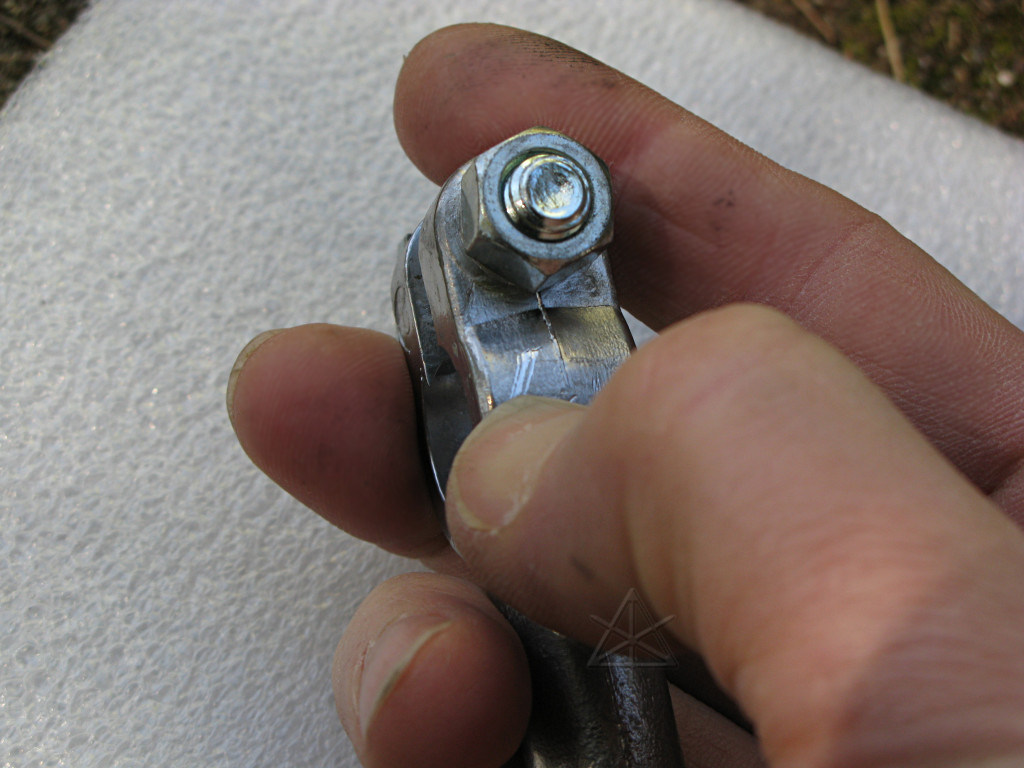
The negative terminal is definitely made mostly of lead, since I can scratch
it with a fingernail.  The positive one is some sort of plated copper alloy or
similar.
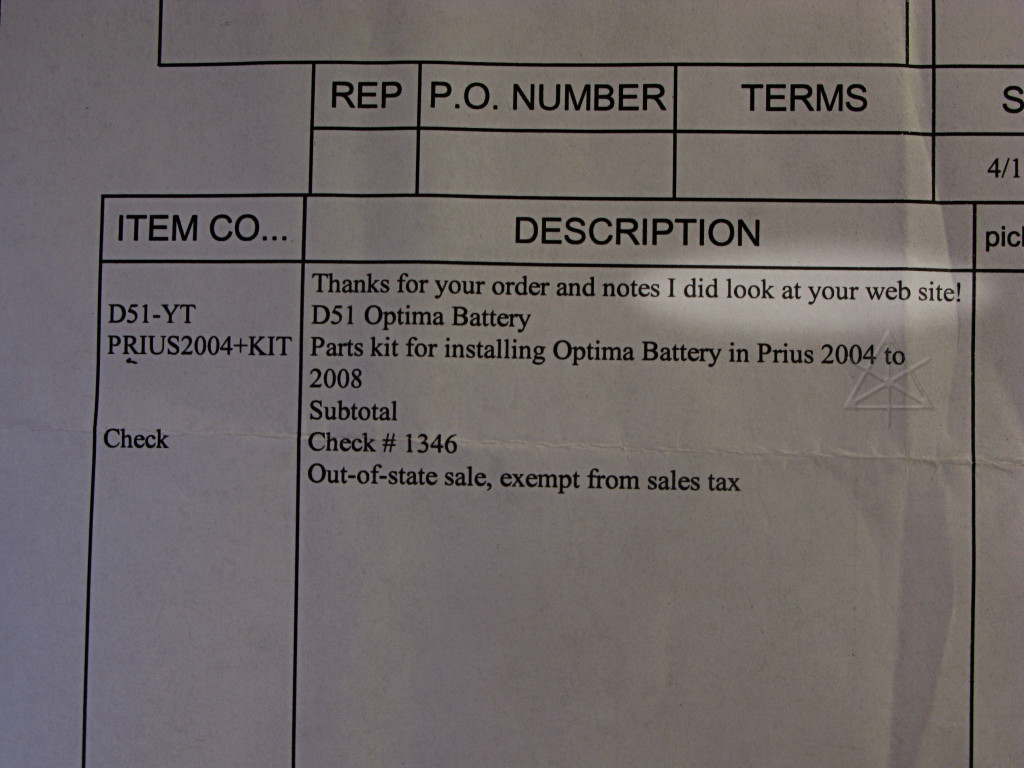
Finding a little personal touch like this on the invoice from a company you've
never dealt with before is rather gratifying.
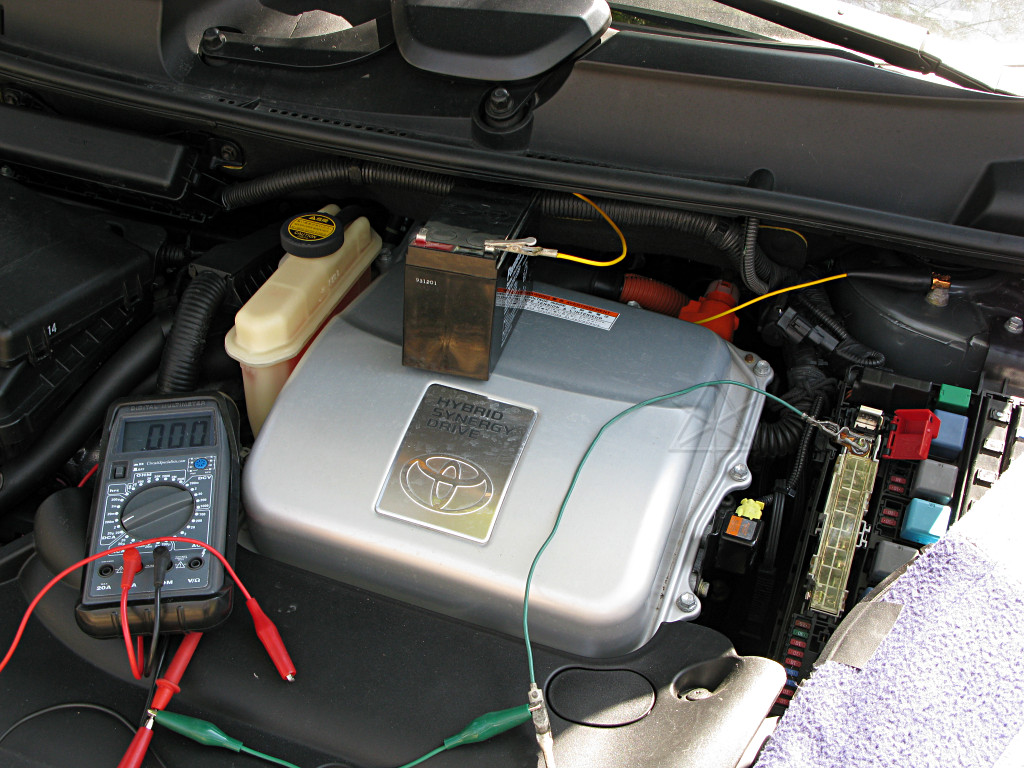
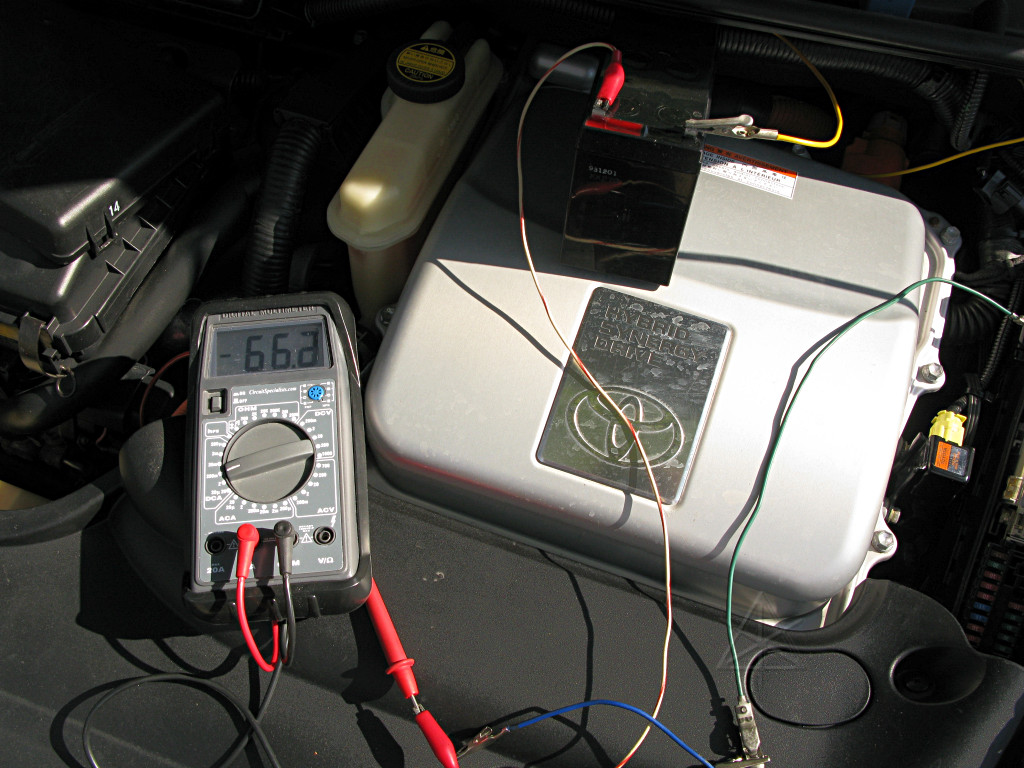
This time efforts will be made to avoid losing any settings and keepalive
memory, by hooking a small ancillary 12V battery into the system before
pulling the main connection.  This is easy to rig up near the relay block,
with a meter inline to show current in or out of the extra battery.
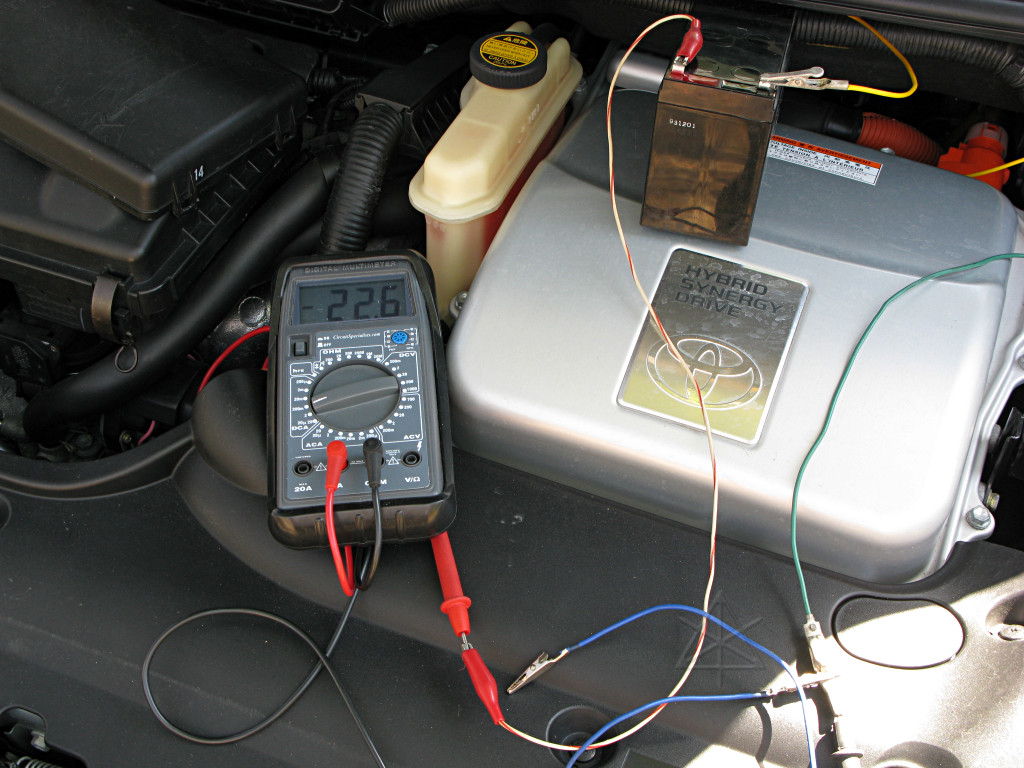
When the extra battery is connected, the car appears to be pushing a little bit
of charge into it at a little over 22 milliamps -- negligible, but proves that
they're now connected in parallel.
Then the main connection and the DC/DC sense wire are disconnected ...
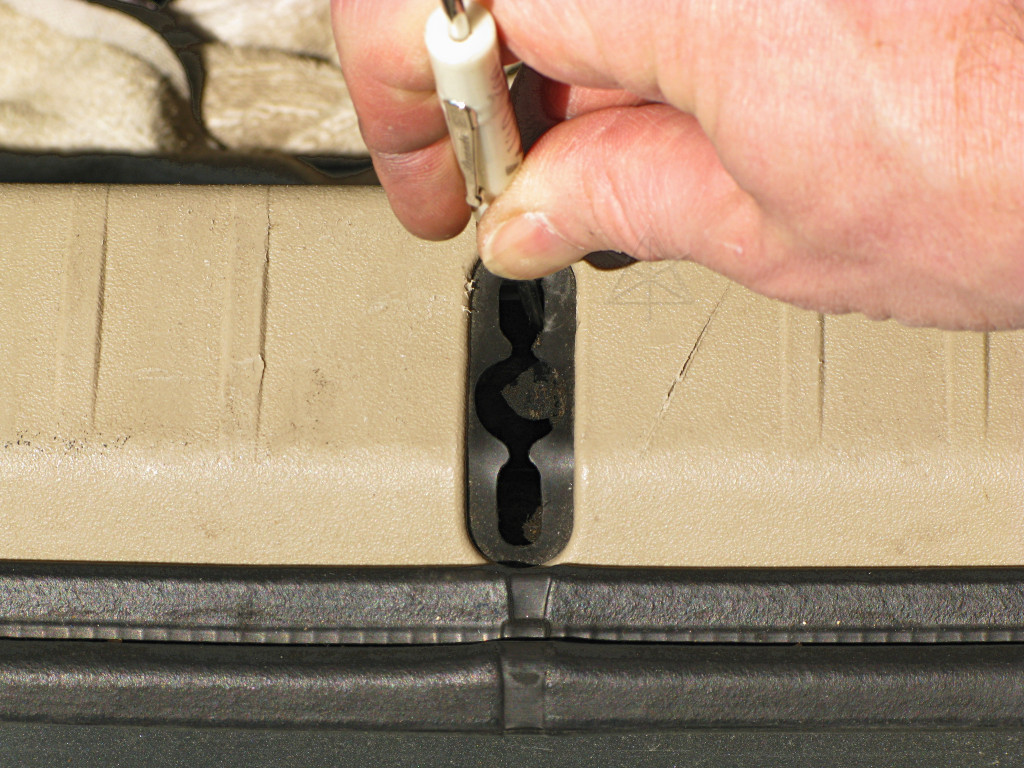
... and all doors closed and the rear hatch latch pushed down two clicks to the
fully closed position to fake the "all closed up" state to the car while still
leaving the back open.
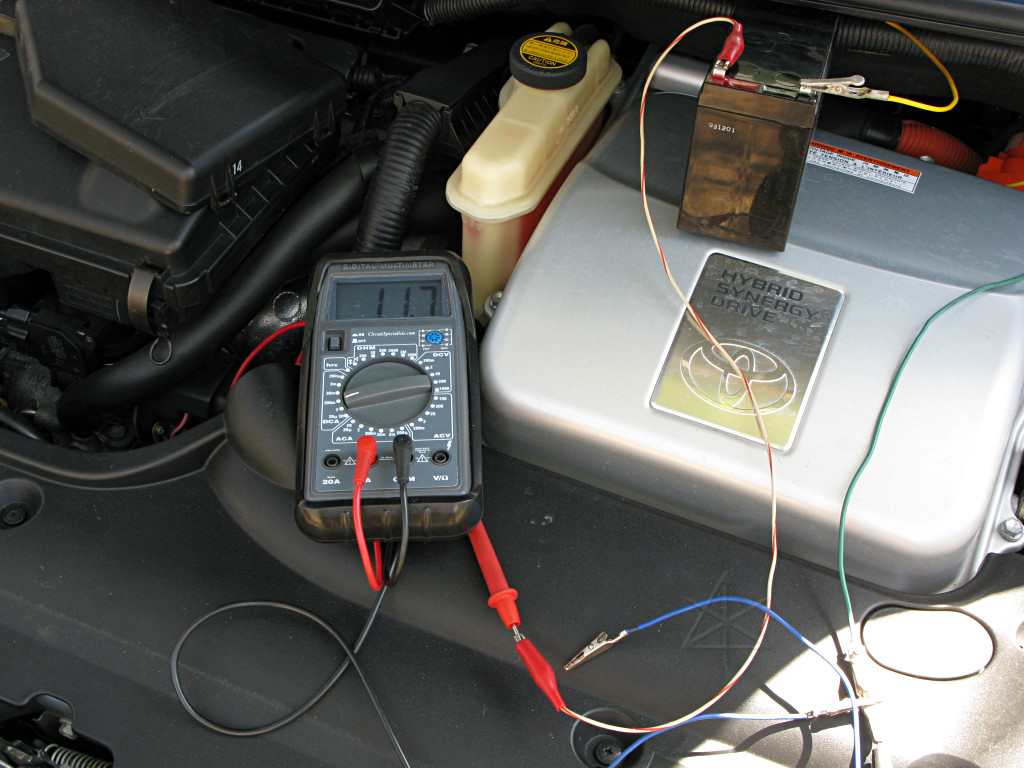
We confirm that the car draws about 11 or 12 mA in fully-down quiescent state.
A small difference now is that the connector carrying the "security" key-icon
light is plugged in where it's supposed to go this time, and the reading
actually bobbles between 10 and 14 mA or so as the LED flashes.  Still, quite
a low current drain.  Other cars I've owned have pulled 40 mA or more just to
keep a clock and stereo-presets and maybe one ECU alive, in contrast with all
that *and* about five more ECUs plus the RKE receiver in the Prius.

This should also be true in a model with Smartkey but with the disabling button
under the dash pushed in.
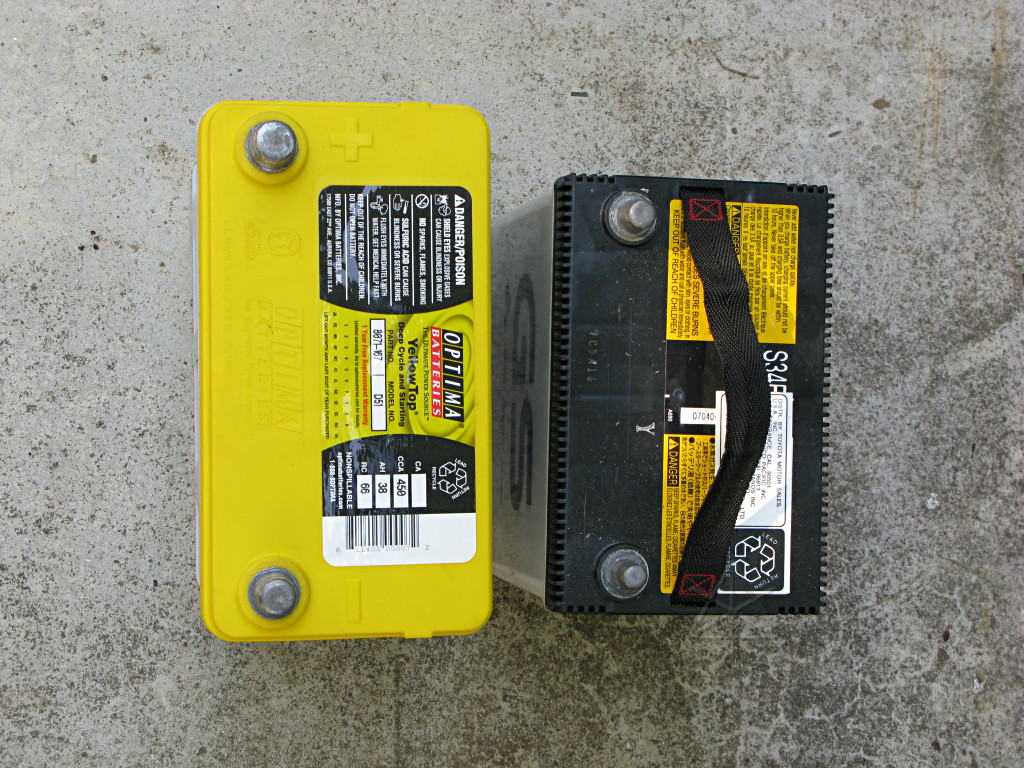
With the car now on auxiliary backup life support, the old battery can be
pulled.  Like on Darell's page, here's the size comparison, although my stock
battery is the smaller version used in cars without Smartkey.  So the Yellow
Top is a little closer to the size of the larger variant of Prius battery.
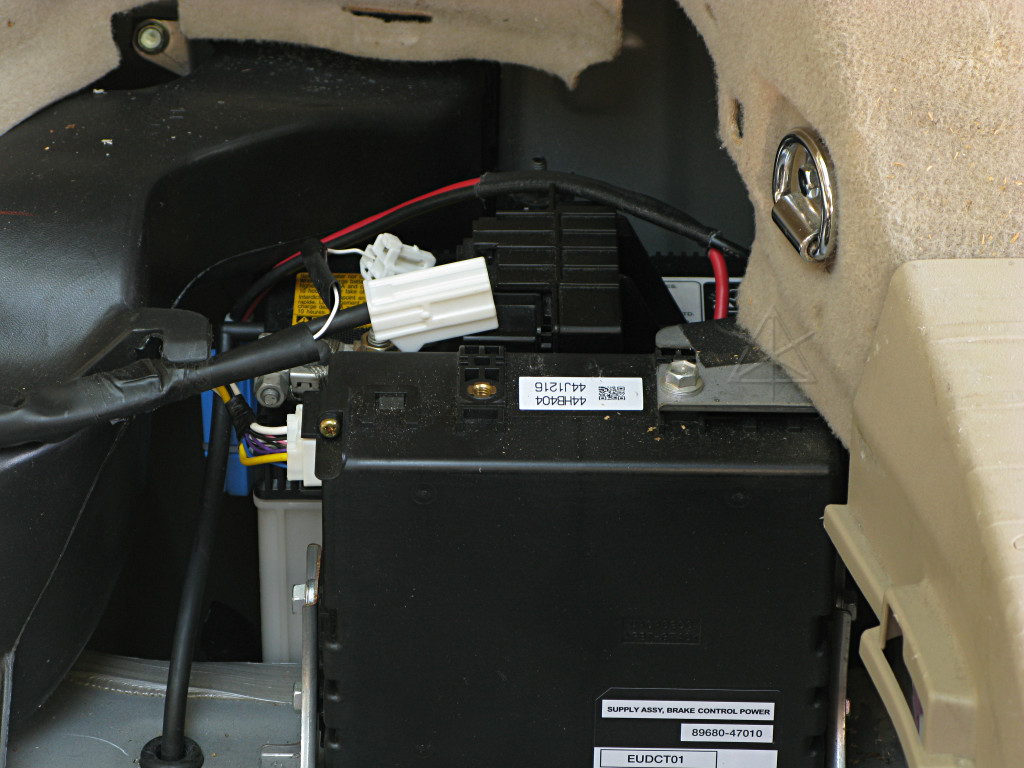
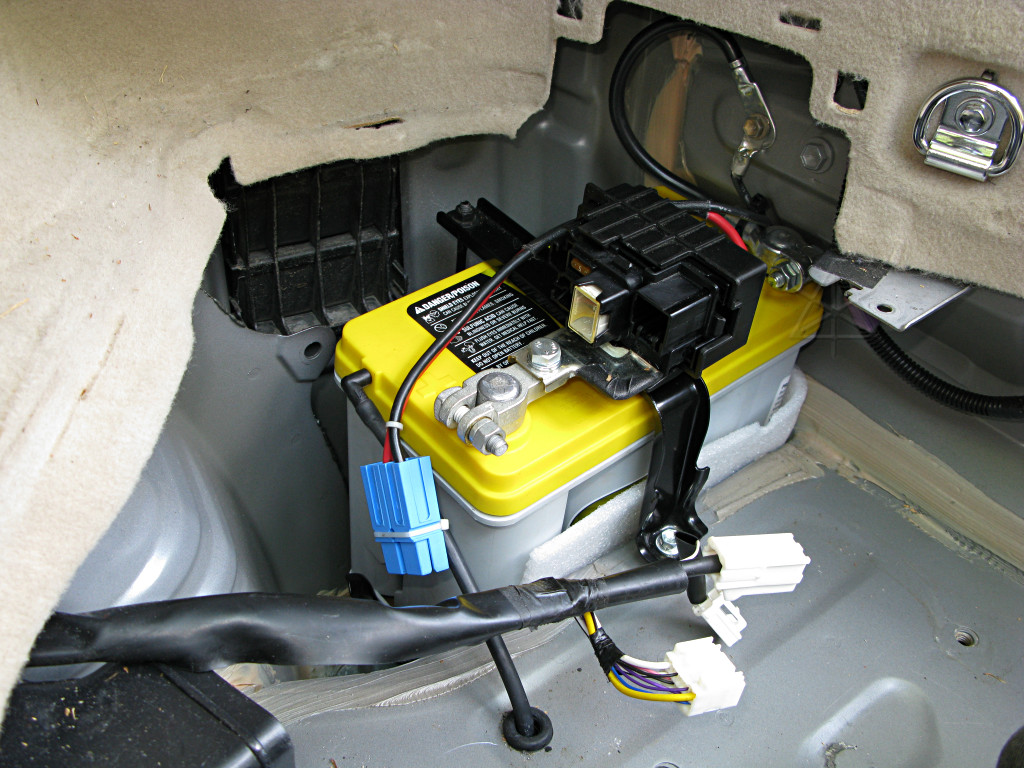
The new battery seems to lean inward a bit, possibly due to the extra foam pad
I've already got down on the bracket [the tan piece on the bottom], and the
inner cells bear against the side of the well in the car body somewhat.  To
protect the battery from potential abrasion I simply use a bit of the packing
foam that came in the box to wrap around the corner and shim it.

I've also removed the brake system power-supply box to open things up more for
better pictures, which also allows getting a little anti-seize on those bolts
which were starting to rust at the ends that poke through the body.
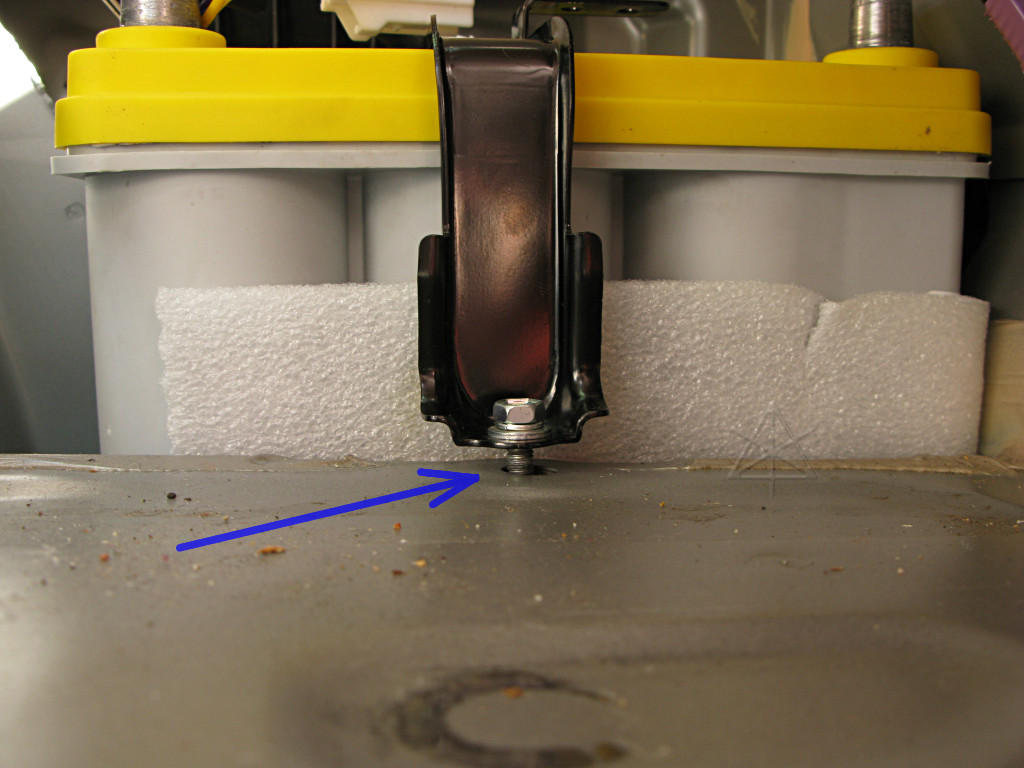
The new battery is a bit taller than the old one, which doesn't let the
hold-down clamp quite reach the floor.  Again, the padding underneath may be
contributing to this.  Clamping this down as is would put undue squeezing
stress on the battery.
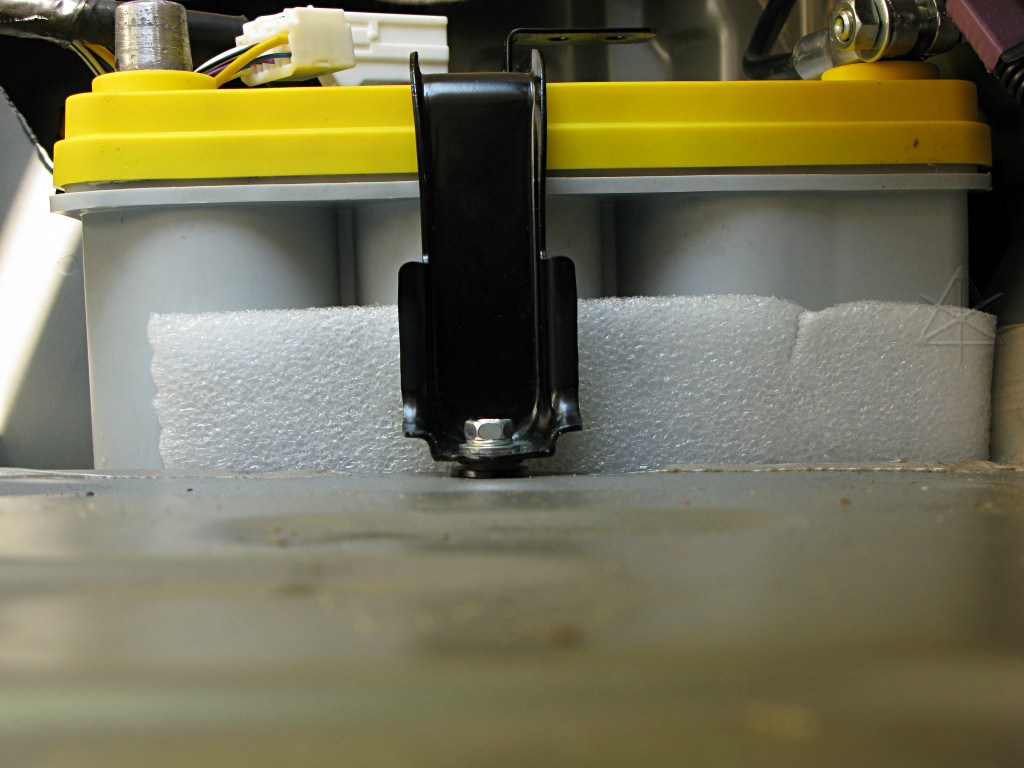
A couple of thick washers provide an easy fix, and the bolt can be fully
tightened down.
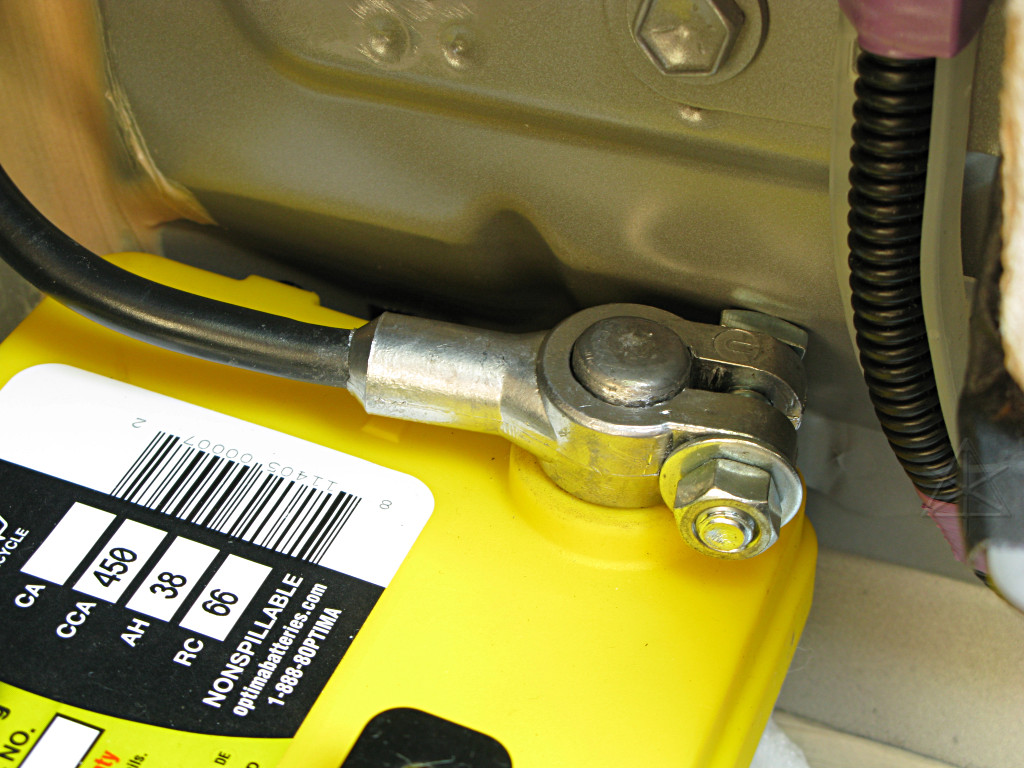
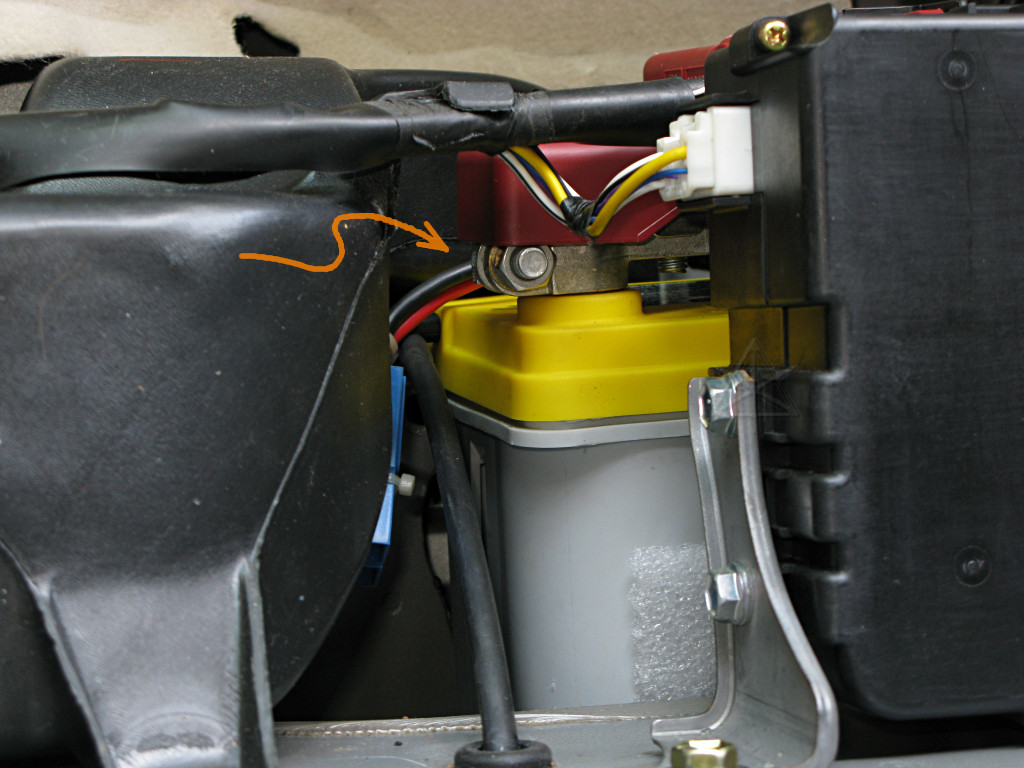
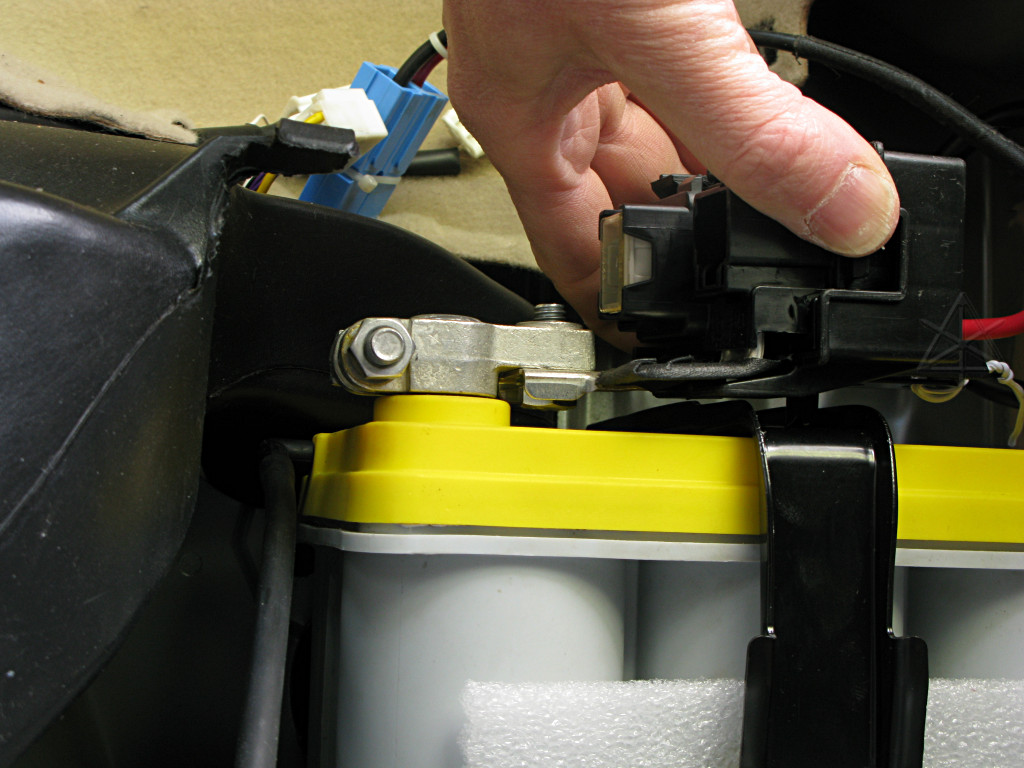
The negative connector has very little clearance to the back wall.  Turning it
a bit clockwise from here prevents it from actually touching, although it's
still close.  I've also added a washer so the nut doesn't grind into the lead
terminal clamp.

The clamp nuts aren't any of the metric sizes encountered up to this point,
they're half-inch.  But 13mm is close enough to that, so we don't have to run
off for the English kit to continue.
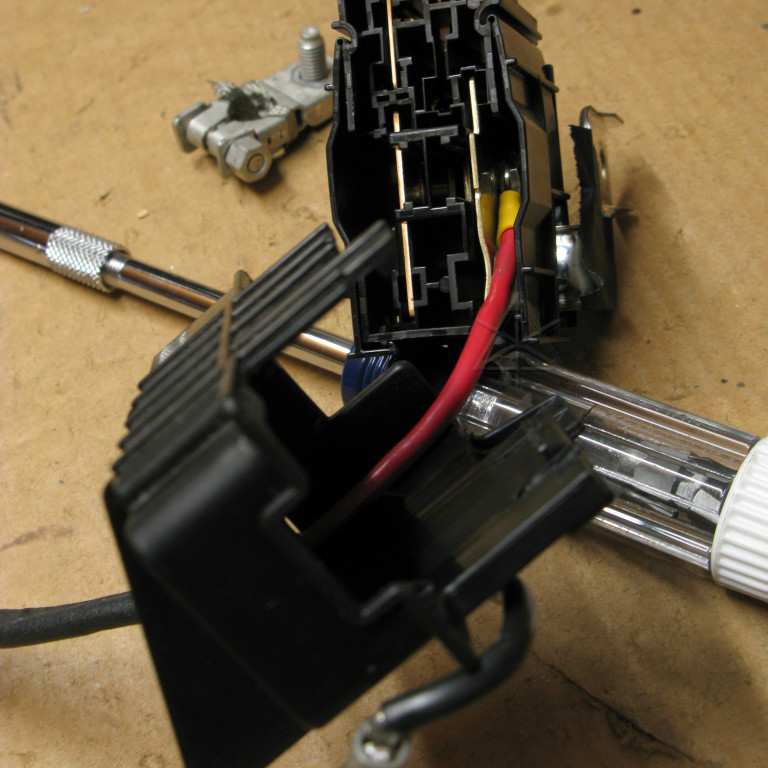
This shows how the extra "powerpole" 12V connection for a UPS is hooked into
the fuse block, which I hadn't documented before.  There's plenty of room to
add a lug under the existing bolt.
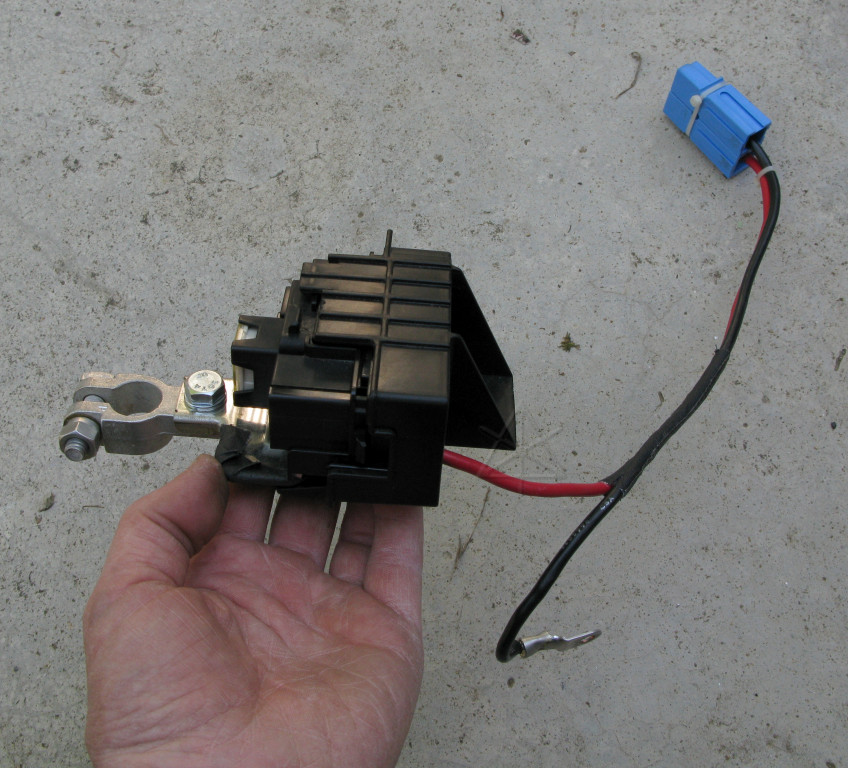
Now with the new positive clamp installed, the assembled whole looks like this
as it will go back into the car.

N.B.: there's some gaff tape wrapped around the near edge of the connection
strap, which is why it doesn't look like metal.
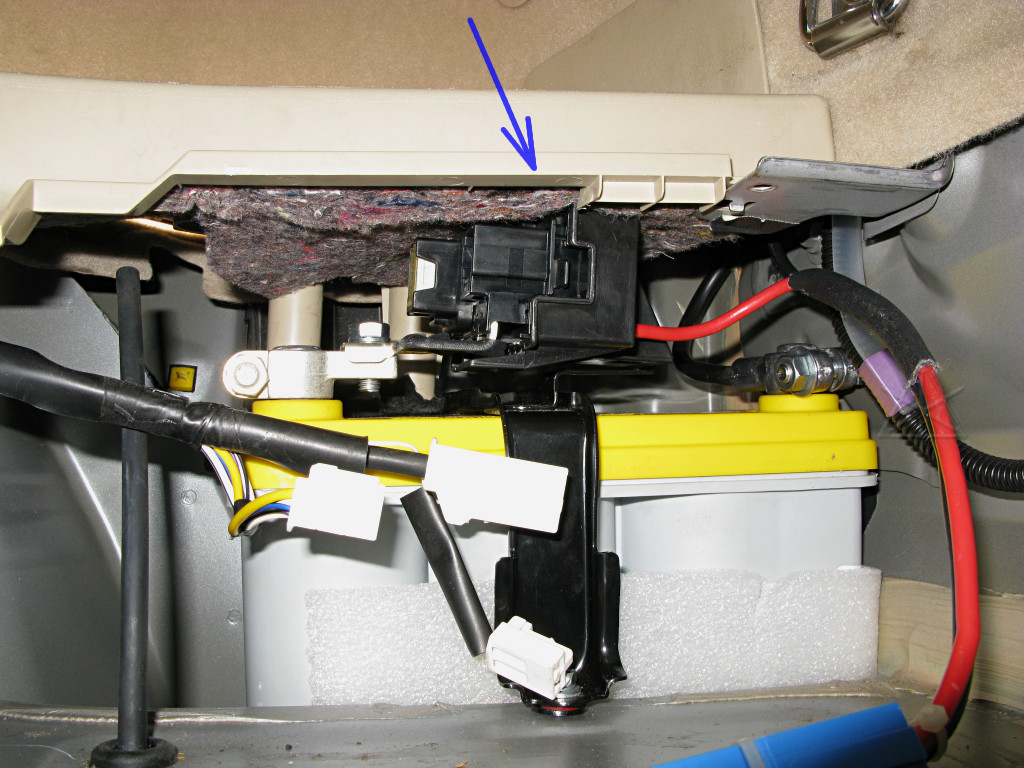
Clearance test: when the floorboard is put back on top of the assembly with the
new terminal, it doesn't quite fit and the padding pushes the fuse block down
a bit.  There is some room for the connection strap to bend down a little
without getting positive-connection metal too near the hold-down strap, and
the padding is squishy, so maybe this is okay.  I've seen some Prius battery
connections bent around way worse than this, and still functional.

The two plastic support pegs from the floorboard piece seem to land just right
on top of the battery behind the terminal clamp as they should, so weight on
the floorboard at least shouldn't push down more on the fuse block.
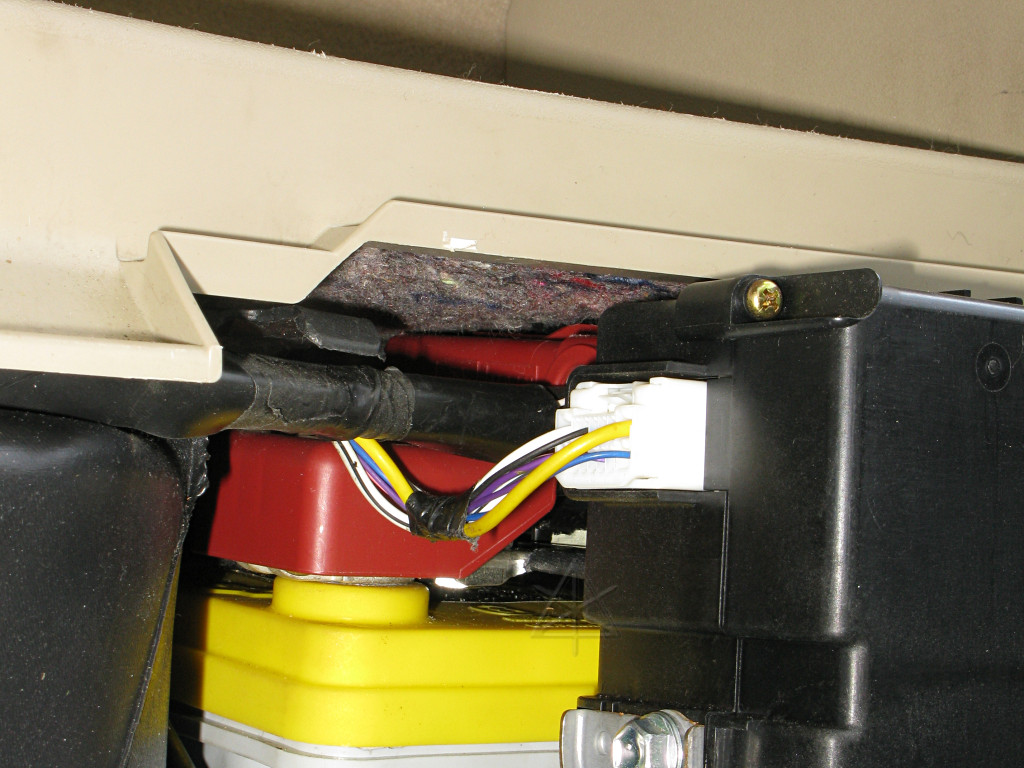
Major connections done.  This is how the Powerpole connector sits underneath
the floorboard when it isn't pulled up and in use with a UPS -- snaked behind
the fuse block and in between the plastic pegs.  It's a little fiddly to get
properly stashed without pinching any wires, but won't rattle around once
it's there.

This self-tapping bolt for the outer end of the duct can be a pain in the
tuchus to reinstall, since it has to be started a long way in past the liner.
The liner can be bent up a little to jam a hand in there and help hold the bolt
in the socket as it's started in.
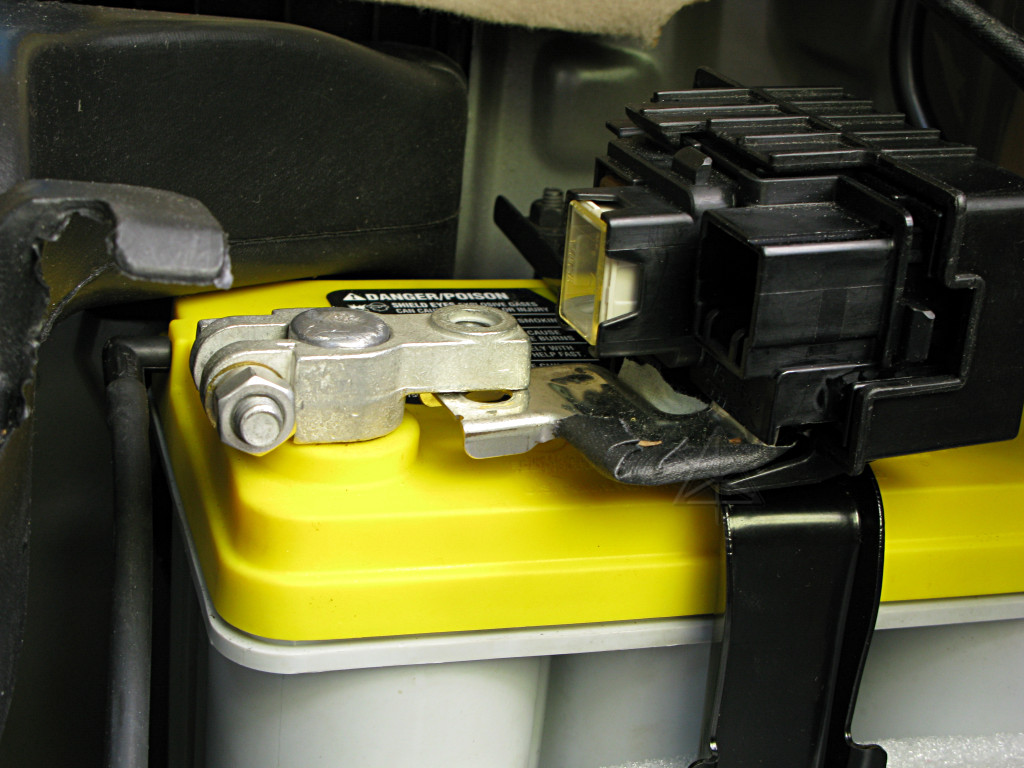
Once the red positive cover is reinstalled, we see that quite a bit more of
the terminal clamp is peeking out from under it than with the stock clamp.

Okay, this is a problem.  The higher fuse block position is causing a couple
of different kinds of mis-fit here, which is rather lame and it's bugging me.
This is the connection configuration specified in the instructions, so it's
not like I've done something wrong.
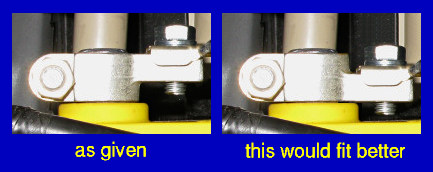
It is fairly clear that making this change to the design of the  terminal clamp
would fix the clearance problem.  [Artist's conception, photochop, etc.]  But
we can't just flip it over in real life because the taper of the hole then
wouldn't match the battery terminal and yield a poor connection.  Perhaps the
e Learn Aid folks could locate a different type of terminal clamp to include
in the kits?  Perhaps infeasible because the design of the existing terminal
clearly tries to leave room for the extra bolt threads sticking out underneath,
especially in the case of batteries whose posts stick right out of a flat
surface and don't have little raised collars like this one.  Then again, if
they have these custom fabbed for the purpose, they could be done differently
for the next production run.
Pulling things apart again allows noodling up a workaround.  If the fuse block
connection is moved to the bottom of the terminal, it will sit at about the
right height.  In fact, that gives it a little more contact area since the
bottom of the terminal clamp is flat and the top features that little raised
boss which touches less of the strap.  The bolt can go in either way, and the
thread end sticks up no farther than the head would have.
With the connection bolted up the different way and a little creative
*un*-bending of the fuse block strap, everything seems to be sitting much more
nicely.  There's still a tiny bit of daylight between the bottom of the fuse
block and the hold-down strap.  There's a big plastic wedge between the two
pieces of metal, so it's not like the positive is in any danger of shorting.
The tab at other end of the fuse block now once again sits flat on its piece
of the bracket, now retained down with a twistie since the little self-
destructing plastic pin is long since gone.  This is the correct height.
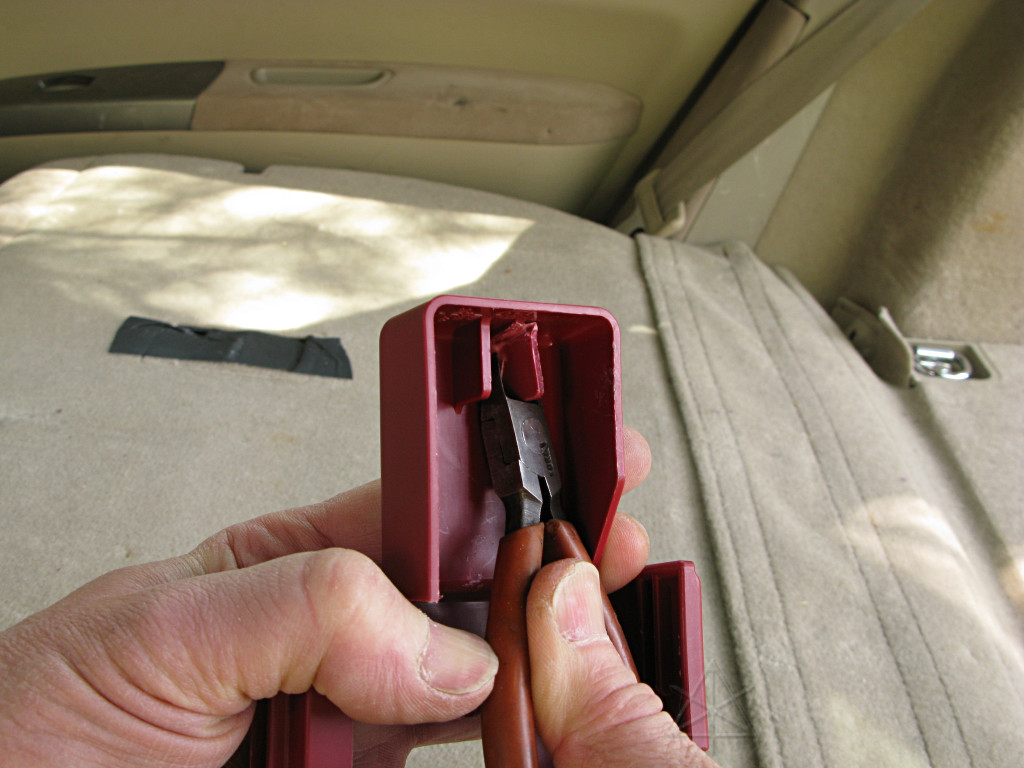
Since the new terminal is generally larger, these ribs in the cover are just
in the way and get clipped out.
Now the cover seats down fully over the terminal, and the floorboard padding
hovers just over the red cover without bearing on it.  [Doubly good since I'm
about to drop my hundred-pound UPS on top of this mess and subject it to 300
miles of nasty post-long-winter New York concrete interstate on the way to
Green Grand Prix.]
With the main connection plugged in again, the new battery is back-charging
the keepalive a little more strongly than the old one.  At this point the
keepalive is removed, and we're done.

To sum up, modifications to the kit and procedure include:

    *	washers [and anti-seize!] on terminal clamp bolts

    *	using a keepalive battery to retain memory

    *	guarding against abrasion in various ways

    *	adapting to new hold-down bracket height

    *	attaching the fuse-block connection on the low side

    *	removing superfluous tabs from inside red cover

These changes and notes may assist others who go to install this kit, which
seems increasingly likely as batteries in the '04 and '05 cars begin aging
out.  e Learn Aid is doing a fine thing here indeed, and makes it all fairly
easy; it just needs a couple of minor tweaks.

The 12V bus definitely stays a little higher on my panel voltmeter as various
accessories are used in IG-ON mode, especially the power windows.  The old
unit had been starting to show a bit of capacity loss and sagging under load,
and may not have lasted another winter.  This also gives more confidence for
running the blower hack and the laptop when bedding down for the night on
roadtrips, without worrying about draining the battery too far.