With another winter coming, it's time to think about better modifications
to mitigate the cold-weather MPG hit.  These pages are a follow-on to the
previous year's warm-air intake [WAI] mod, but here providing much more
extensive detail about several procedures at once:
- Document the relative simplicity of cowl removal
- Install an electric engine-block heater
- Try a different method for a warm-air intake pickup
- Play with grille / radiator airflow block-offs
We will attempt to lessen some common confusion about how the block heater goes
in, and to detail the ease with which the cowling piece under the windshield
wipers can be removed.  The cowl assembly looks daunting to some DIYers,
but it's quite easy to deal with and once it is out, there is much more
access to the parts behind the engine which facilitates all kinds of work.

These are large pages because of all the images, and may take a while
to load.  Many of the pictures are links to their larger versions, which
should be viewed for much greater clarity in what's being discussed.
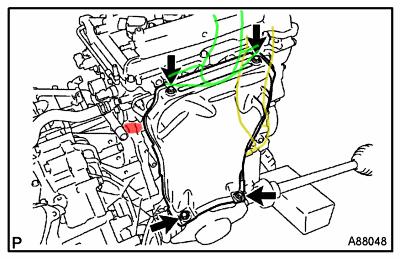
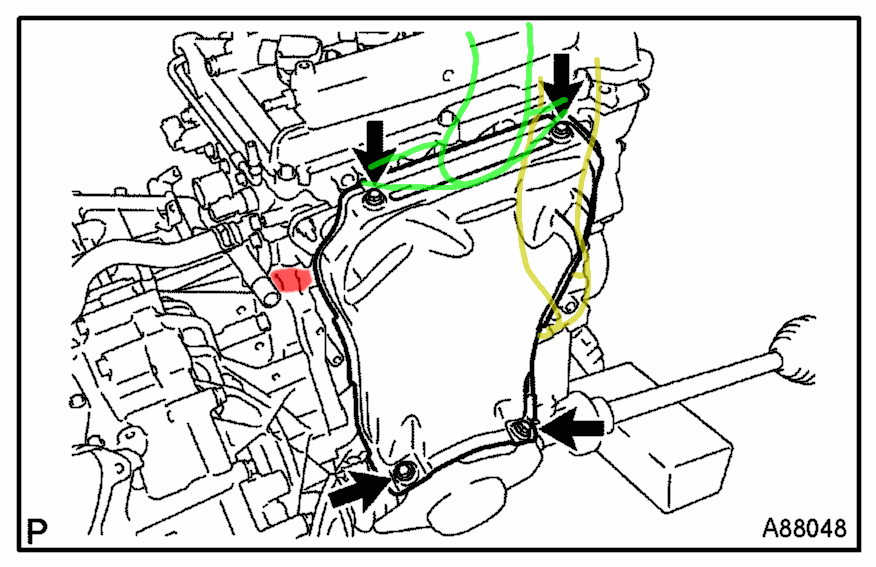
In this drawing of the back side of the engine, we see a fairly substantial
heat shield over the exhaust header.  It is bolted on at the points shown
by the black arrows.  This shield is a dual-wall assembly with an insulating
layer in between, not just a rattly piece of sheet metal.  The yellow outline
is where the first warm-air intake version from last year ran, sort of
hooking around the back edge of the heat shield.  The new idea [green] is
to bring air out through the small gap between the heat shield and the back of
the block right above the exhaust header pipes, which should provide plenty on
the theory that hot air from the header should rise and be ducted toward that
area by the heat shield itself.  The small red area is about where the opening
for the block-heater is.
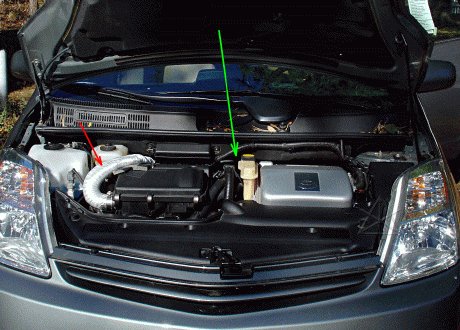
The area we need to access is fairly far down into the gap pointed to by the
green arrow, much of which is blocked by the big cowl piece that hangs very
close over the engine.  We'll begin by taking that off.  It should be noted
that the silver tubing [red arrow] is not a standard part of the car -- that's
my original section of added flex-duct left over from the previous warm-air
mod, which will be re-used here.
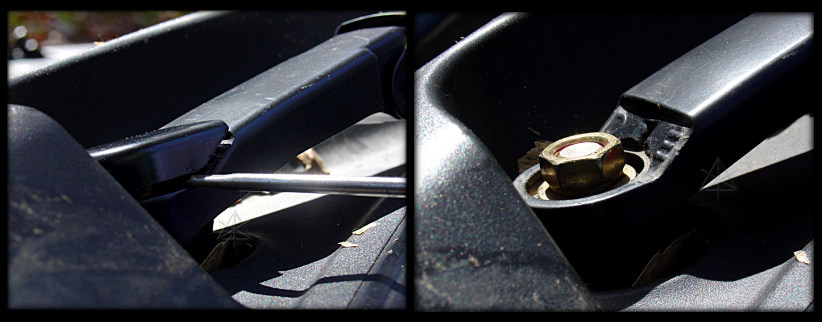
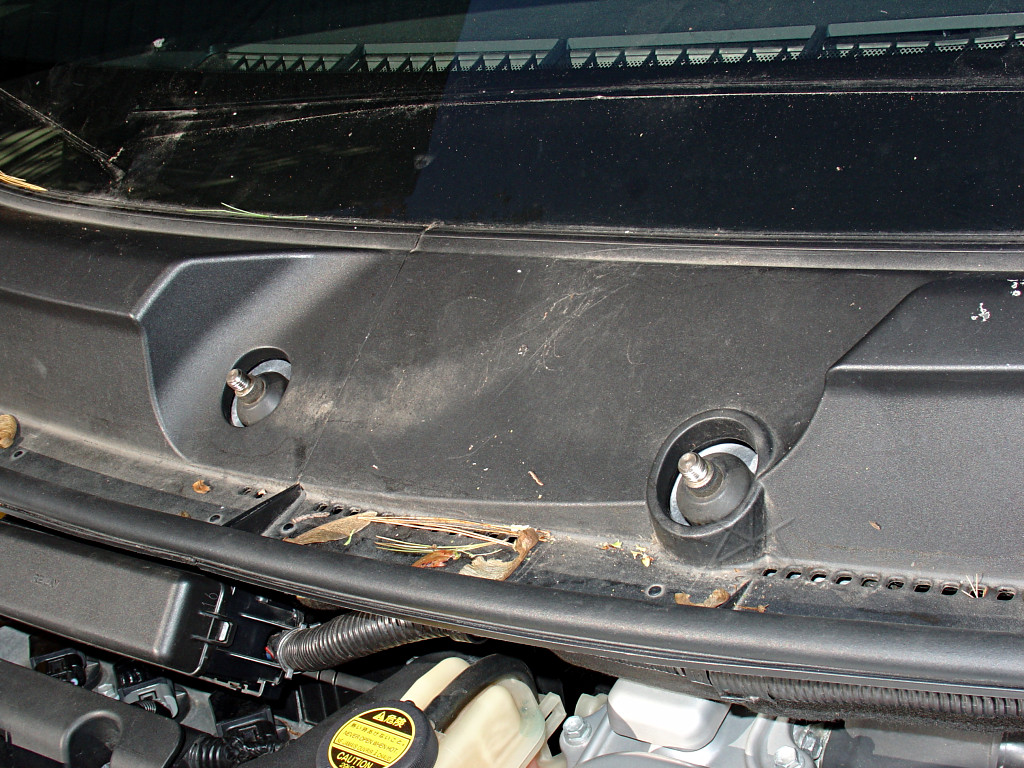
The windshield wipers need to come off first.  Carefully pry the small plastic
cap up from the base of the driver's side wiper arm, revealing the nut.  Take
note of where the outer ends of the wipers sit on the windshield, because
you'll likely be putting them back in the same alignment later.  [If they are
not parked in their standard place, power up the car and cycle them once to
land them at their home position.]  Use a 14MM socket and remove all three
wiper nuts -- this one and the two black cap-nuts on the passenger-side
one -- and lift the arms away.  Note that the arm springs will try to cock
the mounting pieces down against the pivot points.  If you close the hood
after removing the nuts, you can simply lift the wiper arms to the "cleaning"
position before removing the arm bases.
The wiper pivots remain.  Oh, right, we need the hood open again...  Now,
notice the subtle vertical seam in the black plastic?  It's actually two
pieces that come out separately.
The rubber hood-gasket strip, however, is one piece across the whole thing,
requiring that at least half of it be detached.  There is also a little glue
involved in holding it down, but in general there seems to be less on the
driver's side.  Carefully pop out the little retaining clips -- you can reach
underneath to squeeze their little wings, or just wiggle each one so it comes
out of its hole.  Fold the removed half of the strip back against the half
of the plastic cover you're leaving it attached to.  Any sticky goop that may
be holding down the chosen half can simply pull free -- don't worry about it.
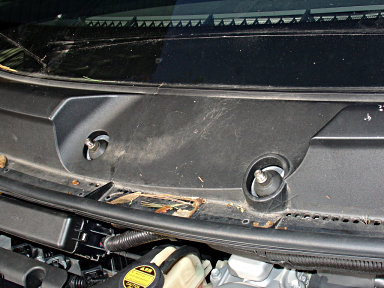
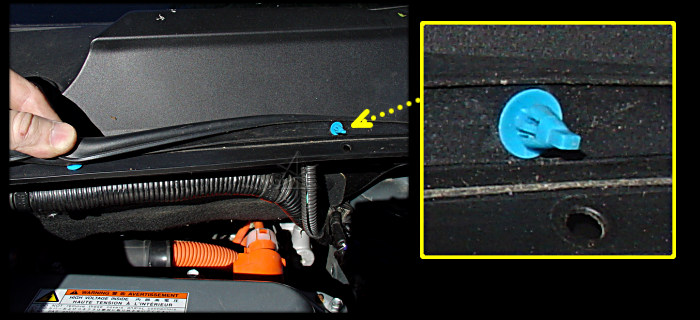
The little retaining pins at the outer ends of the plastic cover must have
their centers lifted before they can be removed.  The easiest way to do this
is push the end of the pin up from below, after which the pin can be grasped
from above and the whole fitting popped out of its hole.  Be careful not
to lose these down into the fender or firewall area.
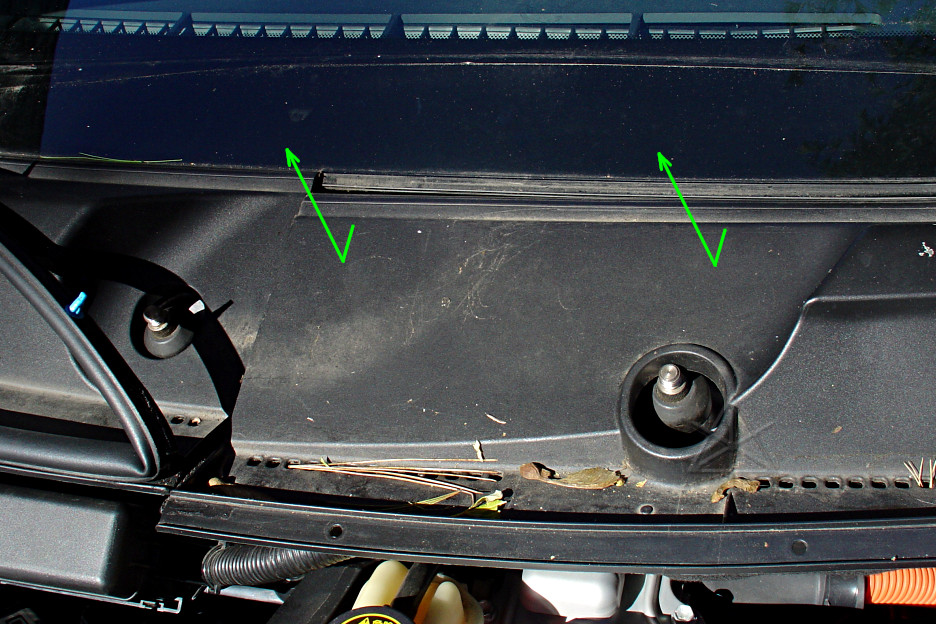
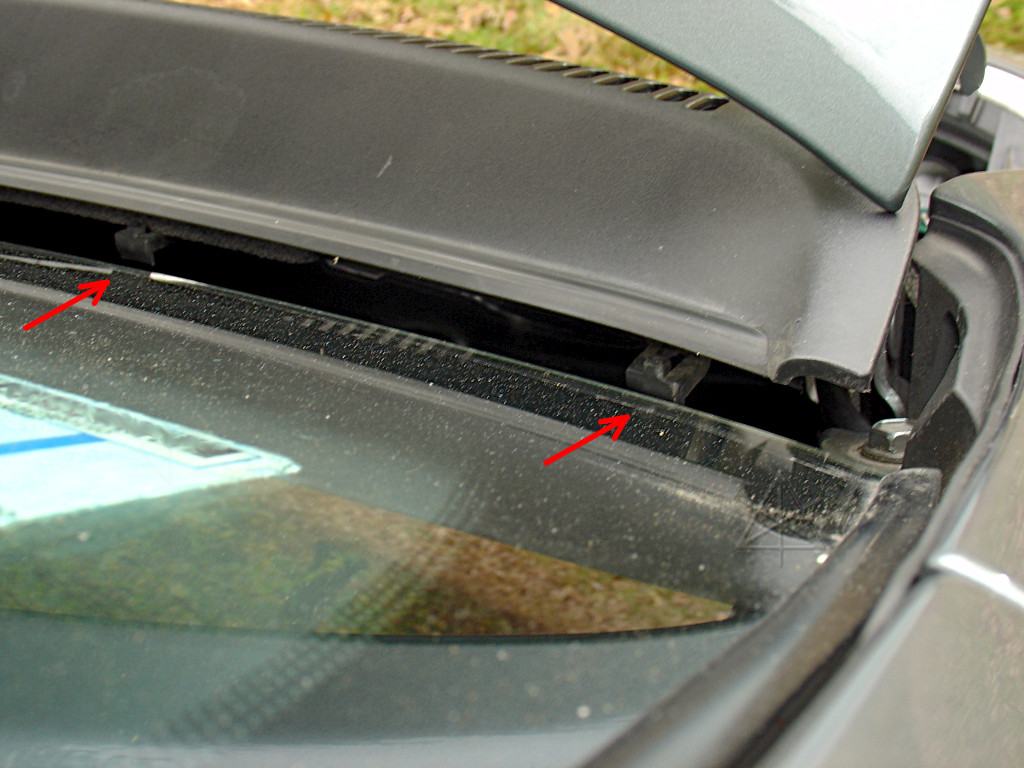
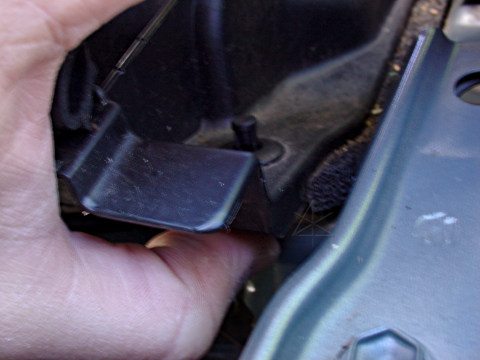
For each half of the cover piece, lift its front edge slightly away from the
metal cowl tray underneath.  This will involve unclipping these little claws,
which is easily done by pushing the front face of the claw away from you
while gently but steadily lifting.  Don't force them -- make sure all three
or four claws are disengaged from the holes in the metal edge before trying
to move the cover any farther, and don't lift any higher than needed to
disengage the claws and float them just above the holes.

Once the claws are free, the plastic should be able to slide straight toward
you about half an inch, and then lift up and away, following the path shown
by the green arrows.
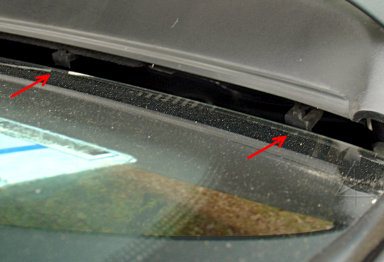
This is why the forward-and-then-up motion is necessary -- these rear claws
actually hook under the edge of the windshield, and the first pull slides
them out from under the glass to free up the top edge of the cover.
It may take a little fiddling to work the outer point of each cover piece past
the hood hinge, but it's fairly straightforward.  Once the plastic cover pieces
are off, we can see the windshield wiper motor and link assembly, the inner
firewall and climate-control intake, and a lot of empty space.  Oh, and lots
of fallen plant-matter detritus, too.
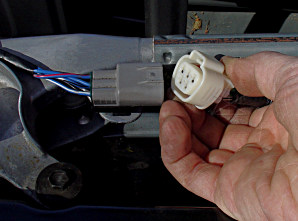
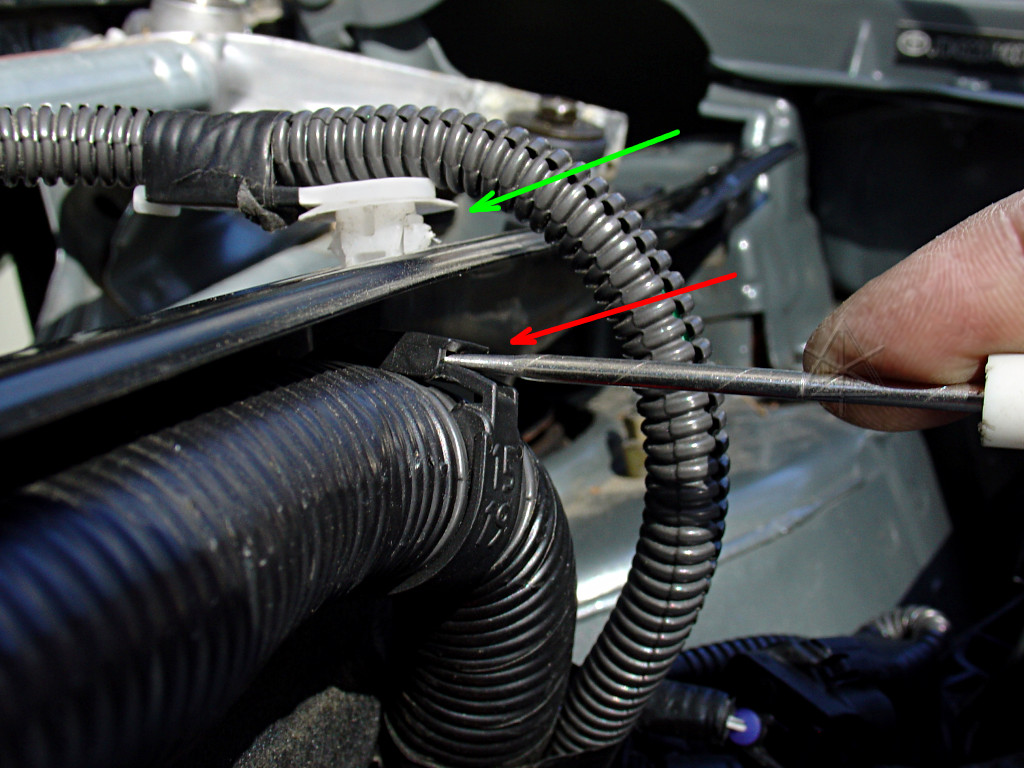
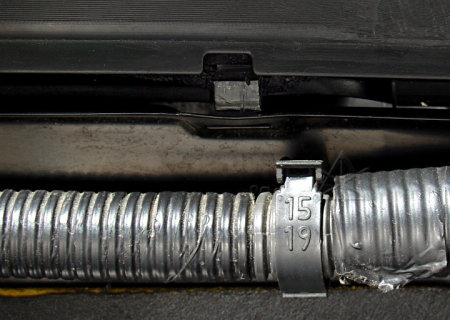
Squeeze the retaining clip and disconnect the wiper motor power plug.
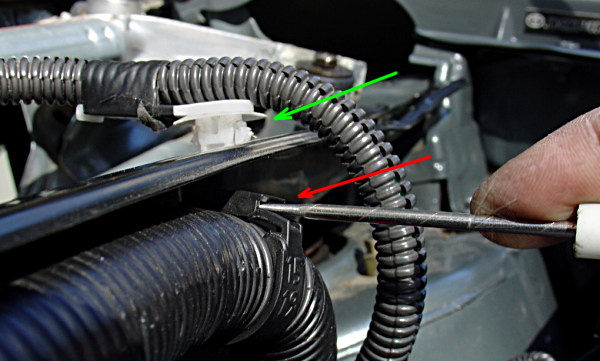
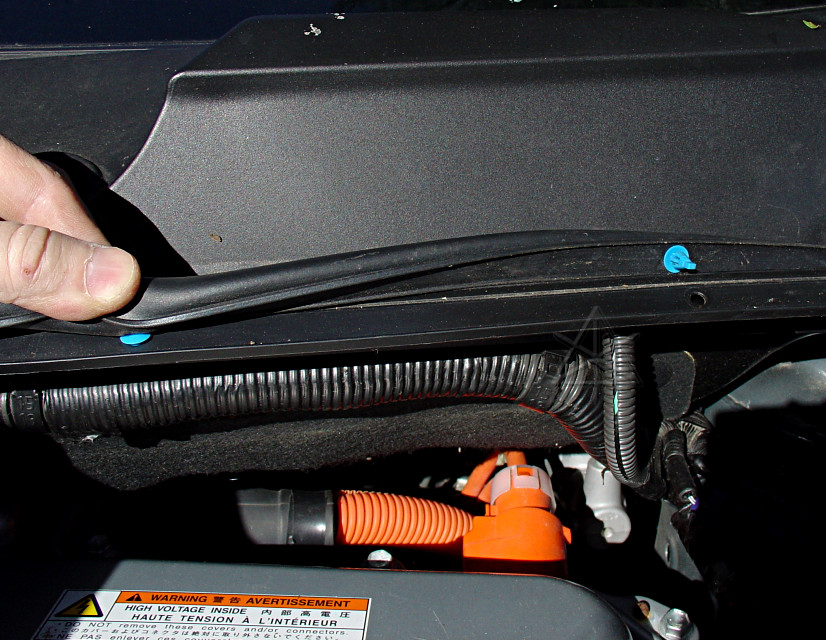
Disengage the wiper-power cable support from the cowl piece [green arrow].
Its little retaining ears are located front-to-back and may take a little
careful prodding from underneath to disengage, but it does come out without
being forced or broken.  Then, use a small screwdriver to unhook the barbs
inside the three relay box cable clamps [red arrow] and let their front
halves drop open.
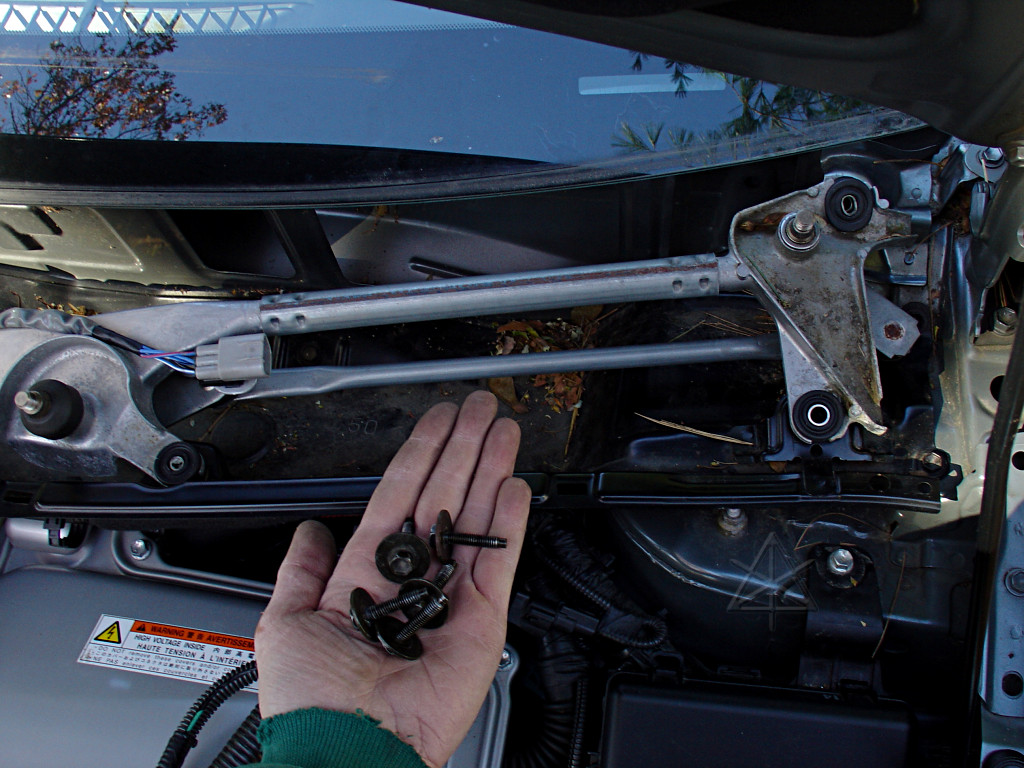
Now, it's time to go nuts with the 10MM socket and extender.  Remove the two
bolts holding the small relay box near the center, and swing the entire piece
of harness out of the clips and forward away from the cowl edge.
These five long bolts hold the wiper link assembly in.  Note that some of
the rubber-bushing holes are slotted to assist realignment, since the exact
mounting hole positions could vary car-body to car-body.
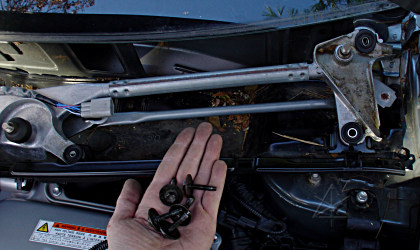
Once the wiper assembly is out, there are seven more obvious 10MM bolts holding
the cowl gutter in.  After removing them, gently lift the cowl tray out.  See
how much organic muck tends to accumulate in this thing?  Keep the tray level
until it's clear of the car, and then dump all that junk out.  [Make sure
you've put the bolts somewhere else!]

This is a common problem with these cars when parked outside, and it's fairly
easy for the two small drain holes to become completely plugged up with gunk
and not let the cowl drain at all.  The symptom of blockage is hearing water
slosh every time you make a turn.  So it's worthwhile to get handy with at
least removing the plastic cowl cover, because a yearly-or-more cleanout of
this area may be necessary depending on where you park.
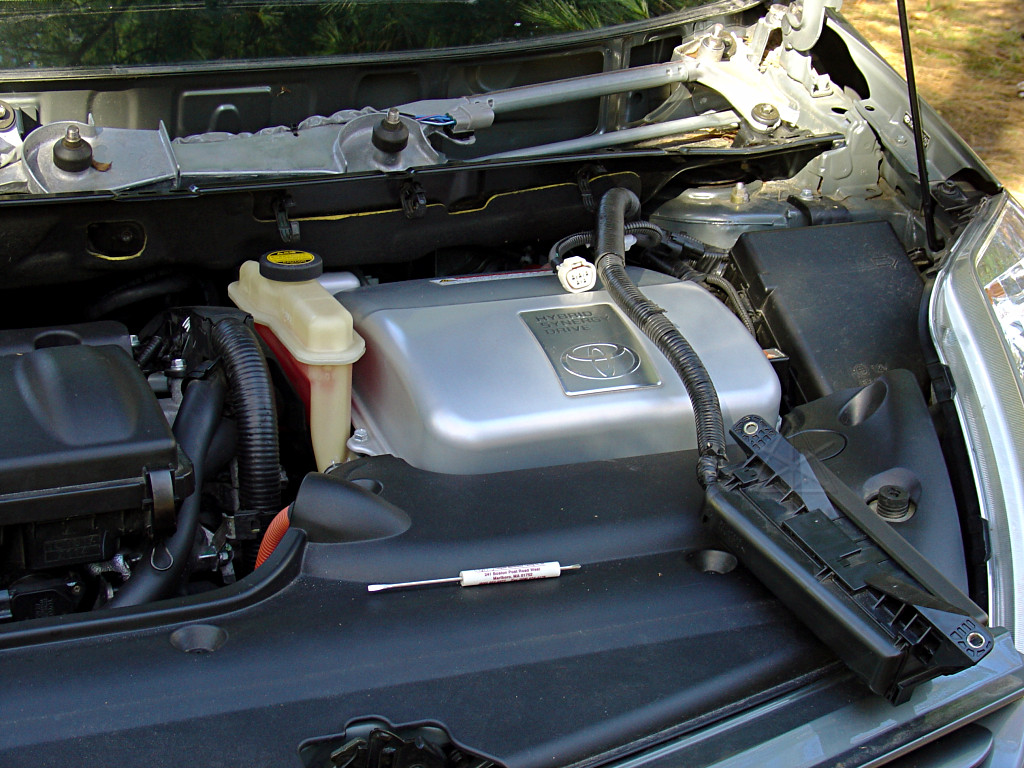
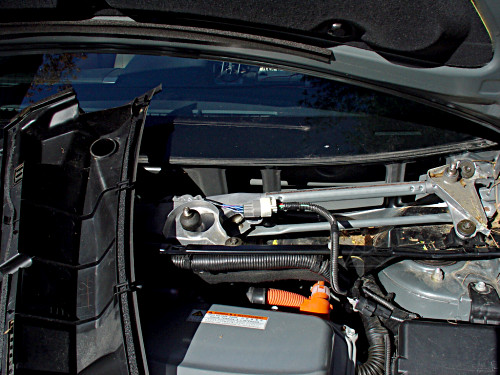
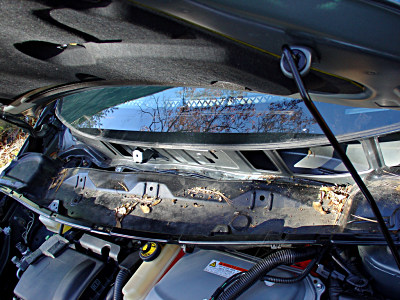
With the cowl finally removed, much is revealed and made accessible! Those
heat-shield bolts are all reachable with a wrench, we can see all of the
brake actuator and plumbing, heater hoses, how the main engine harness
arrives from the rubber gland in the firewall, and in general everything
starts looking much less jammed-in and scary and mysterious.
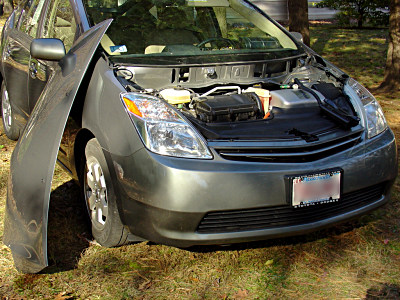
Now, just for the sake of convenience and to discover the relative ease of
doing so, I've also removed the hood. This step is NOT needed to get the
block heater installed, but since I'm also going after other things and
trying to get decent pictures, I figure it would help. The windshield-washer
feed hose is still attached between the car and the hood at the passenger
side -- I just pivoted the hood around that point so I could set it down.
I looked at disconnecting the washer hose and even had the washer-tank out
of the car during most of this, which itself is a pain in the tuchus because
as soon as the hose is pulled off the tank outlet, blue fluid starts pissing
all over until you can get a stopper onto it. But the hose itself runs out
under part of the fender before coming back in up at the hood hinge, and it
wasn't clear I would be able to easily feed it back in if I'd pulled it all
the way out without pulling the entire quarter panel off. So I just left the
hose attached, using the fairly generous slack to maneuver the hood. The hood
is aluminum and very light, easily handled by one person including hinge
reattachment.
Continue to page two for the block heater installation itself...
_H* 061116