| It was time to un-lame and stop hunkering over the computer and actually get up and do some real work around the place, and start photo-documenting the whole process along with. I also realized that I had no idea what a lot of the building materials I'd been reading about were like in real life, and hit the local lumberyard to just wander around and *look* at their stock for a while. I spent a couple of afternoons on that, in fact, because I just hadn't examined this stuff with a particularly critical eye before. I learned what VersaLam and other "engineered" beams are like, how the Huber ZipSystem sheathing panels go together, the several types of ridge-vent filter material, the numerous shapes and sizes of Azek cellular-PVC trim products, and of course all the different types of rigid foam insulating panels available. They had a fairly complete line of Timberlok and Headlok fasteners including the monster 14" long self-drilling screws, any number of StrongTie joist hangers and hurricane ties and post anchors, and long shelves of flashing material in aluminum, steel, and that classic old-school sheet lead. Wow, so much *stuff*. Hopefully by subjecting the reader to a long boring list of these things I've given the barest tiny taste of just how many different building materials there are to know about, let alone the right ways to use them. We've come a long way from piling rocks on top of each other. |
Work to facilitate more work
A tear-off opportunity seized
|
I also did minor exploration behind the indoor trim of another window
upstairs, in
fact the one right below "yellow mold central" which had definitely seen its
share of water issues too, and found that the rough opening under the trim
and water-warped paneling was just fine. This was all rather reassuring,
that the house probably had "good bones" as they put it and that any needed
rot repair would be at a few vulnerable surface areas. Well, I wasn't
100% sure about parts of the main foundation sill, either, but would
leave discovery in that area to the professionals.
It was amusing to find that the windows were basically held in by the casing trim on either side -- no fasteners to speak of around the frames themselves. Meaning as soon as the rest of the outer trim was pulled, the window would basically be ready to fall out of the house. |
The DER concept
| At this point the green-builder folks and all my research had me pretty convinced -- my decision to seize the re-roof/re-side opportunity and go the energy-retrofit route was becoming clear, even if I wasn't sure about the windows yet. Maybe not as "deep" for me as some of the more extreme studies, but the benefits of doing the external insulation had become quite evident. I began referring to it among friends as wrapping the whole house in a giant foam beer-cooler. In working toward that I had been talking fairly extensively with Synergy and Boston Green Building both of which heartily endorsed the idea; the latter was also a candidate for a while but had to drop out later because they were so overloaded with several of the National Grid program projects. [Or maybe it was because I had too many questions for them, it was kind of hard to tell but they did bail rather suddenly.] Synergy had suggested that I go visit one of their job sites in progress to get an idea of what happens during these things, which I thought was an excellent idea; you can only get just so much info from pictures in case-study PDFs and it would be nice to see the real thing. |

|
He scribbled me a little diagram of the polyiso foam mounting and flashing
detail at the sill and basement-wall area; drew it right onto the foil-face
of the wall we were standing next to. They flash from the bottom of the
sheathing out under the foam and bring a piece of bug mesh along with which
covers all the rain-screen openings at the bottom, because otherwise every
wasp for miles around would want to build a nest in there. Sealing at the
top of the basement wall also helps with the whole air-sealing picture in
that traditionally leaky area.
The other thing we see here is how a shallow relief pit is drilled into the strapping to accomodate the HeadLok screw holding it on; this maintains a uniform flush surface for the siding with no funny bumps underneath. Nice attention to detail. The Building Science guys had done some stress studies of furring-over-foam assemblies, and found that the foam has plenty of compressive strength such that even through four inches into the original studs, a wall like this can easily hold up heavy claddings like brickface and stucco long-term. Hanging vinyl siding on it is thus absolutely no problem, but a lot of townie building inspectors don't understand how or why this works yet. |
Clutter-busting
|
That was all good fun, but I had to turn my attention back to my own set
of tasks.
Renovation invariably implies an opportunity and likely a need for some cleanup, and some areas had collected various middens of Things. There's a delicate balance between that frugal New England "save everything because it might come in handy later" mentality, and flat-out hoarding. If any aversion therapy is needed, there are plenty of those fairly horrifying "buried alive" hoarder videos up on Youtube. I'm not nearly that bad and also understand the need to throw things out, it's just too easy to be lazy about getting it done sometimes. And as my own prep work got under way, I discovered many fortunate little coincidences where something I had saved turned out to be the perfect fit for some different application. Even a few bits of stuff left over from the previous owner of the place came in handy, in an almost magical way at times, for constructing new things. So saving some quantity of potentially useful items isn't all bad, it just needs a little discretion and decently organized storage. Clutter is like snow: you never think a few more tiny flakes landing on top of the pile are going to matter, but before you know it there are several inches covering what used to be a nice clear surface. |
|
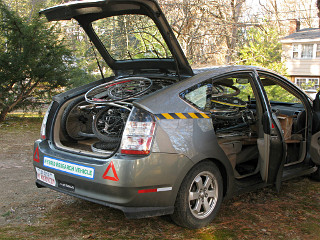
Fortunately, I know some folks who routinely take big loads of collected
material to
Bikes Not Bombs,
and I managed to cram *all* of the bicycles and fragments thereof
into a groaning Prius-blivet of parts and ship it to a certain
backyard staging area down in town. Well, minus the one I actually
ride, of course.
This was just the first of several cargo-Tetris games in the interest of getting stuff *outa* the house. I also became aware of the awesome "launch power" of the local Craigslist free-stuff section, where people eager to take my offerings would respond within about ten minutes of the posting. As I looked around I started spotting more and more junk I just plain didn't need, was never going to get around to fixing or playing with or breaking down into parts or whatever, and now it all had to just plain *go* whether I could find good homes for it or not. Anti-hoarding! |
Coal mining
|
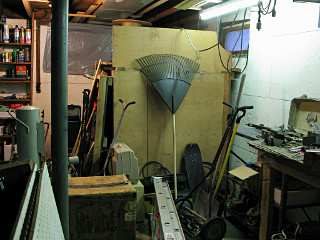
When I took ownership of the place I found that the previous owner had a
coal stove in the basement. Its flue had been taken apart and the extra
hole into the chimney repaired to meet fire code, but the stove was still
there and so was this big ugly particle-board storage bin occupying one
corner. I had never gotten around to taking that apart or even delving into
its depths; it was mostly empty and was basically waste space all that time.
So storage of various other crap tended to pile up in a mess around it.
It was also pretty clear that the window above had been the means of coal delivery from the driveway outside. The whole setup, in fact, seemed similar to the description in this PDF. |
|
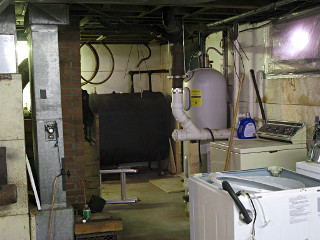
... a local fellow in the neighborhood gleefully offered to take it away! Poof, gone! Said someone in his family could use it in a vacation cottage or something. So one afternoon we grunted and huffed the thing into his car, and off it went. In return for my contribution, and because he's done many similar jobs elsewhere, he came over later and installed an extra reinforcement pipe hangar on the toilet stack which is iron all the way up the chase to the roof, and with that height and all the junctions into it must weigh hundreds of pounds and appeared to be held up by very little otherwise. What he added is the clamp and threaded rods visible here, just in front of the water heater. Same type of rig they support fire standpipes with at each floor up through taller buildings. |
| The stink-pipe changes to PVC just below the iron because that's what they installed on the Title 5 septic-tank replacement just before I bought the place; there was no way *that* alone was going to hold up the rest of the pipe if it ever decided to slip. On the bright side, the iron/PVC transition gave me an idea about what to do at the other end where it penetrates the roof, i.e. do the same in reverse before going through the roof deck to reduce thermal bridging past the insulation. I floated this concept to the Synergy guys, and they thought it was a great idea. | |
|
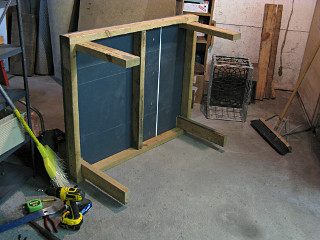
I thought of constructing some sort of low table for the heat-recovery ventilator [HRV] that would eventually arrive, as I didn't want to chain it up to the joists in the typical way they get installed. This piece was about the size I was thinking of and I'd just recovered a small handful of 2x4s of some rather dense wood. They'd make fine legs for something like this. So in the bit of space cleared in front of the coal mess I started throwing together the HRV table, which after the addition of a couple of diagonal braces later worked out perfectly and fit exactly where I ultimately intended it to go. That way any HRV fan vibration would be coupled to the basement slab rather than the floor above, and wouldn't transmit noise into the house structure. |
Small stuff
HVAC study
 The interest in heat pumps of various sorts had kicked off a fairly deep
bit of research into HVAC in general, both on the theory side and what heating
and air-conditioning techs deal with day to day. Moving to a heat-pump for
heat and cooling meant determining the correct size and capacity for a
system that would be appropriate for the house *post-retrofit*, which was
a target way off in the handwave-y future and I needed at least a few
ballpark numbers to start from. I found myself a decent
psychrometric chart,
which helps describe the relationships between temperature, humidity,
and energy of air. It looks
like a crazy, meaningless tangle of lines, but once you learn
how to read it
many aspects of the environments we find ourselves living in are explained.
It shows why "winter air" gets so dry -- we let it infiltrate from the outside
with some nominal moisture content, and as it gets warmed up the *relative*
humidity goes way down. We can see how cold we have to chill hot, humid
summer air to reach the dewpoint line when the moisture starts raining
out of it. We can eyeball-calculate the BTUs needed to heat or cool a given
volume of air over some temperature delta, and then convert that into gallons
or therms or watt-hours or pounds of coal or whatever. And because our
buildings are always trying to equalize inside vs. outside heat via loss
or gain across the envelope, we have to keep cranking energy in the
opposite direction to keep ourselves comfortable. How much energy
depends almost entirely on how good that envelope is at resisting heat
flow, both in direct transmission [e.g. insulation R-value] and air
exchange in and out [tightness of construction details].
I also discovered that the residential HVAC industry is plagued by a lot of guesswork and flat-out bullshit, particularly where setting up and tuning a system is concerned. A lot of "technicians" don't even understand how the refrigeration cycle works, they just know a couple of numbers they need to see on some test gear and if the evaporator gets "beer-can cold" then they're packed up and in the truck and heading to the next job. The science of filling a system with the right amount of refrigerant is imprecise at best when half the required conditions for measurement are ignored, and the pictures and videos of improper duct installation are numerous. Personal accountability is generally evaded and the consumers are left pick up the cost of that careless laxity with poorly-operating systems and higher energy costs. Well, maybe it's not all that bad but there's no doubt that certain levels of misunderstanding exist even on successful installations and repairs. I found one or two really bright spots in this otherwise somewhat gloomy picture, such as UDarrell's HVAC stuff, which is a little confusingly enthusiastic in its style but packed with good clue and tons of references and war-stories. HVAC can be non-intuitive at times and many of its field workers do things by rote without completely understanding what's happening inside. Fortunately, the newer super-efficient systems have eliminated a lot of the guesswork with better sensor feedback and computer control -- subcooling and superheat, ambient temps, capacity turndown, variable airflow, all automatically handled -- some of them even manage their own refrigerant-filling, simply taking the appropriate measurements and informing the technician when they're done. And some of the blame for poorly-performing systems does rightly rest on the consumer who never remembers to change filters and clean coils and muck out the slime in evaporator pans or do any of the other basic end-user maintenance that A/C and heat pump systems should receive. But at this point in my study I was quite aware of all of that and prepared to deal -- it would still certainly be a task less onerous than scraping oily soot out of the rusty little convolutions inside the furnace. All fine and dandy, but what would my specific needs be? I had two major sources of data to work with, both of which would be viewed with skepticism by the guys over at the HVAC-talk forum. One was the fact that my little 5,000 BTU air conditioner for the basement could keep things quite a bit drier both down there and to a surprising extent in the rest of the house. The other was the burn rate on the oil furnace, whose efficiency I soon determined to be on the order of 60-something percent in terms of heat delivered vs. amount of oil consumed. Now, the by-the-book way to do load calculations is through a thing called Manual J. A few years ago a bright HVAC engineer named Hank Rutkowski got tired enough of seeing all the different ways that installers would take guesses at needed capacity and get it wrong so often, that he decided to try and codify it across the industry. By trying to pull in *all* the possible factors affecting a residential building -- climate zone and degree-days, insulation, window types and which way they face, roof and siding colors, shading, square feet, where the equipment gets located, number of occupants and their behavior, appliances, pets, plants, and everything else -- he came up with an inordinately complex method to go room-by-room and add up all the anticipated loads for both heating and cooling. But evidently those who ground their way through the process were pleased enough with the results that it was adopted as gospel by the industry. By the time Manual J reached its eighth edition nobody did any of this by hand anymore as there are any number of computer programs to plunk numbers into, but even with these tools there's still a lot that the human driving them can get wrong. How, for example, does anyone determine the *net* insulative value of a wall *assembly* after thermal bridging, hidden construction shoddiness, and largely unknowable parameters for various components are taken into account? Simple: you can't. While a formal load calculation can certainly help ballpark what to expect, especially in well-managed new construction where routine inspections can keep things reasonably uniform, it is not the be-all and end-all answer to how many tons you need. Real life is not that kind. Unfortunately the industry has clung tightly to the idea and I read rhetoric from several high-horse purists who try to maintain that an HVAC tech who does *not* jump through the hoops of the various ACCA Manuals is some sort of lowlife who doesn't deserve to be making a living at the trade.
Heat loss follows nicely linear relationships with the temperature delta and insulation value, and I could already see that increasing the average envelope to over R20 plus way better air-sealing was going to easily cut the whole-house energy needed by two-thirds or more. And that doesn't even meet what some of the researchers consider "superinsulated" -- still, on a "design day" as the industry calls it, or rather some of our coldest winter *nights* of perhaps 0F around here, it seemed entirely likely that I would still be able to heat the place post-retrofit with the proverbial hair dryer and a couple of cats. I call that "goodenoughinsulated" for now. |
|
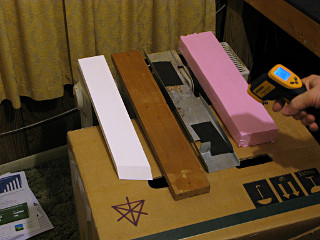
My new obsession with HVAC science and its thermodynamic aspects
began bordering on the silly, as I tried to absorb the related theory and
at least a bit of vicarious practice from the field reports and advice
that others posted on their forums. How well would various construction
materials perform under differential heat loads? Here I was trying to
figure some of it out -- testing thermal conductivity of various items.
Azek, wood, steel, and
XPS,
with one end of each atop my space heater and
taking readings at the other with my new toy: an infrared-gun thermometer,
more properly called a pyrometer. I figured having one of those would
come in handy for this sort of thing.
This really just amounted to a little entertaining make-work, as the thermal properties of numerous materials are freely detailed at Engineering Toolbox. |
|
Another one of the local home-shows came along and one of the candidate HVAC suppliers I had been talking to was going to have a booth there, so I figured I'd stop in and eyeball some units and ask more questions. A common problem on evaporators and other HVAC components is icing, usually due to poor airflow, miscalibrated valves, or incorrect refrigerant quantity. So after reading a bunch of these problem reports and reasons I was amused to see this bit of HVAC science gone wrong: a badly iced-up refrigeration pipe at a compressor outside the building where the show was. Now, this particular one might be for a commercial kitchen fridge or freezer, whose running parameters are a little different from an air conditioner ... but obviously something wasn't insulated right here, as this shouldn't happen in the first place. |
|
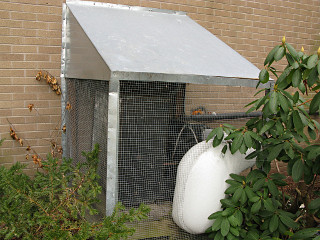
I was intrigued by the little hutch someone had built around this
installation, as I was thinking of doing much the same to whatever outdoor
unit I'd wind up with. Keep the rain and rodents out of the works, I
figured, and everything would last longer.
I had said HVAC dealer out for a site visit a few days later, who despite having initially expressed interest in my project was visibly dubious about a> my seat-of-the-pants load calculations and b> finding a one-ton *ducted* system that wasn't one of the single-point mini-splits. My own research had indicated that at least a couple of manufacturers either had the type of ducted air-handlers designed for typical furnace replacement or were about to offer then within another month or two -- it was becoming clear that my needs were just slightly ahead of what the market was waking up to providing. The guy apparently didn't believe it and was obviously a bit of an old-school sort himself, and probably decided that I was some kind of freakazoid who didn't know what he was talking about because a couple of days later I received the "Royal fuck-you" letter which was actually phrased as "this is not our area of expertise, good luck on your project". But that was nonetheless a bit of a slap in the face. Between that and possibly having gotten myself just a little burnt out on the HVAC thing in general by now, it was time to turn my attention back to other pressing issues. | |
Wreckage
|
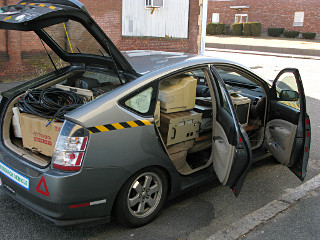
The years had brought an excess of electronic boat-anchors from hamfests and computer-upgrade giveaways and trashpicks, and there was clearly a lot of it I'd never use, fix, or part out. So it was pretty easy to just look around and form a big pile of stuff to go, and the early result was Prius blivet # 2: saggin' close to the suspension bump-stops on my first big run down to CRTR in Brockton. They take almost anything, including old air conditioners that still have old-skool R12 freon in them. I even got close to $50 just for the non-stripped copper electrical cable at the metal scrapyard right next door, which I didn't expect but they said "we *have* to give you money" and weighed my wire in and that more than paid for the small fee the recyling folks wanted to take the larger CRTs. No wonder copper plumbing is getting stolen out of peoples' basements -- the stuff fetches about a buck a pound as scrap. |
Fun with doors and windows
|
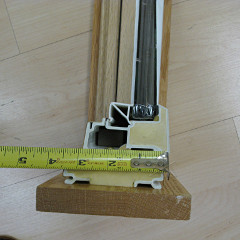
After reading about the various downfalls of wood and vinyl frames, one clear winner emerged as the desireable choice material: fiberglass. Pultruded fiberglass, which is a type of extrusion but with better structural characteristics. One maker of fiberglass-frame products geared toward the energy-efficiency market is Serious Windows. Great name, and apparently a highly favored product for deep retrofits and "zero energy" homes. [The line has recently been sold back to its original parent company Alpen, so the "seriouswindows" site may cease to exist at some point. Still the same product line, though, and making some new and interesting developments. Read this post for a much deeper view into that story.] The frames are filled with closed-cell foam, and it's dual glazing with a low-E membrane suspended in the middle and various types of inert-gas fill. Their line starts at R-5 or better and goes up from there, which is generally far better than most dual-pane units on the market. The real advantage of fiberglass is expansion ratio -- it is, after all, glass, and the frames expand and contract at exactly the same rate as the glazing itself meaning that the seals joining the two are likely to last far longer. |
|
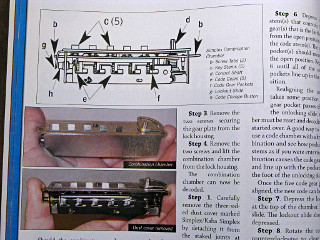
What's especially ironic about me having one of these locks on my door is that *way* back in the day I wrote one of the seminal text-files [backup copy here] on how to manipulate them open using differential pressure techniques. It even works if the lock has been programmed with the special "mil-spec" trick that requires holding a button halfway in during the open cycle. Simplex didn't tell everyone about setting combinations like that, but it's pretty obvious once you start studying the rather cleverly designed innards. Here's part of an article on them from Locksmith Ledger. |
| I finally got the thing installed and working on the side door, and it got a quick and fugly bit of weather-flashing with Tyvek tape. I figured at the very least it could be an easy way to provide contractor access as long as this door was still in place -- give them a combination and change it once they're gone instead of worrying about managing keys. | |
_H* 120509