House energy retrofit project 26

Late spring went by in a bit of a whirlwind, some of it spent on planning for events later in the summer. This year's roadtrip would take me to Texas, where the lighting rig I was tasked to design would get built and flown. With quite a few items crossed off the house to-do list by now, the ongoing retrofit follow-up work could take a bit more of back seat.

[Click any image for a larger version.]

    Light and heat

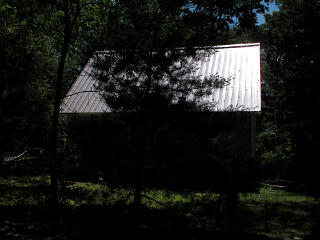
Bright roof in June sun Soon enough it was the middle of June, with the solsticial sun falling pretty much straight down on the roof and from a 45-degree surface, guess where thereafter. Another brightness check from across the street showed a fair amount of reflection but still reasonably diffuse, possibly more by now so with a few months' worth of organic crud accumulation on the already carefully-chosen panels. The guy living across the way said he never particularly noticed my roof at all, so I concluded that everything was okay on that front.


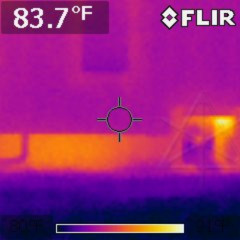
Warm convection above shade But things were heating up! The window shades in back were doing a great job helping block whatever dribble of radiation managed to get in through the low-SHGC glass, but still giving rise to convective loops in the inverse direction from winter. Again, not in a way that seemed to be spilling lots of hot air up out of the window boxes.

I remembered the idea for a small mid-level awning rooflet along the back wall over the first-story windows that the builder had talked about at one point, and felt reassured here that it would have been extra trouble for very little gain.


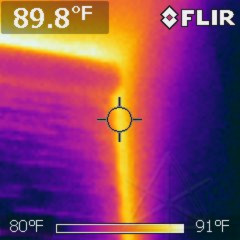
Foundation wall thermal pattern (again) For the most part the foundation remained its somewhat inscrutable self from an infrared-scan standpoint, but this time the boundary of where the additional insulation to date stopped was fairly well-defined. After a day's worth of warming on the back wall the blocks were clearly storing some of it, but the ones toward the left where the added insulation was evidently weren't getting quite as cooled down by conduction to the cooler basement. The wall temp closer to the condenser hutch seemed to drop off across a fairly clear vertical line corresponding to where the new foam ended.

So I really wanted to get the basement job completed. I only needed three more 4x8 sheets or a small batch of cutoffs or seconds, and wasn't too fussy about what form factor it might come in as long as it was still foil-face. After a couple of fruitless excursions around Craigslist and Insulation Depot wound up inquiring at the local lumberyard, the same place that had given me the beat-up blue board. They stocked 2" polyiso and would even deliver a small amount across town for free, so I went ahead and ordered.

To clarify, I wasn't even close to needing any cooling yet so the whole HVAC system remained shut down for much of this time. The basement humidity kept drifting up a little, though, which I kept in check with occasional runs of the dehumidifier. [Not the hacked-up air conditioner anymore, I had trash-picked a "real" and better-optimized unit from around the neighborhood that still worked fine and only needed a bit of cleaning.] This is the shoulder-season problem: the air outside isn't overly hot but carries a lot more humidity, and we don't necessarily want to just throw the house open to that. Judicious ventilation and dehumidification of what comes in, without necessarily cooling too much, is what's needed and unfortunately that still requires throwing a little energy at the problem. Still, with the time-of-use billing in effect my June electric bill was possibly the lowest I'd ever seen.


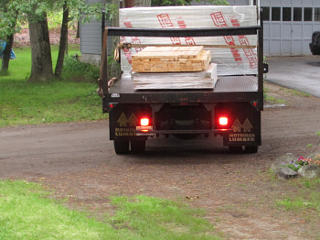
Polyiso panel delivery arrives A few days later the truck from the lumberyard arrived on a rainy morning, with my meager three panels shrinkwrapped up into a neat package that was easy to zip into the basement.

A different brand of foam They had gotten a little wet and dirty anyway, so I unwrapped everything and wiped them down and stood them apart to dry the rest of the way. Since I had ordered the foam sight-unseen I was a little surprised by these being a different brand than the TUFF-R. The foil face is a single layer and a little heavier gauge, and the foam itself doesn't have fibers running through it and is thus slightly less structural. But the R-value and cutting methodology would be the same, so I was fine with that.

Exposed strip of cinderblock That sliver is warm!
Here's why I wanted to wrap my insulation job all the way around the corner and bond it to the doorframe. That little exposed sliver of raw cinderblock was already quite warm from the outdoors! And a known cold spot in the winter.

    The last bits of basement wall

De-funkifying exposed wall area This would hopefully be the last of dealing with any exposed parts of the block wall low down, where the moldy funk was still most obvious. That characteristic smell came at me full-force as I cut away the decrepit parts of the styrofoam, and it all wanted a healthy shot of Concrobium before being filled back in with 1" XPS right to the corner. That stuff seems to work quite well, although leaves a slightly salty type of deposit behind on smooth materials. That's kind of the idea, though -- create an inhospitable environment that more mold can't grow in.


Cutting water pipes free of sprayfoam The pipes to the laundry hookup used to basically come down snugged right against the cinderblock, and had gotten buried under the rim sprayfoam job at the top. With the whole wall about to be behind more interior insulation and thus likely to run colder than it used to, this would present a greater risk of these pipe segments freezing -- thus I wanted to give them thermal access to the inside space if not bring them farther inside the envelope. First thing was to cut away the foam covering them, in a nice sort of trapezoidal ramp down on either side. I then found that I could move some joist clamps and create a little more clearance behind the pipes, and likely jam a little insulation between there and the wall as well.
I wound up taking most of the assembly apart and floating it all off the wall, to see how it could be reconfigured to be more toward the interior. It turned out that the pipes would naturally hang with about a half-inch of clearance from the block, which would be perfect because I had some strips of half-inch polyiso that could neatly run right behind them.

This area was going to be one of the really fiddly bits in completing this insulation job, I could already see that. I wanted to keep the pipes exposed toward the interior without a major plumbing rework, but have the rest of the new layer reasonably thick.


Moisture barrier behind mounting board The mounting board still needed a fairly solid connection to the wall and couldn't really sit much farther in without placing some stress on the pipes, so I left it at the same mounting plane but with a token bit of thin foam I had kicking around behind it mostly for a moisture barrier. I let the pipes pretty much govern where everything would go, adapting to their points of least bending strain. The piece of wood would likely run a little cold but that would be okay over a smallish area.

The concrete plug at the upper left was where the hole for an old laundry drainage pipe had been blocked off, and stuck out an inch as it had been cemented with the old styrofoam still in place around it. Replacing that surrounding layer would be easy enough and then the 2" top layer could prevent it from being a thermal bridge ... but then I started getting a different idea about it.


HRV shifted out from wall Various OCD complexity would continue all the way along the wall, as I'd have to work in behind where the HRV sat and the soil pipe and water heater. By now I had come up with what to do as far as raising and leveling the HRV table better -- because I wanted the floor footing to continue past there, so its legs would actually have to sit up two inches for the foam, and then the thickness of little 2x4 sections to spread the weight out. But I had to pull everything away a bit to finish the preliminary seal at the bottom of the styrofoam, cured and then cut back flush the same as everywhere else.

Full sheet can go into place With more of the footing in place, the next wall sheet would be the only "fullie" in the whole project -- which still needed a bit of shaping at the bottom to adapt to the gaily rolling terrain of the footing following the contour of the concrete. Once dry-fit and trimmed so the tape wouldn't be bridging huge gaps, it was ready to be caulk-glued into place.

Custom cut insulation with a test hole More of the crazy around-the-pipes rig took shape, locking the thin strips behind the pipes into place forever. The dryer conduit and the wire to the quad-box didn't need to be kept warm, and would be buried under slots cut in the second layer for better neatness. The second outlet got swung up and mounted on a joist overhead instead, for a more sensible place to power temporary lights from. And here's where the funny idea about the cement plug came in -- I'd actually leave that one spot open through a small tunnel in the insulation, with the canonical piece of "IR surface" gaff tape across half of it, as a way to monitor the interior-side temperature of the block wall above grade.

Finishing the polyiso layer More of the new polyiso could go in, filling around the rest of the laundry hookup. A crazy stepped recess was constructed to leave some hand room for tightening hoses, and taped in a way that would shed water if needed. One of the valves had needed some stem-packing work for quite a while, and I'd never gotten around to it as they're just not open that often. The HRV got completely taken out at this point and the ducts tied back, so I could work past there and access by the near side of the water heater.

It was also rather fiddly to get the layer completed behind the water heater, which I wasn't about to empty and move just for this. I had already added some pieces directly behind it a while ago, extra foil-face to try and reflect some of the radiation coming off the warm fittings on top. Using up all kinds of random scraps in a truly cut-n-cobble fashion I eventually worked around the soil pipe and the washer drain riser which itself annoyingly sat less than two inches out from the first layer ... but whatever, it didn't have to be perfect, just better and more air-sealed than the old stuff. With a large feeling of satisfaction I cut the two long strips of 1" needed to close it all up around to the doorframe [leaving a gap for the compression bar hook] and let them cure into place before taping. Said gap got a couple of filler bits stuffed in behind and all sealed up too, and the last of the visible cinderblock -- except for my deliberate test hole -- was GONE.

Except that we had gotten well into warm weather, so I wouldn't be able to tell if all this would have any real effect for another several months.


Sealing flaw from foil-face texture The new IkoFoil had some annoying surface characteristics, forming deeper and longer fissures away from edges that stretched tape wouldn't actually fully seal. Spots like this needed an extra patch out to where the trench ended. Even a little channel like this could let significant moisture-bearing air in if fed by a good path from the outside.

    Condensation management

Condensation deflector construction The HRV got put back together sometime in the midst of the final push, and the first step while it was still away from the wall was to figure out the permanent water-management detail for the incoming pipe from outside. This was an improved version of a quick-n-dirty hack put in after discovering the damp fiberglass, to try and keep the plywood from getting wet. A piece of tie-line was run around the pipe snugged up against the wood, and foil tape applied around its lower half [in two overlapped pieces, only the first half is on here] so that the edge of the tape just hopped up over the tie-line and touched the wood. This would become a drip edge, but not quite yet.


Insulation back onto HRV intake duct Then it was time to figure out exactly where the table would sit, and size the fresh-air duct to match. It couldn't quite go right against the wall -- with the new foam running behind everything space was now a bit tighter as the fat, insulated exhaust duct had to pass behind the fat, insulated inlet. The short length and curvature of the inlet meant needing to custom-shape a layer of fiberglass effectively longer on top than on the bottom with gussets cut out underneath, and to hold it in place against migrating while I slid the outer sheath down from where it was all crunched up around the top. Tieline and tape to the rescue.

Final forming of condensation catcher After cinching down the tie for the outer sheath about an inch from the wood, came the very last step on the intake: gently pull the tie-line out, leaving a small flange of the aluminum tape out at 90 degrees close to but not actually touching the wood. Any condensation that formed on the small strip of exposed duct would in theory drip straight off the lip, hit the tape underneath, and roll harmlessly down the foamed wall without involving the plywood.

Well *I* was proud of the idea, anyway. It's a little delicate, but works. Urethaning the wood was probably the wisest part of this whole thing and probably should have been done way before now.


    Water and fire

One of the long-running local activities was the progress of a new subdivision development across the way, part of which was going to involve upgrading my street. We actually fought this project for over fifteen years in various town halls, because the local residents knew that a plan that straddles a town boundary is just a stupid idea. But the developer just wouldn't give up, and finally got his go-ahead on it and the related road improvements so having the street in front of my house ripped up seemed inevitable. It remained to be seen if having the subdivision go in was going to be a benefit or a detriment to the neighborhood long-term, and it did enter my thinking a little while planning the retrofit. If nothing else I had probably given a good resale-value boost to my place regardless of what would happen to general neighborhood values later, not that I really had any intention of leaving it anytime soon.

As part of various proactive thinking I figured it might be a good idea to re-identify my water shutoff, which I had lost track of since the last time it was dug up. Quite a few years ago I'd had a leak right at the curb-stop valve itself and it had to be replaced -- and being five feet underground, it was a rather interesting operation done long before I owned a decent camera or there would be a page all about that too. At that point I had gotten a pretty clear idea where the top of the valve casing was, but failed to mark it with anything and as leaves fell on the area and snowplows deposited more crap on top I realized I didn't really know anymore.

But I wanted to know, not only because it's a good idea to have detailed information about your immediate infrastructure but because part of the subdivision-related plan would involve extensive excavation to put in new drainage infrastructure under the roadbed. I had no confidence in the developer's ability to not screw something up in the process. Besides, it could be an opportunity to get the valve cover up closer to the surface if the digging was going to intersect where it was. So I dug around where I thought it had been, played with a couple of small metal detectors whose range was piteously inadequate, and eventually gave up and asked the town public-works department if they had any as-builts I could get measurements from.


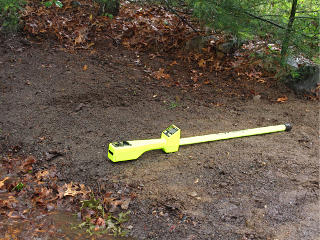
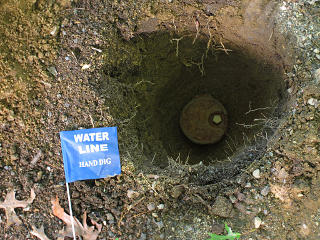
Electronic water pipe locator They didn't have any drawings, but they were happy to send out a guy with the Big Beeping Wand to help me out. Took about two minutes to nail it.

Finally, the water shutoff is unearthed Which was kind of amazing, actually, because it had subsided quite a bit farther down than their usual depth. Apparently the telescoping valve casing tubes tend to slowly sink over multiple freeze/thaw cycles, so since the previous exposure it had been steadily vanishing down into soil that was probably softer after the excavation anyway. But here it finally was in the light of day again, so I grabbed measurements relative to the house wall and as I filled it back in, did my usual trick of placing a couple of bricks on top with their ends sitting just at the surface so finding the exact spot would be much easier next time without having to leave the silly little blue flag over it. Apparently kids swiping those is a common problem anyway.

Wouldn't having a larger flange on the top section of the valve chamber help prevent the tube subsidence?? Seemed like a no-brainer. Well, it didn't really matter as all of this got a real fix during the road paving job.


Building up fire-pit fill Another little project was to finish the fire-pit idea, which would also use up an ugly pile of fill in the backyard that I'd been picking away at for grade adjustments here and there. The rocks that had come out of this before had gone into the drainage pits, so I needed a little more stuff and I wanted it all to be fairly water-permeable. Random chunks of chimney concrete helped bulk it up and then it seemed appropriate to recover and use the crumbled refractory I still had from the furnace firebox as a layer that might wind up near heat. A thin layer of inorganic dirt went over this and then I laid a flat bed of bricks to finish.

Trying to light coal Well, temporarily, anyway. Because ordinary red bricks are considered a poor choice for applications involving high heat, I didn't load it up with wood and try to have a big inaugural blaze in it. But I did play around with trying to light some of the coal I still had. I even built a little grate with a chimney out of a can and some mesh, put in a nice layer of coal and stuffed paper in underneath to try and kindle it ... all failed, including just trying to nuke the whole mess with a blowtorch, as none of the coal would actually continue burning worth a damn.

Proper coal combustion is apparently an art form that at least this would-be backyard pyro never learned let alone lost. Well, probably better to leave that carbon sequestered anyway. And re-line this thing with real firebrick at some point.


In the meantime, back to water. A bit of a heat wave was going on by then with daytime temps pushing 100, but the house didn't seem to be warming up a whole lot or at least doing so very slowly. The high-SRI roof was really doing its job again! Outdoors had nonetheless gotten pretty disgustingly humid, and I was trying to keep the place closed up and ventilate as little as possible to avoid bringing the yuck in. It finally became time to kick the main system into cooling mode, and part of that included finishing the wiring from the condensate pump to the integration box to enable the overflow switch. This at least didn't need fancy relays, being just a simple dry closure to the "forced off" input at the air handler.

Eventually it got warm enough inside to be worth actually cooling, when the main system would handle the incoming air and I could test the overflow safety. There was a perceptible difference in compressor load between letting the system control the HRV or keeping it off, because running the HRV on humid days brought in a significant increase in latent load. But at the expenditure of a little more energy, at least nicely *dried* outdoor air would get exchanged into the house.


Condensate safety shutoff test The extracted water, of course, would drop into the condensate pump and to test the limit switch I simply pulled the pump's power plug and waited. In case the switch wouldn't work at quite the right level I arranged to catch any possible overflow.

Water is *almost* overflowing condensate pan It took a while, but the switch finally kicked the system off with the water up to right about here [visible in the hole]. Just under the edge of the black plastic pan, no actual spillage. Whew. The green LED on the Daikin controller went off and stayed off, which is exactly what one would want to have happen if condensate ejection could no longer be done. As long as the overflow switch remained closed, the controller showed its little "central control" icon and wouldn't respond to any commands.

So yay, the cooling was finally ready to be on full autopilot. The air-handler would control the HRV so any incoming ventilation would get conditioned first, and a two-event schedule programmed into the controller would simply keep the system off during the electricity peak-rate times and bring it back on in the evening. I gave it a setpoint of 78, figuring that would be enough to invoke a little cooling but not go nuts about it -- because I wasn't going to be there for the rest of the high summer. It was time to put the car in "RV mode" and make that roadtrip to Texas.

Which hasn't been written up yet, but will get done at some point as it became a *very* wandering path to San Antonio that went through Glacier National Park, Yellowstone, and hundreds of miles of mountain backroads in the process. It was pretty awesome, as I've discovered is my usual perception about places out west.

When I finally returned, the first thing I noticed on walking in was a strong smell of polyiso foam. Which was a symptom that very little ventilation had gone on. I checked the HVAC meter and found that the total power demand over the time I had been gone averaged out to the 2 kwh/day compressor standby -- the system had *never run* to cool the house the entire time I was gone. Granted, there weren't a whole lot of cooling degree-days for that month but even with a setpoint of 78 I figured there might have been a couple of peak days that could sneak the house up to that. Apparently not. Have I mentioned the nice heat-bouncing SRI of the roofing yet?? And the humidity basically hadn't changed at all either; lack of exchange and the tightness of the envelope meant none of the outside air had managed to get in or even diffuse its moisture inward.


Gunk in AHU drain pan Because I had thought the system would be extracting more water while I was gone, I had left whatever was already in the air-handler drain pan sitting there. It doesn't drain completely by gravity, because the outlet to the condensate pump sits maybe a quarter-inch up from the absolute bottom. As the remaining sump slowly evaporated away without being replaced by any new water, it left a layer of oily gunk in the bottom of the drain pan that I was hoping to avoid ever having accumulate as that's what can grow mold in condensate systems. Argh. I swabbed out what little I could reach and learned from this that I should have vacuumed out whatever water was in there before launching on my roadtrip.

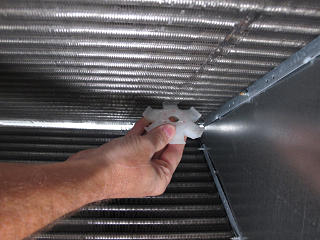
Fin comb at work I could also get in along the inner edge of the pan through my nifty new access hatch, and brought in a hose nozzle to try and spray down into the pan to float loose any of the guk that would. This was of dubious productivity, as it may have accomplished little besides getting me wet. But while in there I recalled that parts of the coil fins weren't in perfect alignment as it had come from the factory. A quick trip to the local HVAC house later I came home with a fin comb kit, and used it to straighten out a few slightly mashed areas. The silly handle that came with the comb is pretty useless for confined spaces like this, and it was easier to just hold the head piece and carefully run the part with the correct spacing down the fins.

Okay, so summer performance seemed to be really excellent overall. The only minor downside was the fact that the supply registers didn't kick cooled air all that high into the rooms, so it tended to hug the floor. It was simple enough to stand angled-up pieces of cardboard in front of some grilles to help push the output higher up, and interior humidity extraction wasn't going to be affected either way.

But in our heating-dominated climate zone, I was already thinking ahead to winter! That whole snow guard kit was still sitting in boxes, and it was time to work toward installing it.


    Think snow

Testing snow-rail clamps on standing seam sample It was expected that the S-5 clamps would necessarily dimple the standing seams a little to do their job, and I still had my small section of mated panel edges to test on. The inner ends of the setscrews are smooth and rounded by design, and bear as gently as possible on the material finish even when cranked down fairly tight. Of course the primary aim is to get maximum holding force but strictly avoid puncturing the panel.

While one's first thought might be to insert an extra piece of something harder to isolate the screws from the panel and spread out the squeeze load, that would somewhat defeat the purpose as the holding mechanism is not solely by friction. Creating a topological change that the screw ends are firmly seated into adds a lot of resistance to longitudinal force applied along the panel, as sliding snow would indeed do.


Configuration of snow rail and retainer feet I had the rail adapter on backwards in the previous shot; this is how the whole assembly sits across the panels. The edge of roof would be to the left here with the snow coming down from the right. The pivoting curved piece with the rubber foot is key -- it sits mid-panel and catches the bottom couple of inches of snow-pack, letting less of it escape underneath the rail and balancing the whole applied load a bit better.

Anti-seize onto all the clamp setscrews Seeing that this was stainless steel screws into aluminum, the possibility of galvanic effects was distinct so a first bit of assembly-line tedium was to preload all the clip blocks, putting some anti-seize on all the dead-dry threads and working them in and out to get it well spread around in there. I expected these to want a little adjustment some time later, say, after their first winter, and they needed to still run free after being out in the weather.

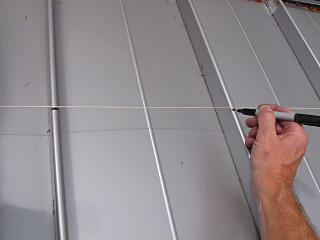
Running alignment string Next was to wait for the right day to install this mess, and sometime in September along came a perfect one: moderate temperatures, mostly cloudy so the panels would stay thermally stable. I picked a location a little over a foot up from the edge and popped a clamp onto what would be one end of the assembly, to serve as an anchor point for a piece of light string.

Marking placement against string Same thing at the other end the same distance up and a nice tight stretch of the string between them, and I had a nice reference line along which to mark for placement of the rest of the clamps.

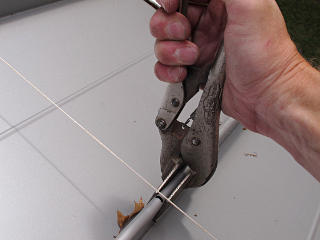
Each seam needs a little squeeze Each seam needed a little squeeze before the clamp would fit over it, as the clamp openings have a slight inward lip at the edge. There's tape on the duckbill jaws for good reason...

Clamp line nice and straight All clamps attached
I wound up leaving the string in place and pretty much aligning off that instead of the sharpie marks, and to avoid any cumulative errors along the span from clamps nudging the string up I added them in something approximating a binary-sprinkling order going from sparse to dense. Fairly soon I had a nice dead-nuts-straight gig line of them across the roof, and figured that the potentially most fiddly part of this was over.

I made sure to put the screws on the seams toward the free ends of the panels as I think was recommended in the install docs, instead of toward the rest of the panel. This helped ensure that any [very unlikely] clamp screw damage bad enough to make a leak would still be above another panel and NOT open to the roof deck. This also happened to put the screw side away from the prevailing wind direction, as the roofer had also done with the "open" edges of the panels themselves.


Roof rails preloaded with parts Next step was to preload the parts onto the rail extrusions, alternating the hold-down clips with the panel feet, and haul all that topside.

Snow-guard project drew blood, of course It was inevitable that wrestling with these various bits with non-deburred edges would eventually draw blood at some point. I don't even remember what I whacked myself on here, in the simple process of putting in all the attachment bolts.

Careful and uniform clamp tightening I certainly didn't try to final-torque the clamps before getting the rails on, in case anything had to move, but as everything seemed to line up perfectly it was time to go along and get all the clamp screws as uniformly tight as I could manage. Torque wrench? Bah, what I feel in my hand is accurate enough for this. A couple of passes of this happened as it was clear [and expected] that a little bit of inelastic settling was going on in there.

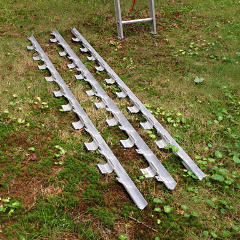
A quick hack to bridge rail gaps Now, I'd only ordered three 8-foot sections of rail which wasn't quite enough to fully bridge 28 or so feet of roof. I spaced each rail section evenly across its complement of clamps and knew I'd have gaps between them, but each free end could accept a panel foot so the panels under the breaks received two feet since I had them left. To stabilize these and make sure they wouldn't slide off the rails, I cut two quick-n-dirty bits of coil stock, curved them to match, and threaded a couple of holes into the feet to receive some mounting screws.

Snow guard all done I'm actually skipping a few final details here, including filling in the outermost ends with a couple of extra pieces fabbed up from leftover z-bar stock and the last two clamps, but in general it was done! Now I was all ready to *not* have a big mound accumulate in front of the heat pump.

Another nice feature of having this was safety -- if I or some piece of gear was to slide down the roof, it would fetch up against this and stop. I soon found that it also made sweeping junk off the gutters easier, as I could leave the ladder in one spot and work from above, using the rail for support.


    On display, against the odds

Winter was still a ways off; the leaves hadn't even really started to change yet. I had another few things to take care of before then, and the next effort to put in quality time in on was an opportunity to show all this off a little, other than on an obscure website.

It was time for *me* to take my turn at hosting a Green Buildings Open House site, seeing as how I'd managed and done and documented all this work and had developed a healthy enthusiasm for the field. I went to look more seriously into the guidelines for hosts on the NESEA site, and was a little disappointed to find that they were apparently giving up on doing the level of publicity they had enthusiastically spearheaded in the past [as well as ignoring my suggestion that they should try to make it a two-day weekend event to allow for more site visits]. It was hard to tell if that stemmed from a lack of funding, time, personnel, all of the above or some other reason. Maybe trying to piggyback onto a "solar tour" that was less about building improvements per se wasn't working out for them. The main GBOH page now seemed to consist of a bunch of excuses basically saying "it was fun and we learned things but we're tired and can't do this anymore", and encouraging site owners to do their own local publicity if they wanted to host.

Fair enough on one hand -- distribution of labor. But reading that cemented the impression I already had that this was probably my only chance to participate in GBOH as such at all, because it appeared to be a dying effort and would probably peter out entirely in the next year or two. NESEA had already outsourced handling the site list to a third-party outfit called EnergySage, a website with a fairly awful design where building owners would sign up and then create "projects" to profile their properties. [Another goddamn password to remember...] At least they were still providing host kits with lawn signs and copies of their trade mag, but weren't shipping them anymore so I picked a day to haul out to Greenfield and pick up a packet. I hadn't seen their offices since back in the Tour de Sol days and wanted to see how things had changed. It was a completely different crew from the old guard I had gotten to know back then, and it didn't feel like longterm institutional memory was particularly high on their priority list. While on the road I also stopped by EcoBuilding Bargains in Springfield for a look around, which was fun -- it's like the Habitat ReStores, but bigger and better organized.

Nonetheless, for GBOH I set to and did my part -- signed up at Energysage, worked through entering various aspects of my project with some rough cost-savings analysis, and tried to reach out to a few of the local press contacts in the sadly out of date NESEA database. I even took and reworked the bad iphone-snapshot-grade picture of said lawn signs from the website, and supplied them with an improved graphic to replace it for the benefit of those who might want to print their own.

I could rant on further about NESEA's former glory and how petroleum fuels need to be up around ten bucks a gallon-equivalent before anybody's going to actually sit up and take notice, but you probably get the idea.


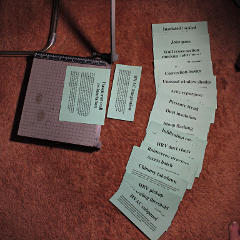
Energy feature labels for open-house Since the whole idea of these tours was to point out energy-related features of a given site, I had the idea to print up a bunch of little informative labels and paste them all over the place to make it like a little self-guiding museum. [Is that what they call "interactive displays" these days? What an idiotic term..] In a way it was just like printing up a bunch of technical details on the Prius and tooling off to the car and energy shows like I'd done a few years back, which was how I hooked up with NESEA and the last gasps of Tour de Sol in the first place. I went back through my notes for content ideas and wrote it all up, wrapping a bit of Postscript around it to facilitate print formatting, and then picked a distinguising color of paper for the output. An HTMLized copy of all the sign text is here for the curious, which among other things is a nice capsule summary of all the stuff I'd done on the house.

Open-house self-guiding info labels deployed One could easily argue that I went a little nuts here. Not exactly "naked house" by now, but the idea was similar and I *did* have my wall mockup on display and flyers pointing to the writeup. The basement had the most reading material, but there was a good share upstairs and around the outside. This slightly different perspective on documenting the place, again in excruciating detail aimed at those who might appreciate it, still made me reflect on how parts of the mainstream might see this as "energy wacko" material ... but really, as this stuff moves slowly from fringe to building-code-mandated practice and energy prices continue to go up, the superinsulated nutjobs heating their houses for $200 per *season* might have the last laugh. Look at the market success hybrid vehicles are having, for example.

Ready for open house The coroplast lawn signs needed nice big arrows, constructed from gaff tape so I could pull it off again if needed. The first one went out at the main road coming off the nearest highway, another one at one of the tricky turns in the neighborhood, and one here at the house itself along with a few other small ones I printed tacked to telephone poles along the way [like you're not supposed to, but ask any of the folks around here who throw yard sales]. For the week before the event I dropped my full address and GPS location into the EnergySage pages. I spammed my local homeowners' list with "c'mon over and see this place" and the date. I bought a bunch of snack food and set up a table for it and the lit and my construction mockups. Really, I thought I had done about all I could as a host and was totally ready to receive the masses.

While the event wasn't a total bust for me, attendance was pretty sparse. Four or five couples or small groups came by over the course of the whole day, including an engineering type fellow I already knew who I'd met at the previous year's event, and some lady who was confused and just looking for realtor open-houses. In other words, not even a whole lot of choir to preach to, let alone hordes of the general public. But it was kind of fun to pass good information along to a few folks who seemed genuinely interested, so in a way it was a very minor success and I lived off the largely-untouched food supply for the next week.

It also taught me that setting up enough signage to guide people to a specific place in a neighborhood is an interesting bit of work, which of course includes the recovery and cleanup afterward. Sightlines require careful consideration, as do property boundaries, and signs ideally should be bigger and higher off the ground than they look when approaching them in a car or they visually vanish.


Finally, a ductwork diagram One bit of appropriate open-house prep was to finally draw up a real ductwork diagram, which I had never really done. This one landed on the kitchen whiteboard so visitors could see the overall topology across the air-handler, HRV, and the house. What isn't shown is the return paths from the outer walls, but even from this it's pretty clear that there's a full circulation path through all parts of the place inclding the attic. And that the upstairs ducts are pretty wimpy, not that it matters anymore.

With GBOH out of the way and likely forevermore, I eagerly anticipated the coming winter. I had a better-suited basement now, snow management for the back roof, and more ideas for various testing and stats-collection to do. Disney's lighthearted animated tale "Frozen" had just been released, and I could totally identify with the appeal of constructing one's own thermally-preferable domicile in the frigid northern wastelands. I'm not sure Elsa's ice palace would have features like functional indoor plumbing, but let's not wreck the fantasy -- like the song says, let it go.

Next section   (27)
Index

_H*   140423