House energy retrofit 03

[Click any image for a larger version.]

    The chimney comes down

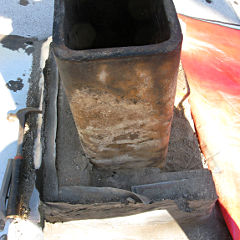
Lead flashing at roof With the furnace's long lifetime finally over, the chimney could be taken down the rest of the way. Minimal chisel work was required for the remaining part above the roof, with the mortar degenerated the way it was -- I basically just lifted the bricks off the assembly.

Wow, *lead* step flashing. Awesome. Well, you can still get that stuff in 50-pound rolls at the building-materials stores, but it was interesting to see it worked into the masonry here as standard building practice of the day. Much easier to fold and shape in than galvanized, that's for sure.


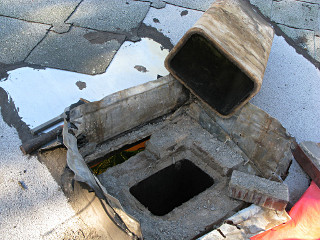
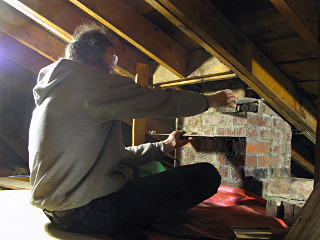
Working through into the attic Removal proceeded down to roof level, and it was really weird to be able to peek into one's own attic from this angle. Normally that's not something you'd ever want to see.

It looked like the next section of flue liner would end somewhere near joist level inside, which would work out nicely.


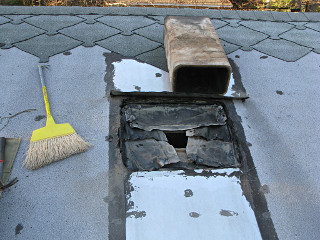
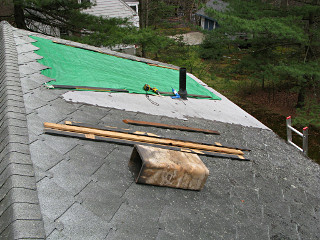
Flashing folded back down into hole The flashing was still heavily tarred into the roof assembly which wasn't ready to rip apart yet, so it all got sort of folded back down over the hole to get it out of the way and the biggest peaks of old tar knocked down more or less flat.

Redneck roof fix Redneck roof fix
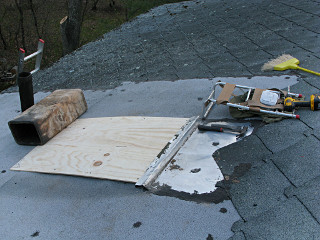
Followed by quick-n-dirty redneck fixes #1 and #2 : plywood screwed over the hole with my old patch flashing folded over the top, and then the whole mess [and hopefully some of the other small leaks nearby] tarped over and battened down with the head of the tarp lapped under yet another row of the old shingles. Hopefully this would hold it for another couple of months until roofers showed up to set things right.

The only penetration to remain would be the stink-pipe, and I still had that plan to change it to PVC somewhere inside to better avoid thermal bridging and condensation in the attic.


Continuing chimney disassembly Work could then continue in the attic, trying to minimize the scattering of concrete as much as possible ...

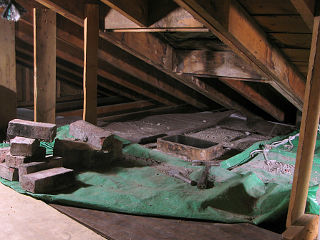
Chimney down to floor level ... finally leading to the whole thing removed to floor level and the second section of flue pulled out -- hello, darkness! And a helluva mess to clean up, but it all got pretty contained in more tarps on the temporary surrounding flooring. Bucket loads of bricks and concrete were lowered out of the attic hatch, carried downstairs and out back -- this whole job was a crapload of work, but well worth it to have the easy duct-chase available. The rest of the chimney still remains, also [as the Synergy guys pointed out] serving as a bit of extra thermal mass inside.

I measured 19.5 feet from here down to the old furnace-flue hole down below, which could conveniently use a 25-ft length of semi-rigid duct to get down through here and over to where I intended to have some kind of collector box to combine the HRV exhaust ducts. A little hint of combustion smell still lingers inside the flue, but it's not offensive at all and I expect will dissipate completely over time.


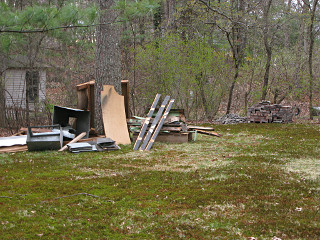
Various piles of junk in backyard The junk pile had grown quite a bit, with the addition of the well-decoration wood and furnace metal and random other stuff from inside. The chimney brick pile beyond it grew to about four deep behind the visible front row, containing over a hundred separate bricks and a few still-assembled fragments.

    Diggin' it

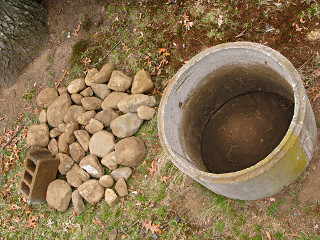
Well-decoration emptied out I finally dug out the concrete pipe section of the well-thingie out front, finding a lot of nice round rocks and a cinderblock and a mess of very angry ants. I got down far enough to find the lower edge of the pipe section, about 3" below grade, and left the remaining dirt mounded in the middle. I was not at all sure what I'd be doing with this yet, despite vague fantasies of a nice little elevated fire-pit in the backyard someday.


Regrading at front wall The extracted fill dirt got tamped down against the wall, replacing the old busted-up concrete "ground gutters" that never really drained right anyways and had turned into a chipmunk condo over the years. I tentatively put additional re-grading like this elsewhere around the periphery, just to get the slope at the wall a little more correct, on the to-do list.

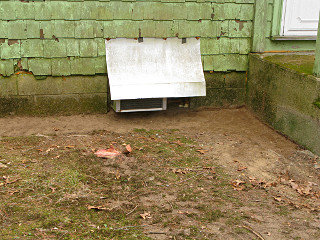
Tucked under the aluminum rain-shield here is the old trashpicked air-conditioner that I'd mounted through this basement window a few years back, mostly to serve as a dehumidifier. The stash of acorns that had accumulated on top of it told more about the critter story.


    Basement window # 3

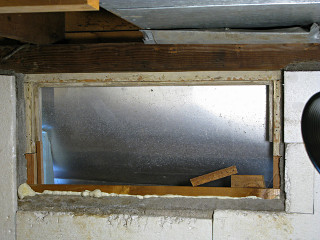
That same window was next up for rework, and a particularly challenging one to deal with. The air-conditioner had fit through it just about *perfectly* with only a little extra blocking and foam to hold it firmly in at the right drain angle. Back then the frame had been in marginal condition but still sufficient to hold the unit up. Sealed into the wall on the north side of the house, the tiny 5000 btu/h unit served rather well as a whole-house humidity-reducer in the summer and ejected the collected water to the outside. About all it could handle was the latent load and didn't give a whole lot of cooling per se, but that helped keep the basement less slimy in high summer and the rest of the house a little more comfortable in general. Not bad for a trash-pick! But with a new HVAC system for heating/cooling on the way, it was time to decommission this ol' hack and turn the opening into another permanent insulated wall section especially considering a slight possibility that one of the HRV ducts might pass through it.


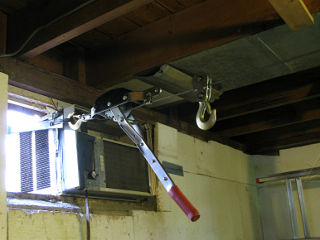
The A/C needs significant force to budge from its spot I had blocked and foamed the A/C in so well that it just wasn't about to budge from the spot without significant additional force. I finally ran a come-a-long to a lally column inside and lashed it to my pry bar, hooked the pry bar around the outside corner of the unit and basically winched it out of there until I could grab and lower it from inside.

All the pieces for this needed to be custom-cut This sill needed extensive rebuilding
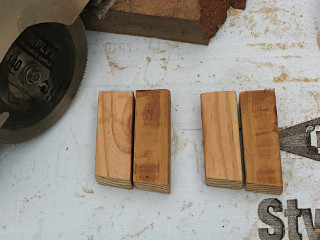
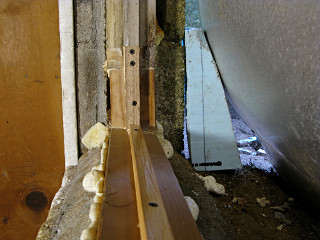
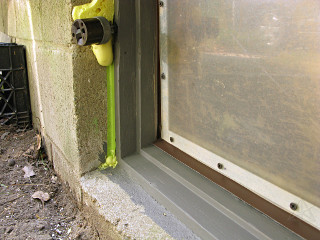
The bottom half of this frame was pretty far gone by now, and the geometry of the masonry "mud" around the bottom was such that *every* piece for this rebuild needed to be custom-cut. The new sill piece got a very thin angled wedge ripped off it, it had to be shimmed up just the right way at the outer edge, and the frame sides were put together by stacking pairs of wedge-cut pieces in between the sill and the remaining part of the old frame. Took a lot of fiddly cutting. The sill piece got bedded into a generous layer of spray-foam and wedged down firmly until that foam completely set, e.g. a day's wait before I could continue, during which it rained a bit -- fortunately I still had the aluminum shield piece that used to sit atop the A/C and could just slip that between a lower course of siding and the dirt to keep most of the splash out of the works here. That and a slab of styrofoam across the inside were enough to cover it up for the overnight.

In the end it all went together reasonably well In the end it went together reasonably well, with a bit of additional trimming to fit and plenty of caulk to seal the cracks between all these separate assembly pieces. A few screws in key directions to cinch it all together and some drying time, and it was ready for the "sandwich" layers.

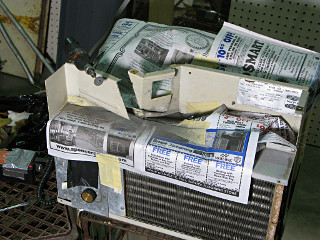
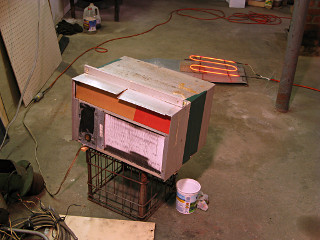
Cutting a path between hot and cold sides of the A/C Meanwhile, it was time to play with turning the air conditioner into a standalone dehumidifier, in which the chilled air that loses its moisture on the cold coil gets reheated by the hot-side before leaving the unit. To do this, it was necessary to cut a large passage between the cold and warm sides of the unit and allow, nay, *force* air to cross that normally forbidden boundary. The front evaporator fan was removed and a blocker put in on the front to channel the air to go into the other side of the unit, around where the compressor is, and blown out through the condenser. In addition, all the side vents in the cabinet had to be sealed up so all the air would go through both coils in succession.

Dremeling out parts of the steel chassis would create a lot of metal and silicon-carbide grit, so all the paper is to keep that out of the works. It took a while and about four wheels to cut the slots, but it all opened up very nicely.


Dehumidification-only mode, but all iced up Early testing was promising, but a typical capillary-expansion system that has no notion what its own load really is doesn't do too well in 55-degree air that's already fairly dry -- doesn't take long to hopelessly ice up. See, that's why systems that can sense their ambient conditions and turn down appropriately are so much better! Fire Hazard # 2 back there wasn't really putting that much more warmth into the space, but this concept of "dehumidification and second-stage reheat" made an amusing picture. Further testing would have to wait until the presence of some real humidity to deal with, but in the meantime a little creative bending of the remaining fan blades got the throughput air flow up to about 160 CFM -- entirely appropriate for acceptable drying performance at the unit's rated capacity.

Why not just go buy a purpose-built standalone dehumidifier like any normal person would, instead of trying to "macguyver something" as one of the guys on HVAC-talk phrased it?? Because this sort of experimentation is more fun, and the unit in question is completely expendable if this doesn't work out or winds up being too much of an energy hog. One future idea is to duct the HRV intake through this thing as a pre-dehumidification stage for summer air exchange, which would require a bit of external sheet metal work and a real drain line to a condensate pump.


    Oil tank go byebye

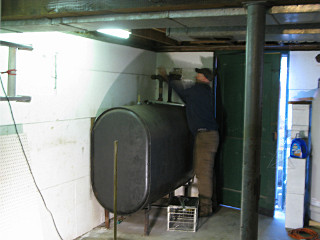
Disconnecting the oil tank fill pipes Another milestone in the abandonment of combustion heating: time to remove the oil tank. This is a special operation because it's considered a hazmat and has to be handled by licensed professionals trained on the environmental caveats about these things. I had already dealt with the feed pipe to the furnace, but here the filler and vent pipes to outside needed to be unhooked and removed and the two remaining support legs cut loose before the tank could move.

The guys seemed amazed that I had already cut two of the legs myself, but I pointed out that they were pretty corroded and fairly easy to deal with. They made short work of the other two with a sawzall, but didn't get them quite as close to the floor as my hand-hacksaw job.

They have some Very Big pipe wrenches. Iron pipe thread that had been tightly joined for over half a century was no match for that.


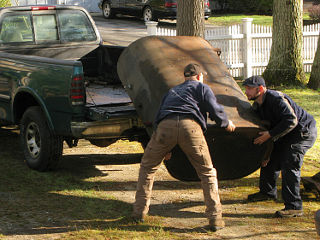
The oil tank exits stage left after 60 years Oil tank hucked into a pickup bed, and taken away
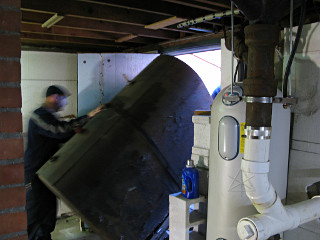
Because I had gotten the tank so empty, possibly emptier than just about any other tank these guys handle, it was easy for them -- they could turn the thing just about any direction without fear of spillage and didn't have to do any in-situ treatment other than cut it loose. They just upended it onto a dolly, brought it carefully across my nice newly built basement-door threshold and out the bulkhead, and hucked it into the back of a pickup which would then make it vanish forever from my life.

It would go to their processing facility where it would get cut open, the sludge cleaned out and disposed of, and the steel sold for scrap.


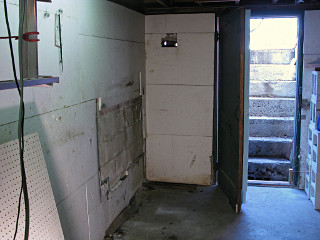
Oil tank gone, another corner of the basement freed up! And poof, I got another corner of my basement back!

This is where yard tools and such now live, handy to the door. I blocked up the two little feed-pipe holes with wads of fiberglass and began to form the idea that right there, in fact, would be the best place to bring the HRV exhaust through instead of routing farther away over to another one of my ex-window panels.


    Final furnace cleanup

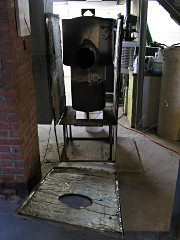
The skeletal remains of the furnace firebox Now it was time to attack the remainder of the furnace. As the side panels were pulled away, the firebox was looking more and more skeletal standing in the middle with nothing connected to it anymore.


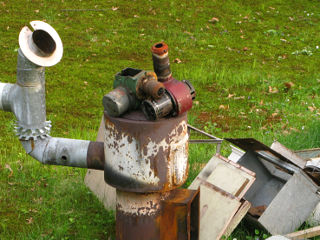
Furnace parts tossed out back, a bit of pseudo-art: snuggleburners Finally all the pieces were carried, thrown, dragged, or whatever out back to add to the junk pile, where they could sit as redneck lawn-art until final disposal would happen. I've tentatively titled this piece "snuggleburners".

The firebox/heat-exchanger piece was *heavy* and left me profoundly crudded up with soot and refractory dust, but I managed to wrestle that monster up the stairs and *outa* there.


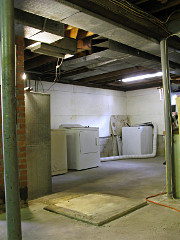
Cleared and cleaned furnace pad, ready for air-handler This was followed by a whole lot more duct-vacuuming and general cleanup, leaving the pad and surrounding area all clear and ready to receive the new air-handler whenever it would show up.

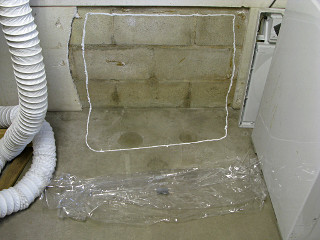
Over there behind the dryer is a portion of block wall without its EPS layer, which I decided to turn into another building-science experiment.


Moisture test patch, impermeable membrane over wall Instead of re-affixing its styrofoam piece [which I do still have], I took some window-plastic and caulked it up to the wall and floor to make a large vapor-impermeable area, to see how much if any moisture would come in through the blocks from the soil, whether by leakage, wicking, or diffusion. With a clear membrane I could easily keep an eye on it over a few months and look for telltale condensation inside the patch. This is also the only area where a little rain water ever came in very early in my ownership, before the soil around the new septic installation had a chance to settle, but I hadn't seen anything more here for years now.

In general I was rather proud of the state of the basement by now. I'd launched a bunch of the junk out of it, eliminated things that were harboring mold, swept out all the spider webs, brushed and vacuumed all of the sill area and joist bays in readiness for spray-foaming, fixed the door and had the windows in progress, compacted all the remaining contents toward the center to give full access all around the perimeter, and in general completed a ton of cleanup and actually turned it back into usable workspace -- both for myself and contractors about to come in and do their thing. And everything that happened down here was part of the overall design of how the house would work after the retrofit was done.

    Front door rework

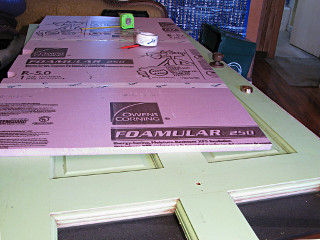
Cutting/assembling front door insulation The existing front door would stay, and another project on the list was to insulate it in a similar fashion to the basement door albeit with thinner foam. The main idea was again to cover the thin inset panels that were definitely the colder parts in winter. Here the door is off the hinges and lying across the work table, as it was far easier to work horizontally. One 2 x 8 piece of XPS cut neatly into three 32" wide slabs whose sides could tongue-and-groove join back together with tape; caulk beads were run around outboard of each inset door panel and the whole thing fastened down with the same screws-n-washers method as the basement. Two minor cutouts were needed for the knob and deadbolt.


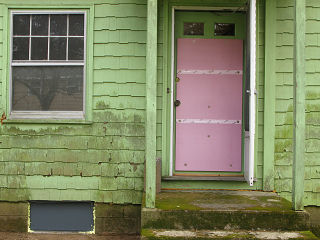
Pink-n-green: superinsulated front door Pink and green: ugly house, but a nicely insulated front door. This had also gotten its weatherstripped threshold treatment a while before and had already proven itself leak-tight. The glass area is still a thermal problem but I wanted to leave it open -- the overall conduction area is greatly reduced, and I have an extra piece of XPS that can attach behind the two windows on the inside for the really cold periods.

Eventually I would paint the whole assembly, but it was fairly weather-protected where it stood and could serve as another construction example for a while.

At this point I had the rest of ex-air-conditioner basement window # 3 done with its PVC panel in place, and more backfilling tight against the wall below. Let's see the rodents try to make a playground out of *this*.


    Basement window # 4

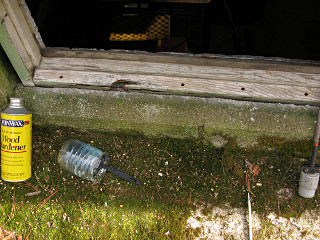
Attempt to save a somewhat rotten window sill The other north-side basement window also had quite a bit of rot in its lower part but since the basic outer shape of the frame was still intact, I decided to try and save this sill since future water intrusion would likely be prevented. To try and make it more structural again, I drilled some holes along the lower perimeter and injected a lot of low-expansion sprayfoam to spread out underneath and fill the interior space, and treated the whole thing with wood plasticizer which goes a long way toward sealing up questionable wood and making it more water-resistant. After all that cured solid, the sandwich went together without further incident. Again, I'll see how it holds up long-term, especially after it's all better protected under the external insulation overhang.


    Punching holes

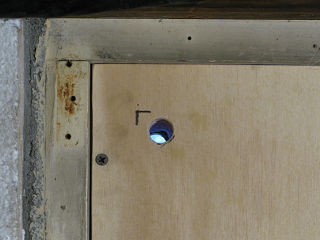
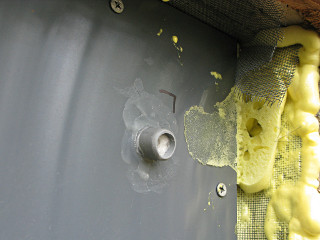
First test penetration of window-to-wall section First test penetration of a sandwich panel, for a relatively small hole. The layers can be seen through here -- the inner plywood, through the foam layers, and the outer PVC. A downward-slanting pilot hole was put through with a long bit first, and used as a centering point on the ply and PVC to carefully drill the final-size holes through those, and then the foam between was slowly and carefully worked away to avoid mangling it and compromising the insulation layer. You don't just ram a hole-saw through this whole mess in one shot; it requires working from both sides and a bit of thought and care to make a neat job and maintain envelope integrity, regardless of what size the hole needs to be. The outer PVC panel should also get caulked or foamed to the first XPS layer right around the hole itself to maintain the overall air barrier.


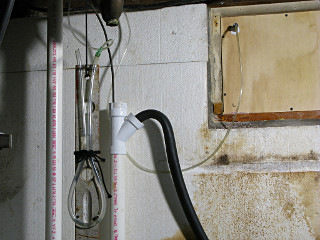
Whole-house manometer This first test hole, in the back-of-house panel with a short bit of PVC pipe as its liner, was for the input to an unusual piece of equipment: a whole-house manometer, built onto an old wooden spirit level and hung from a joist.
I described this one to the homeowners mailing-list group:
   "A whole-house *WHAT*?" I hear you say...

   Ignore the black washer drain; the manometer is all the clear tubing.
   It also goes outside via the first penetration [ooh! that'll kick
   everybody's spam filters] through my "superinsulated" basement-window
   replacement panels.  A short piece of 1/2" PVC pipe, sloped slightly
   downward toward the outside, gets sealed in with caulk on the
   inside [wood], and PVC cement at the outside [3/8" PVC sheet over
   the entire window frame], passing snugly through the 2" of XPS in
   between.  The small clear tube in turn is sealed into that, making
   a small and leak-tight path to the exterior air.  The HVAC lineset
   and electrics will also go through here via larger pipe sizes, as
   will the intake duct for the HRV.  I bought a Malco circle-cutter
   for a reason...

   So WTF is with this manometer thing?  If you don't remember what
   a manometer is, it is easily looked up -- basically a simple means
   of measuring *very* small pressure differences.  Everything about
   the air-handling side of HVAC is described in inches of water
   column, and less often Pascals.  Well, here's how to measure if
   the house is at positive or negative pressure.  One end goes
   outside through the sealed pass-through, and the other is open
   to the basement air, yielding a direct i.w.c. measurement.  What
   this is useful for is seasonal HRV intake/exhaust damper balancing,
   where positive interior pressure is definitely desireable in hot,
   humid weather to keep structures drier, and neutral to slightly
   negative in the winter [same reason].  Even a tight house can
   push or pull undesireable humidity levels through parts of its
   own walls if the pressure gradient is wrong for ambient climate
   conditions.

   Before we jump all over negative house pressure and "but what about
   radon?", understand that pressure differentials aside, the basement
   itself, near the floor, will be one of the exhaust-path pickup
   points.  That's the point of an HRV, to collect all conceivable
   pollutants near their points of origin and push them *outside*.
Running a box fan upstairs pushing air out a window with everything else closed up produced a visible differential -- not a huge one, but initial testing by opening the basement door nearby made it level back out. For something tossed together from junkbox parts and such a high geek-factor in design and purpose, it was entirely worthwhile. I figured that once the HRV was in place and the house got genuinely air-sealed, this would become much more useful.

Exterior of manometer connection, not much to see Not much to see on the exterior side of the manometer connection. The sense tube does *not* come all the way through the pipe, but stops shy of the end with a little wad of fiberglass loosely stuffed in it to keep bugs out. It still certainly passes air-pressure differences. The inner end of the liner pipe gets caulked to the wood and the outer end gets fastened in and sealed with PVC cement, as would any other such penetration regardless of size. At this point I had a selection of different diameter PVC and ABS pipe sections just for the purpose.

Another expectation here was that the window-screening at the top of the blockoff panel would eventually integrate with the overall envelope rework in some sensible fashion and keep insects away from the sill.


    One less wire

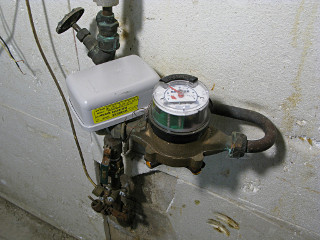
At one point I spotted the guy from the town water department going around the neighborhood taking meter readings, and asked him who I needed to contact to authorize unhooking the wire between the meter and the outdoor interface to eventually move it to another such wall-penetration. He told me that the right answer was to not bother with the wire anymore but install one of the remote RF units that allows reading the meter from a passing truck instead of having to traipse onto each property and plug the reader into every house. I already knew the old reading methodology wasn't particularly reliable, having received at least one erroneous bill, so this seemed like a fine idea even if it slightly violates my sense of controllable data perimeter. The power meter had already been changed over to a remote-read long since, so why not the water as well to eliminate any further need for utility workers to walk all the way up to the house to do their jobs.

Besides, the meter wire was in the way of where work would be done on the electrical panel, and I decided to simply unhook it anyway [which I could despite the little cover and seal over the screws at the meter]. Thus, the water dept could come out any time they liked and do that changeover before the next reading/billing cycle.


New water meter RF unit So a couple of days later a guy showed up with the RF unit, and installing it was about a 15-minute job. Now instead of the wire running outside, I have the wall-mount version of one of these(pdf). The guy just zip-tied it right to the meter plumbing and hooked up the little wires -- no worries about placement, concrete-block walls or being below grade or even the pending presence of a lot of foil-faced polyiso on the house, as the spread-spectrum burst evidently punches through just about anything and gives a strong enough signal at the street. The spec says it blurts out a meter status every 14 seconds or thereabouts, and the internal battery lasts damn near forever.

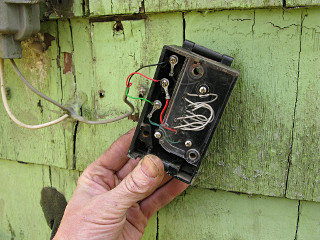
Old water-meter interface -- not needed anymore Therefore, I wouldn't be needing this old interface anymore or its wire leading inside, and took it off the wall. The data interface is only the red/green/black wires ; the rest of the pins simply encode in a hardwired way which customer account the meter is associated with. The water department didn't even want it back; they're *done* with these.

    Fascia forensics

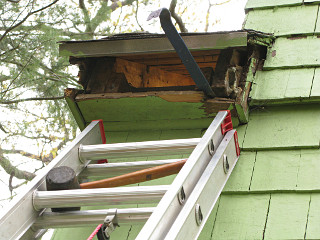
Small eave piece where bees had gotten in a few years back Several years ago, a small colony of bumblebees had gotten into the house through some hole in this area and were starting to build a nest above *my bedroom ceiling*, about three feet away from where I sleep. What alerted me to this was hearing them buzzing. They were in deep enough that there was no way to attack it from outside; I had to tarp up my bed and drill small holes through the ceiling drywall angled toward my best guess as to the nest location and inject the serious-neurotoxins type of hornet killer through small tubes. That killed the nest, and I had later sealed up the hole they'd been using with expandy-foam. But I never figured out how they really went from the exterior hole to where they'd nested, and decided to try and find out.
With the fascia and soffit pieces of "Beehaven" opened up a bit I could certainly see into the skinny upper-floor attic area [lit from inside here] and a couple of other passages, but there are enough pieces of top plate and rafter and joist in the way that I still couldn't determine the path over into the first-floor ceiling. It was somewhere near where my pry bar is stuck in, possibly to the right of that rafter-tail. Not that it really mattered anymore, as all of this was about to get torn apart and rebuilt anyway so I gave up and bagged the whole end of this piece in plastic [but correctly shingle-lapped under the moribund remains of the roof piece and given a drip edge below some distance from the wall]. In addition, a small roll of fiberglass I happened to have sitting around *exactly* fit stuffed into the space under the sheathing without even taking the packaging off it first. That temporary fix was probably better insulated and water-sealed than this part had been in years.

I don't really understand why this one-rafter-wide strip of roof is so popular in the cape style; it adds complexity to the framing and roofline and takes away a few square feet from the space under the shed dormer. But we see it everywhere up here. While the idea came up and was discussed with the builders, the reason I didn't opt to bump out the sides of the dormer to line up with the rest of the house and simplify the whole thing are: not wanting to get that deep into structural changes, and figuring the increased overhang at the other end would sit lower down over the side door and better serve as a weather awning.


    Basement window # 5 (second keeper)

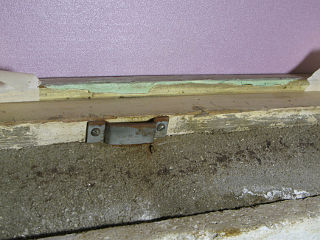
Weird green putty to build up the sill As the other window with its whole frame and sash in relatively good shape I would save this as a window, where it would receive the same cleanup and second pane and a complete weatherstripping job. The bottom frame rail had a few minor pits in it, however, possibly worn down from where the previous owner used to put a coal chute through it as this one is over where the coal storage used to be and was clearly the delivery path from the driveway. To build a little bulk back up I found this weird old "Green Magic" auto-body putty in the stash of ancient substances left to me when I moved in, which apparently hadn't dried out over time, and applied same down into the hole next to the masking tape in the hope of filling the gap and creating a new flat surface for the window to seat against.

This ol' stuff was VOC city and made the whole basement smell like solvent for a while, but seemed to harden up well enough.


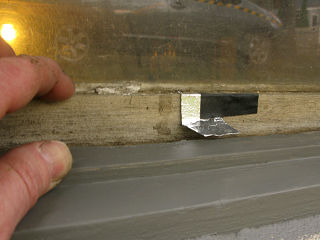
Prototyping an over-sill flashing piece But because a> I didn't quite trust the longterm robustness of the putty even after painting, and b> this window is much closer to grade level than the one on the other side, I wanted to protect the area a little better. A tiny piece of flashing might work -- to come in just over the sill rail and match its slope, shedding water out away from the putty job and weatherstripping in general. I prototyped up the fit with a little piece of tinfoil and determined that it would work, including just barely clearing the edge of the rail while opening inward. 3/4" up and 3/4" out, seemed simple.

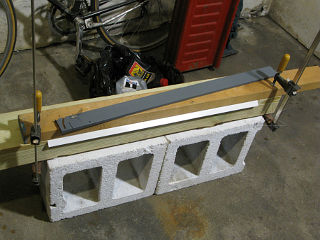
Quick-n-dirty metal bending brake Cutting a long thin piece of flashing was easy enough on a guillotine-style paper cutter; bending it lengthwise was another matter. A quick-n-dirty bending-brake setup was needed to get anything close to a straight bend. The white strip is the light side of the typical white/brown painted aluminum roll flashing sold at the big-box; I had originally bought it to fashion some covers for fluorescent light fixtures but it would be fine for this purpose too. A leftover strip of PVC served as a tool to push down evenly and actually do the bend, although this flashing is deceptively tough enough that it still had to be sort of done in sections. It came out pretty even, though.
Oh, right -- and the stuff in the trash bag speaks to how I actually took a break from house stuff earlier that day and changed the oil and trans-fluid in the Prius. Can't forget about one's other little obsessions, can we?

Refitted 'keeper' basement window with sill-flashing lip And there we have it: a perfectly-fitting flashing rail to shed splash water away from the weatherstrip. With the window almost closed here, the tight closing clearance can be seen along with a little of the side weatherstrip inside. The window closes tightly enough that the only strip option is the high-compression open-cell foam, which according to Frost King is only supposed to last one year but in reality it'll probably do better than that with the infrequent use this window gets.
As mentioned a page back, the extra plastic pane is mounted in the same foam-gasketed manner as #2 but on the *outside* of the swinging sash. This is the other half of that experiment, and once cold weather hits again they'll be observed for condensation and thermal performance to determine which was the better way to go at homebuilt dual-pane setups. They're on opposite sides of the house, but at east/west instead of north/south and similar shade profiles so that the amount of impinging sunlight shouldn't be a major difference.

    The chimney bricks find a new home

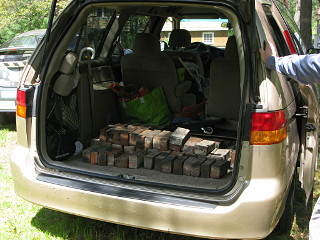
Most of the clean chimney bricks heading for a new home Around this timeframe a friend had seen my mailing-list ravings about taking down the chimney and the offer to give the bricks away, and said "I'll take 'em!" and came up to do so. Picking out the cleaner ones still added up close to 100 bricks, which at 4 - 5 pounds each makes a fairly loaded-down minivan, but not over its rated payload and off they all happily went.


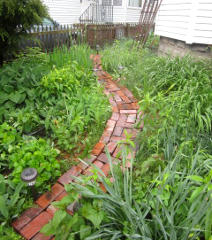
Garden path He reported the result a little later: the bricks had become a nice little garden path, sort of in keeping with the many nearby brick sidewalks all over Cambridge. [Ignoring the fact that many of those are all humpy and bumpy from years of frost heaving, but what of that.]

Next section   (04)
Index

_H*   120521