House energy retrofit project 12

    Day 6

[Click any image for a larger version.]
Hidden note about the project I was up early the next morning and waiting around for the crew to arrive, and decided to create a note about the project that would eventually get hidden -- at least until someone went to remove the side door again, in who knows how many years from now. Little time-capsules like this are a fun tradition, and in this case it could highlight what the current state of energy-efficient building was at the time.


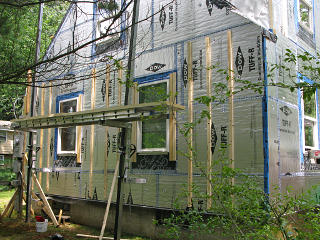
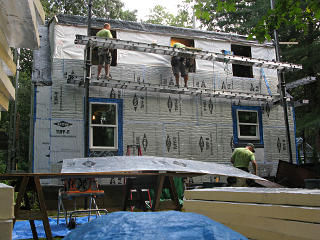
Scene out back They had moved the whole cutting and prep operation to the backyard, visible as a little damp vignette out my back window that morning. In general they were careful to cover up their work surfaces and materials, although the water-impermeable foam didn't need as much attention in that regard.

Screen door jalousie fitting I decided that I'd also put in a little cleanup work on the front storm door that day. First thing was to pull the totally stripped crank and gearing for the glass; a typical failure mode in such things. Let's remember that the operative word root of "jalousie" is "lousy". Later I pulled all the glass panes out of their clips and left them out for the duration as it made the whole door much lighter and easier to handle.

Final three windows Today's project would be the final three windows and finishing the foaming on the rear.

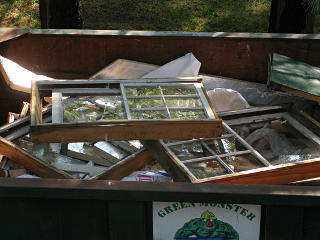
The ONE broken window The last of the old windows got heaved into the dumpster, and one *finally* got a broken pane -- probably because it was already slightly cracked and much weaker against the landing impact.

Newspaper insulation from 1973 Another time capsule! The guys found some old newspaper wedged into some of the rough opening gaps upstairs, as a token gesture toward a little air-sealing. I managed to smooth out this piece without destroying it too badly -- it was very brittle. Boston Globe from 1973, ballyhooing about the energy crisis. And the DJIA less than a thousand?? Unheard-of these days. This was completely hilarious, considering that here we were doing a big energy fixup to the house, and now I was especially glad I'd left my own little timestamped scrawl on the door framing.

It also gave a strong hint that the whole shed-dormer was a retrofit done around that timeframe -- the paper could not have gotten in there in 1956 when the house was originally built. But it was still long enough ago that the color and quality of framing wood in the attic wasn't really visibly different between one area or another. Perhaps the entire roof including the framing had been redone at that point -- hard to tell, and I certainly didn't have any documentation on its history.


Matching shed angle While the main roof is a nice easy-to-deal-with 12/12 pitch at 45 degrees, the shed dormer is something like 22 degrees and required a bit of fiddling to match into the foam layers.

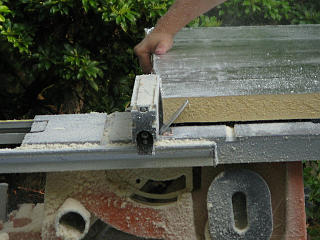
Precutting angled foam In this case the guys mostly found it easier to pre-cut some of the edge angles needed on the ground with the nice adjustable table saw, so the ground guy was kept busy ripping the appropriate pieces. They spread a tarp under the table saw to keep all the foam dust off the ground, but were probably breathing plenty of it.

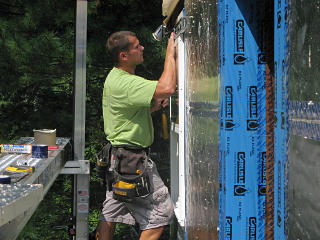
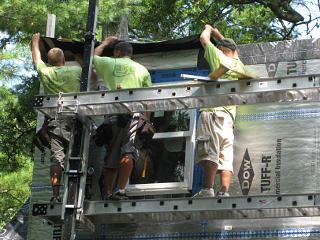
Leveling up a window The window installations here were pretty straightforward. All the upper story windows were the same size and smaller than the ones downstairs, so pretty easy to handle.

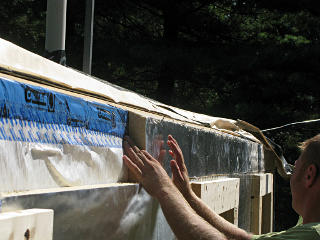
Sealing shed-dormer I&W down Finally the roof Grace was brought down over the new foam and flashed-in window assemblies, and *not taped* along the bottom.

Location knocking by leak holes We still had the leak mystery to solve, so the head guy on the job that day sent me into the attic to knock on the deck where I'd still seen the leaks and he followed me around up top with more patching material.

Here was the "aha" moment: It turned out that they had only patched screw holes near the *edge* of the roof where the staging brackets had been anchored, nothing in the middle where I was here by the attic hatch. They realized that it wasn't just around the perimeter; the mid-roof anchor points were also a problem.


Hole patches This time they scrutinized the whole surface for *any* holes. The updated patching methodology was fairly thorough: a healthy squirt of Black Jack into the hole, and then a piece of Carlisle flashing stuck down over it. Like the plug-n-patch systems used on car tires these days.

They agreed that they really should *always* be patching any holes from removed screws, and I considered that a minor triumph: we had turned the whole miserable situation into a positive learning experience, and this information went back to the GC as I summarized the whole story in email later. Hopefully this got plowed permanently back into the training they give to anyone who works retrofits for them.

It was around this point that I noticed that the Grace was already starting to go significantly yellow under the sun exposure. Manufacturer spec for leaving it uncovered is only about 60 days; it's not a roofing material and *will* degrade under ultraviolet.


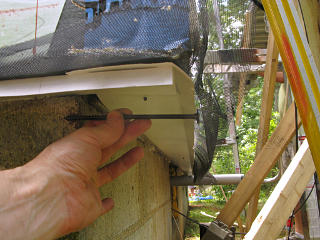
Threshold splash protector Later that day I pulled the front door off the hinges and added a splash deflector for the threshold. It was from a piece of the *old* spare roof drip-edge that the prior owner had left some of kicking around the basement. It was pretty much the perfect size and shape for here; a little upward bend at the outer lip would allow the piece to reliably glide over the sill without snagging. Sort of like the little flashing bits over the basement-window weatherstripped points, but bigger. A few well-placed drain holes would let water out of the lowest part but with the door closed, well clear of the threshold piece. It looked a little clumsy but proved quite effective going forward.

The whole threshold assembly was still rather obviously damp from the soaking it had gotten before, but I figured it would slowly dry out if this could help keep bulk water off it.


Angled cut for reglet in foam Additional water protection was deemed necessary for the basement bulkhead junction to the house, with better upper-edge detailing than yet another piece of tape. Flashing into a slanted dead-end cut into the foam would work much more reliably, similar to what is commonly done on chimneys to flash from masonry onto the roof without letting water down into the hole.

Reglet flashing heading in Bulkhead flashing seated
This is commonly called a reglet. The cut had to be worked a little wider than one pass with the knife to fit the metal in, but once it was large enough the flashing piece slid in nicely and completed the seal over the bulkhead lip.

I might have been tempted to make the metal piece a little longer to overhang either side of the bulkhead structure and the gap between it and the foam alongside, but with the whipping everyone had just taken on the topic of water management I figured they knew what they were doing and were giving all this careful thought.


Starting west strapping With walls fully foamed up it was time to start adding a lot more of the strapping that would eventually hold the siding.

Screw length illustration An attempt to visually match the structure to the screw lengths they were using for this: The surface of the furring above is visible through the screen, and we can kind of guess where the wall studs would be sitting on the mudsill behind the original sheathing. I've actually got a better plan diagram in section 17.

A naive look at this might make the viewer think that the screw might just bend down under the weight of strapping and cladding if it's out at such a distance through the relatively soft foam, but it's totally not an issue.

The folks over at Building Science have made extensive studies on the load-holding capability of this type of assembly. The compressive strength of typical rigid insulation types is high enough that the whole thing acts like a truss with the screw in tension and shear, but not significant bending stress because bending yield would try to further compress the foam around it and is thus resisted. This report from BSI goes into quantitative detail on their testing, which concluded that deflection in this setup is irrelevant even when using heavy claddings like cement-board or stucco. The quantitative results start on about page 25 of the PDF. In other words, once all the strapping is snugged up it ain't goin' noplace.

That same paper, about a 7.6 Mb PDF, also contains numerous details about air barriers and water management and is a really good read for anyone seriously interested in these details as applied to insulation retrofits.


Bottom limit for furring strips Coravent and bug screen
They snapped a chalk line slightly above the bottom edge of the foam and brought the strapping only down to there, because a strip of Cor-a-vent would run under that to match the strapping thickness but leave the bottom openings freely permeable by air and water. The bug screen was then folded up and tacked over that, making an invasion-proof bottom termination to the whole rainscreen.

Other retrofit crews do this a different and slightly more clumsy way -- they bring the strapping all the way down flush with the foam edge and cut little pieces of venting mesh to fill in the gaps between. That's more cutting work, and is likely to leave larger holes into the space if the bug screen gets torn somehow. With the continuous strip, even a compromise in the screen leaves the rest of the bottom-edge barrier more robust and with less exposed wood.


Strapping rabbets over window flanges Where strapping came up to window flanges, shallow accomodating rabbets were cut into the ends to match everything to the outer plane. The windows would need a nailing surface right up to the edge of the frame, to attach siding J-channel to later.

The little plastic nubs along the bottom of the window frame are weep hole covers, many of which were missing when we received the windows or got knocked out during handling. They just clip in, and also help keep insects out of the frame voids while still freely letting water out. With so many missing after the windows were installed, Serious eventually sent me a bag of extras after I asked what I should do about it.


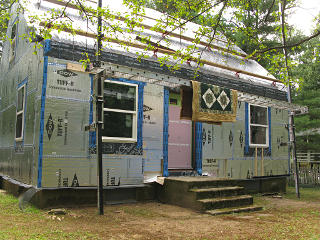
The silver cube! At this point I was telling friends I was living in a silver cube, and they should still come look at it. My neighbor was in his yard earlier in the day seeing all the flashing and tape, and asked me "how are you going to *breathe* inside that thing?" ... and this was *after* I had brought him through the basement and shown him the whole ventilation system. If anything the air quality was going to be far better than it ever was in the leaky pre-reno house.

But as the weather was becoming more hot and humid, I wasn't really running the ventilation much yet and the house was getting plenty of air exchange during the days anyhow.


    Day 7

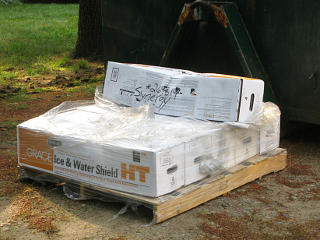
High-temp Grace Another small delivery arrived in the morning; another batch of Grace, this time the special high-temperature version designed specifically for roof decks. It was time to start on the top layers.


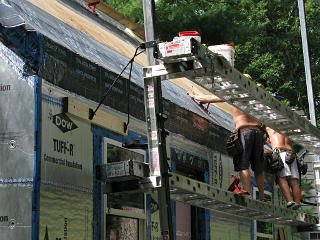
Pump brackets remounted low down They set up to start on the front first, and for this the staging had to be bracketed in way down under the roofline. Large cleats were lagged in through the foam and then the brackets attached to those.

Lining up to roof edge Foam pieces for this wouldn't need quite as much fiddly cutting and fitting, with no windows and doors to work around, but they still naturally wanted a fairly precise match to the rest of the box. The lowest row also needed a 45-degree bevel to match the front wall plane.

Table saw set to cut 45 The bevel was fairly easy to pre-cut on the table saw before handing the pieces up.

Lining up next layer The second layer, also pre-beveled at the lower edge but cut to a shorter width, would follow the standard model of its edge seams staggered in different places from the first layer.

Distinctive frost melting pattern from thermal bridges This is what can happen if the layers aren't staggered, or if only one thicker layer of right foam boards are applied. Obvious thermal bridges where they butt together!
This shot is from Joe Lstiburek's paper (pdf, 1 Mb) on convective airflow loops and unexpected thermal paths in what was originally thought to be a superinsulated structure. While mostly just a learning experience in the case of Joe's barn [although he calls it "professional embarrassment"], in other structure types it can lead to damaging condensation buildup.

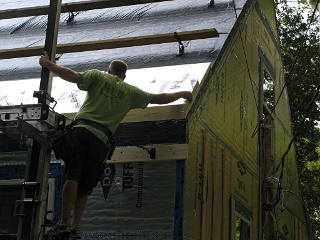
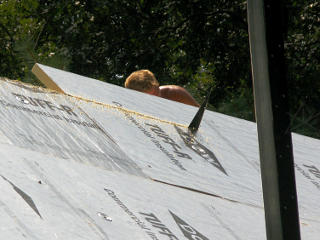
Sneakers stick to grace The planks farther up had to be taken out before foaming could proceed, and our guy-turned-mountain-goat here showed how his sneakers could actually stick well enough to the Grace to walk up a 45-degree roof angle. The potential success of this is a crap-shoot, as it totally depends on the rubber composition of the shoe soles.

And yes, he took his caulk-gun of Black Jack up with him to fill the screw holes left behind.


Walking on foam edge It was far less dicey to simply walk on the edges of the foam once it was screwed down, using the start of the second layer as a work ledge to lay up another row of the first.

After the front edge was formed it got yet another layer of membrane run along it to seal up the foam edges. Not really a reverse flash, as the foil-face underneath would conduct water right toward the outside. The main thing was to protect the open edges of the polyiso.


Front roof progress Work continued upward, and they clearly had a pattern in mind that would give the best seam-location disparity between the layers.

It was also getting quite warm and the sun was starting to come overhead, beginning the "double sunburn" scenario from direct exposure and the light reflected off the foil-face.


Right around this point, I realized that we had a planning problem. This was the time to act on how large the various new roof overhangs would be on the gable ends, and we had never gotten around to a discussion to lock in some numbers for that. The guys on the site were about to make a stock assumption about it based on what they "usually do" on other houses but I had been pushing for fairly generous overhangs for better water protection, and suddenly the crew needed a firm decision on measurements because it heavily affected their immediate next steps.

I managed to reach PM on the phone as he was offsite that morning and get it hashed out on the fly. He advocated more modest overhangs so the house "wouldn't look like it's wearing a hat", whereas a big hat was precisely what *I* was thinking about and pushing for!


First plywood goes on We compromised on 12 inches over the sides which was the dimension they really needed for today, and they could proceed accordingly with adding the plywood "over-roof" layer on top of the foam and leaving exactly that much hanging out over the edge. They were going to build that entire front deck today, leaving space for the front overhang assembly go to on later [whose size was still unknown even after all that thrashing].

Re-finding the rafters For plywood attachment they needed to know where all the original rafters were. They hauled out the "SAVE ME" board but apparently this didn't entirely help, as with the gables bulked out something or other was thrown off by a non-predictable amount. The framing in that whole roof area, rafters and joists alike, is all 16-and-a-something inches on center instead of the standard 16. No clue why, but it made life interesting. To find the rafter ends again, one guy had to actually *slit open* the Grace layers over the ridgeline and peek into the peak, trying to see the rafter ends and making a fresh set of marks for them up top.

Another compromise in the water-shedding layers, dammit. The slit wasn't that long and he laid a piece of Carlisle flashing down over it afterward, but the whole membrane over that area now wasn't what I'd call continuous.


Grace-HT going up Along with the plywood they started the new Grace layer, using the new high-temp stuff. Another release-papered flap was left to cover down to the corner.

Flinging brackets off The planks and brackets were removed, and the latter found their way back to ground level via the usual gravitational means. These fellas don't like to *carry* anything downward when they can just fling it. The front yard is sort of a miserable excuse for a lawn, so I certainly didn't care.

Wrangling foam up Foaming could then proceed upward fairly rapidly from there.

We can just barely see the blue of the ridge-line Grace repair here; the slit didn't have to go all the way along, the funny dimensions had just thrown them off in one small area near the middle.


Low-SHGC glass comparison The sun was now beating down and it was pretty hot out, and it was an appropriate time to check out what the new low-solar-gain windows could do. The difference through the glass vs. direct is quite profound, in fact, and by keeping the southern windows closed the house was already staying quite a bit cooler especially on the lower floor.

Weird window reflections With all the layers in the window panes, reflections from them are *really* bizarre. The Serious units are dual-pane but with a membrane suspended in the middle that's also the low-E layer, making them effectively triple-pane but with less weight. Light through them does get a slight green tint but one gets used to that as quickly as looking through, say, car windows and not even really noticing anymore. It's a question of visible contrast.

Trimming first roof layer It was easiest to bring the first foam layer up with some excess and then cut that off in situ, rather than try to pre-size it on the ground.

Front roof almost fully foamed The second layer also stuck up a bit, and here we can definitely see the seam staggering along the edge.

Trimming top foam All that got cut away too, but two inches higher up along the thickness of a foam layer on the roof behind it, to create the interlaced "air maze" as the layers turned the horizontal corner.

Flapping away foam dust The hand-sawing had created vast clouds of polyiso dust, which got flapped away with a towel so it wouldn't impede membrane adhesion.

This is why I'd be finding tiny shreds of the foil all over the yard for years afterward.


Reflection from across street With the front all foamed but not much of the plywood on yet, I figured this would be about the most reflective the roof would ever be, even more so than after the metal roofing was put on. I ducked across the street for the neighbors' perspective on it, and tried to determine how obnoxious the mid-day reflection might actually be.

Reflection percentage It looked bright from here, but at this range wasn't actually sending a whole lot of extra light across. In a patch of direct sunlight on their front lawn I could just barely see a second shadow of my finger from the roof-reflected source, so I concluded that this wouldn't be nearly as bad for them as I feared. The final roofing layer probably wouldn't be this bright anyway.

Re-flashing the peak Overhang taking shape
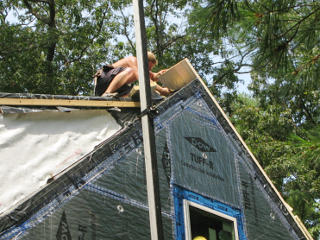
To complete the seal over the peak, a small start on the shed-dormer foam had to be installed to mesh with the front layers. Then the actual peak where all the foam met could get a run of flashing. Thus burying the slit-and-repaired Grace at the old ridgeline underneath forever...

Here I could see the basics of the gable overhang taking shape as the plywood came up.


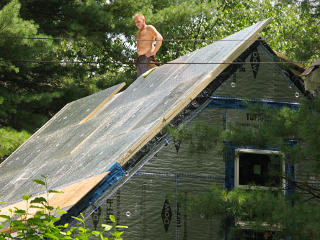
Laying grace in the heat It had gotten brutally hot outside, the discomfort compounded by working on shiny foil-face foam and black Grace as they added more plywood and added more courses of I&W shield.

With all this fascinating stuff going on, though, I wasn't about to hunker in the house trying to stay cool while they sweated it out.


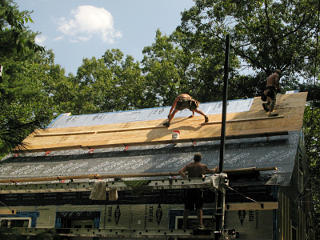
Hopping around on the roof Plywood kept going up, and the plank brackets and a couple of extra cleats appeared on the new surface. Today brought out some of the best in the guys' agility hopping around on the 12-pitch roof.

Screws lined up to rafter Attaching plywood was a little tricky, as all screws had to go through the foam and old sheathing and find their way firmly into narrow targets of the original rafters. Many measurements for cutting and pre-countersinking were called up and down. At plywood seams, they made sure to align the break right over a rafter line and did a cute trick of running screws in right near both edges but slightly angled so they'd hit the rafter from both sides.

This makes the observer really understand how the new over-roof surface had plenty of uplift protection, given the density of screw placement and the fact that they were using plywood instead of OSB.


Rafter misses inside Hitting unseen rafters by eyeball guess isn't easy, and there were a number of misses. There's a change in the feel of a screw-gun between when a point lands solidly in a rafter or just sheathing, but a couple of the guys weren't quite as versed in telling the difference. The head guy went into the attic, which was about 110 degrees inside by now, to look down every rafter bay and knock and call out wherever he could see screw points and had the guys outside back every one of those out and take a new angle in [from the same exterior hole, of course!] to try and go into the rafter instead. He amusingly phrased his findings as "you guys suck!"

They had to be careful how the re-threading was done, when one also considers that a moved screw would leave yet another hole in the lower Grace layer that would never get patched. Some of the screws took two or three more tries to sink into a rafter, undoubtedly making a bit of mincemeat out of the intervening layers. As I watched this going on I thought, what if a little water *did* manage to get into the assembly from up above? It could run right down those now empty channels where a screw shaft used to be, through the compromised Grace, and into the attic. But I think their concern was more about the structure and getting a solid physical connection for the plywood.

A rafter miss not only weakens the attachment point, but since these longest steel screws come all the way from the exterior they also form little thermal bridges. Cold screw points hanging down can collect indoor condensation and drip water, but not if they're buried in solid wood. In other types of retrofit jobs that involve through-bolts of any sort this sometimes has to be taken into account -- one case study described how big bolts holding a deck ledger on and coming through an insulated wall got little cubes of styrofoam placed over their protruding ends inside, to prevent problems from condensing water.

Now, not every screw here could get the same treatment -- the slightly shorter screws for the buttons initially holding the foam down would usually wind up mid-field and poking in through the sheathing, and still be thermally connected mostly to the outside if they were at the second foam layer. Nothing much could be done about those.

Still, this was among the many reasons I specifically included the attic in the ventilation system design.


Finishing grace layer The last row of plywood was added, measured to come up pretty much flush to the layers of foam starting to go down the backside, and then the Grace was rolled out all the way up for a new waterproof layer. Now all those screwheads and rafter-miss boreholes, in theory, were buried.

Grace flopped over peak The top of the Grace was flopped over the peak a little, preventing water from getting into the seam. A little "nordic hut" peak was left above the cheek-wall strip since the foam meeting it would be dealt with a little differently later.

Peak from above Here's how it looked at the end of that day. The difference between the new Grace and the older and already yellowed-off Grace is pretty profound here.

It was Friday, and I would have to continue living with the heat from the shed-dormer roof and its mostly black surface with southern exposure for one more weekend. But with the rest of the house mostly foamed and the return-duct hack to pick up already-cool air from the basement the air-conditioning load was handily continuing to remove humidity. In other words, it was quite comfy inside as long as I didn't need to go upstairs too much.


Servicing the portajohn Usually a guy from the port-a-john company would come every Friday to service ours, but this week he showed up on Saturday morning.

Behind the loo is all the remaining stock of full foam pieces we had left -- less than a full bundle. Everything else was already on the house or in the pile of cut-offs.


Airing out bedding The weekend cooled down a little and turned into gorgeous weather, and I took the opportunity to do a bunch of cleaning. The scaffolding they'd left in place over the front was perfect for hanging up some bedding to air out. The rain-deflector had gotten reattached before the guys left, albeit a little higher up from the door than it had been before.

Note carefully [big picture] that the plywood stopped a foot and a half or so up from the front corner, leaving a discernible lump at its end, but the Grace on top was left long enough to flop down over everything [with its release paper still on] and keep the front nominally watertight as long as it could handle water running straight down the wall.


Next section   (13)
Index

_H*   121201