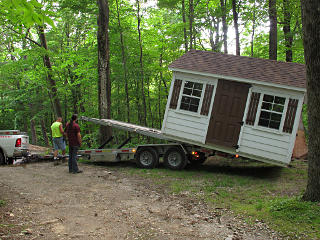
Baitcon on-site storage shed!

Initially installed 30-Jun-2014

Baitcon 25 was a fairly cut-n-dried copy of the previous two or three years, as we've settled into a pretty steady routine at the Abode site since it is so well suited to the event. In fact the Abode management has so grown to welcome us year to year that they offered the opportunity to install a permanent on-site storage shed for the large infrastructure items we would normally have to truck in every year. And "on-site" means *really* local to where our stuff gets used, a spot right near the generator and tool sheds so gear has to move all of a couple hundred feet to where we normally set it up and use it. This idea has precedent, as the Spiritfire folks also keep some of their stuff on-site now too.

The con-com heads arranged the shed purchase and delivery, from "Shed-Man" right down in the valley below a few miles away. However, I was about the only one of the crew awake on the morning it got delivered. I didn't even have the camera with me when the truck rolled up but soon realized that if anybody was going to get pictures of this it was all on me so I sprinted down to the car to grab the camera before things got too far along. These would basically be the only shots *I* got at Baitcon at all this year -- that's okay, terabytes of other peoples' pictures walk out of here every time and some of them even go up on the net later.

[Small pix link to big ones, as usual]
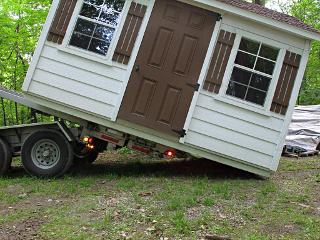
Shed teetering on tail of trailer They had managed to back the trailer over a fairly nasty hump into the area and the shed was already half off it, teetering on the very tail end. I could already see that the trailer was very specifically designed for this, with full hydraulics and a chainmotor to push shed frames back and forth and lots of ratcheted tie points.

And the shed is *so* cute, with its little windows and faux shutters. It doesn't really need windows, but it's the style they had. They lock fairly firmly and one can always staple up garbage bags or something over them.


First end down One end touched down about where we wanted it, and the process of extracting the trailer from underneath began. This was a bit more involved than just driving away, to say the least.
 

Sliding trailer out from under About to finish drop
The trailer has a whole articulated rear section that can extend further and go completely down to the ground, to gently deposit the last edge without any drop. All of it is driven from a wireless controller, so the trailer operator can walk all the way around the load while moving it.
 

Fine positioning of last edge Not only that, but the very tail section can hydraulically move *right and left* to place the last corner exactly where desired. Useful for those frequent cases when the back-in angle couldn't be perfect.
 

Prying up for first block placement So now the shed had its runners on the ground but was sitting at a crazy angle; time to level up! Fairly tall support blocks would be needed on the downhill side. To begin the process, the low corner was pried up and a temporary block added.

The shed weighs about 3000 pounds total. A simple wood-framed structure, with pressure-treated floor joists and runners underneath but the rest is just generic 2x4 framed construction. The cement-board siding probably adds a fair chunk of weight by itself.


Pipe underneath for easier sliding We wanted to shift one end slightly; the easiest way was to slip a PVC pipe underneath and then the whole end could be slid back and forth a little. Pry bars and floor jacks, nothing fancy about any of this.
 

Early in leveling process Doors not quite aligned
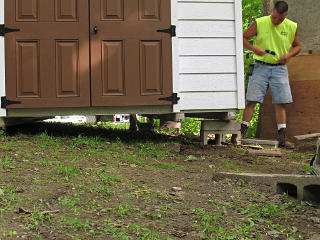
I noticed early in the leveling process that the end doors could be used as a guide to tell how much the whole building was racked. Framing isn't 100% rigid, and there's not much to prevent the entire box from a little end-to-end twisting.

We didn't really have time to prepare a proper foundation site for the thing, so this would all be done on the fly with blocks which would get us going and perhaps minor fixups could be done to the underpinnings later. The ground here *is* a little soft and gets some water flow and soil creep, so attention will have to be paid to how things migrate year to year and perhaps some extra reinforcement proactively added. Many of the other buildings around the site are basically up on colums of cinderblock too, and while some incremental motion from winter frost heaves is evident, they've held up pretty well over many years with minimal fixing along the way.


Leveling with plenty of space underneath Close to leveled, one could see that we're on a pretty good slope here. But the up-on-blocks method felt pretty solid, and the shed guys probably do this all the time.
 

Placing center block Center block
While the building is only 10 x 12 it wanted to have a center-floor support point too, and of course the only way to insert one was to belly underneath and place it. That and a few shims hammered in on top got it nice and solid.

The whole set of blocks was also placed high enough to leave a little daylight under the uphill runner, by design, so rain runoff could go completely under the thing instead of hitting it.


Blocks along edges midway Additional blocks were placed at midpoints along the edges, and at the "front door" I dug out a little bit of the soil that might otherwise bring water against the front block and the runner above it. What it really wants there is a little 3-foot path of pea gravel or something.

Most of the support components that weren't concrete were of a composite deck product like Trex, for water-resistance. The shims were probably ordinary wood shims, and thus may be one of the first bits to rot out and need replacement later. I think we're all more concerned about the soil here than the column materials, though.

After it was done I was running around pointing it out to anyone within earshot, phrasing it as "we got a box on blocks!"


Optimal installation or no, we gleefully loaded our fridges and freezers and crates into our new "summer home" and still had lots of room left, as this has far more floor area than the corner of a garage we used to use. It was relatively easy to roll the big stuff down to here with a 2-wheeler hand truck and a couple of people.

A nice construction touch is steel diamond-plate across both door thresholds, to resist the common problem that those edges get chewed up as items are moved in and out. One thing the shed does need is a couple of collar ties added across the rafters. Even though lack thereof might be code for a building this small, there's almost nothing to prevent roof spread in the middle under full snow load. I was all set to add some that day but we couldn't find suitable wood; we arranged that either the Abode people would take care of that later or maybe I'd go back later in the summer to do that and check on support block creep.

_H*   140703


    One year later

  Despite best efforts to schedule an interim visit to install roof reinforcements and check up on things in general, we didn't manage to return to the shed until over a year later as the event wound up happening in a later time-slot the following summer.  The shed roof had clearly survived the snow load over the rather brutal winter without any mishap or visible distortion, which was pleasing, but what we found inside was less so.  Mice had easily gotten into the shed and had set up shop in amongst our stuff, leading to a rather disgusting collection of mouse-turds and pee stains and some shredded cardboard where they could find it.  They even got inside a couple of the attached-lid storage containers, because for some obscure reason the 9 inch high size of Akro-Mils flip-top crate has extra holes molded through the plastic under the handholds at the ends.  As we unpacked we had to clean and disinfect quite a few items, which lengthened overall event setup a little, and we realized that besides finally installing the collar ties, efforts to make the shed generally more mouse-resistant were definitely warranted.

Fortunately I'd gotten a reminder about that from the crew before we got on-site, and added some quarter-inch "hardware cloth" mesh and a staple gun to the batch of tools I brought along for the work.  Wasn't quite sure how that part would play out yet, but the first order of business was to get the ties in and then think about the rest.


Measuring for cuts The 10 foot width of the shed would need pieces around 9 and a half feet long to bridge the rafters fairly low down, and I figured two of them would be plenty to resist snow-load spreading.  Two ten-foot hunks of 2x6 came in the rental truck along with the event food, and that evening I grabbed a helper and we got started on measuring and cutting.  She, in fact, took most of the wood-wrangling pictures here.

The big chest-freezer hadn't been moved out yet, and became a convenient workbench and stepstool.


Determining rafter angle Angle transferred to wood
The ties would need a slight corner cut to match the roof angle, which looked like about 30 degrees but was easiest to just template up with a piece of paper and transfer to the wood at the correct height.
 

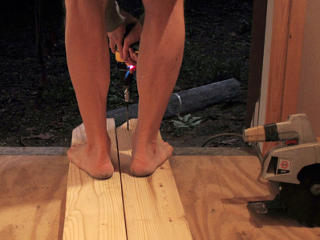
Cutting angles to fit under roofline Total length and conformance angles came from a couple of easy saw cuts.  I left the ties just long enough to rest the ends on the top plates, so we wouldn't have to hold them up while aligning things.
 

Inward preload on top plates The framing and roofline still looked sound and straight after the winter as mentioned, but I wanted to make sure it was all squared up before installing the ties.  In fact, it would make sense to apply a slight preload to tension the ties just a little since outward spreading is the movement they hold against, so I basically wanted to pull the sides of the whole building inward at the level of the top plates.  I drove a couple of lag screws into the top-plate assemblies and we hooked a come-a-long across between them, initially taken in just enough to hold itself up.

One tie was temporarily rested in place to determine the best attachment points, then marked as shown in the blue circle.


Drilling collar ties The ties got the larger holes drilled, more or less screw thread clearance size but without much slop.
 

Drilling rafter lead holes through ties Lag screws in
Tightening up the come-a-long could only bring the tops of the walls in about an eighth of an inch -- this shed is a lot stiffer than I expected!  Maybe those gussets at the ridge do more than I give them credit for.  I brought it in as tight as I dared, to the point of slightly bending the screws where the cables were attached, and left it held that way.  With the ties installed where they were going to go, lead holes for the lag screw points were drilled *through* the clearance holes so everything would align correctly in that slightly inward-preloaded state, and then the screws were run in and torqued down.  The come-a-long tension was then released, transferring the preload to the ties.
 

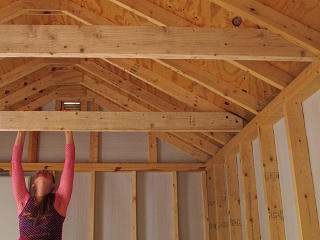
Hang test 2x6 boards on edge are quite strong, especially under slight tension.  No deflection during various "hang tests"!


    Mouseproofing

  I think it was one of the Phils in our crew I first heard say, "mice are a fluid" in reference to their ability to get through tiny holes.  They can certainly squeeze their little heads through openings of 3/8 inch and maybe even as small as a quarter inch if it's a slot, and nibble enlargements to holes in wood and plastic as they see fit.  They'll even dig their way through some types of spray-foam, which they must have been doing to my own house pre-renovation even though I'd tried to air-seal around the foundation/sill gap below the siding.  Metal is generally the way to stop them -- small-gauge but strong screen, coil-stock flashing, and steel wool in strategic places.  I had brought mesh along, and one of the shopping runs early in the event returned with packets of steel wool and a bunch of large glue traps.

For some reason the shed doors are installed to not seat directly against their frames, but stand off about 3/8" resting on small spacers when fully closed.  Maybe it's some concept of ventilation, in conjunction with the small gable vents, to not have a totally dead air space inside.  We considered replacing all such spacers with longer strips of trim wood or something, which would have necessitated ripping down a bunch of suboptimal source lumber and a lot of cut-n-try to fit it all tightly.  I didn't feel confident about that or that the mice wouldn't chew their way right through it.  In idle moments during the event I studied the problem and the door geometry some more, and worked toward solutions using the materials at hand. 


Anti-mouse mesh door gaskets What the doors needed was mouse-impermeable gaskets, to lightly squish between the mating surfaces like weatherstripping.  Mesh strips about an inch and a half wide got stapled/nailed around the relevant edges and bent out appropriately, to rest against the frame parts and bridge the gaps with the door closed.  Or at least sit close enough to block mouse-sized mismatches.
 

Mesh interface into steel wool jamb filler At the hinge side the mesh would connect into a wad of steel wool, blocking a recessed channel formed by the jamb and shed structure.  Fortunately, the hinge-side edges of all the doors seat tightly in the frames already and didn't need special treatment, but all the other vulnerable edges and corners got their metal "gasketing" and steel-wool fillers.
 

Mouse gap closed With the door closed I could check alignment and coverage.  This shows how the door is designed to sit out from the frame.  My vertical-edge mouse-block would simply wrap around the spacer blocks and come up against the frame outside of them, so I didn't have to mess with the door seating plane at all.  The double-door at the other end was a little more interesting but easy enough to get tightened up too. 

With the doors now carrying sharp points and edges of the mesh, people would have to be a little careful around it but having it on the doors seemed way better than trying to line the shed opening itself.  The door at least gets out of the way of moving items in and out and is thus less likely to let the mesh get banged up or bent wrong.


Caulked stud-bay bottoms I found a caulk gun and a tube of Dynaflex 230 in the tool shed, same favored stuff as liberally used in my house retrofit, and went around to caulk along the bottom corners of all the stud bays.  The inner sheathing looks like some kind of cardboard, i.e. not really structural, and appeared to already be curling a bit here and there which might open up more holes around the sill.  So it seemed prudent to seal all that up too.

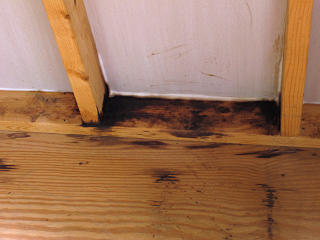
This particular bay was right behind a major nest the mice had constructed into the under-works of one of our refrigerators, and was totally disgusting.  The moist soup of mouse turds and pee had clearly soaked quite a way into the framing, and after extensive cleanup would hopefully all dry out before any real rot set in.


  I also found that the corner blocks of the siding form little inch-square vertical channels that run all the way up to the soffits, at least one of which had evidence on the pier-block underneath it of being a mouse highway, so all of those got stuffed with steel wool top and bottom as well.  Close re-examination didn't find any other substantial gaps in the structure or its fittings.  The gable vents already seemed screened well enough as they came, and the soffit vent screening along the both eaves was visibly tight. 

So I wanted to think that solid mouse-proofing was actually accomplished here.  After we loaded our gear back into storage, about eight big glue-traps got strategically placed around the doors, our stuff, and even the soffit spaces where they'd evidently been playing.  But it felt like these had been *very* enterprising super-mice, and would simply escalate by using a hole saw or high explosives to come straight up through the floor next time.  Short of replacing the whole shed with a bank-vault-grade bunker, I wasn't sure what else we could do.  The next year would tell how well we did.


_H*   150907