|
My car's metal door key had been getting a little stiff and hard to work, and
sometimes took quite a bit of wiggling back and forth especially in cold
weather before it would turn at all. Since I often use the mechanical key
to lock the car when it's powered up, to run short errands and the like
without going through the whole warmup routine again, I depend on the lock
functioning smoothly.
It was pretty clear just from the feel of it that the lock was fairly gunked up inside and needed cleaning, and I was procrastinating on what I thought would be an extensive disassembly of the inside door panels to get to it. Then I dipped into the service manual under "Front door: Overhaul" ... |
|
|
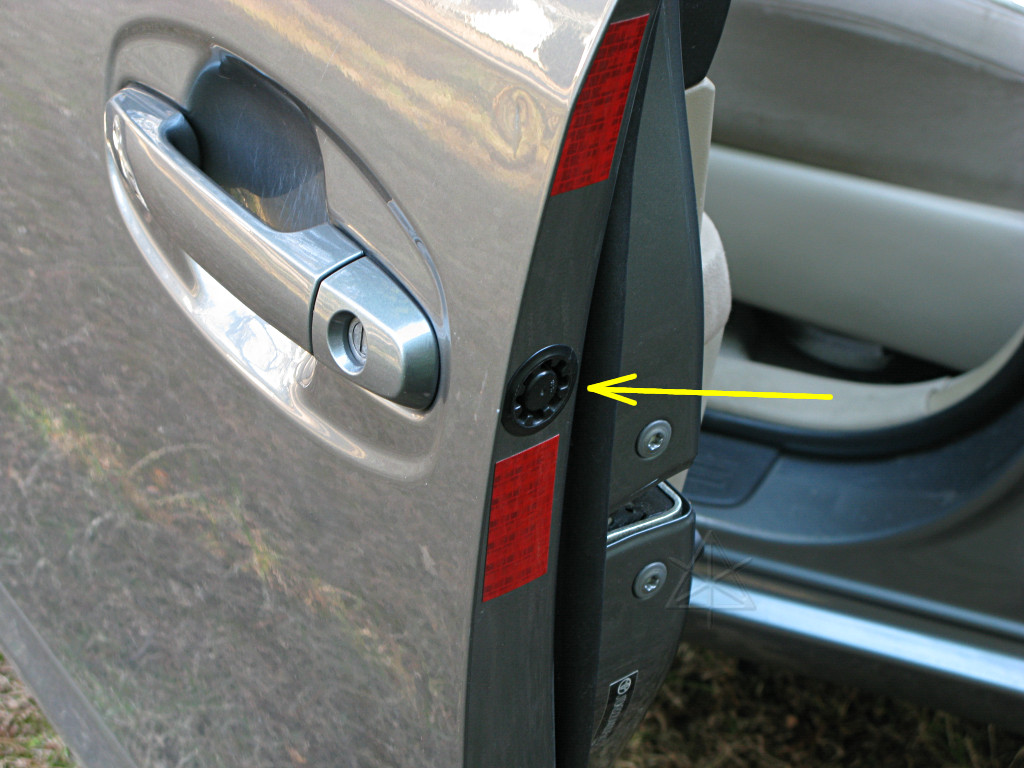
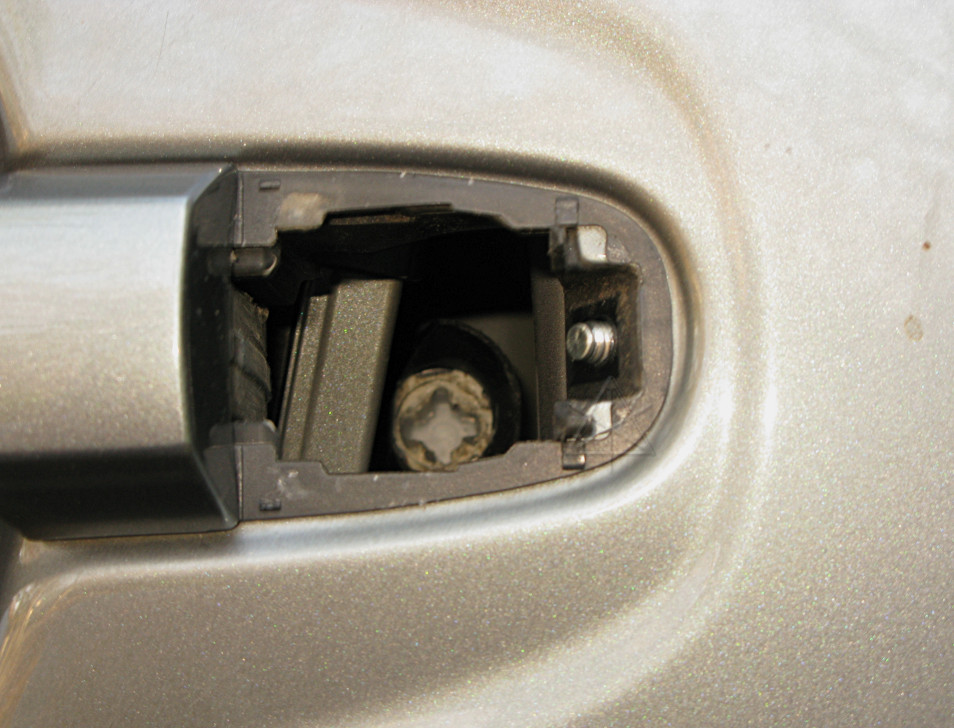
It turns out that Toyota thought about making lock service much easier, and no extensive door disassembly is needed. Note the juxtaposition of the keyhole and the indicated plastic hole plug, which is quite easy to pry out. |
|
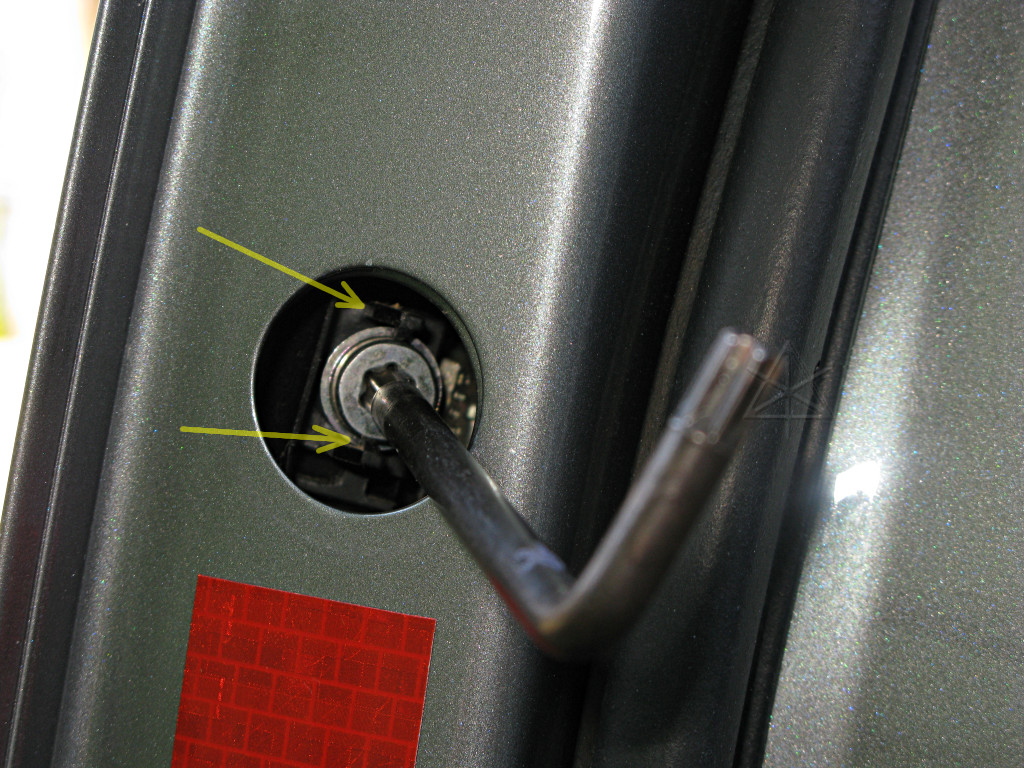
Under the plug is a T-30 torx bolt, which when loosened releases the whole lock cylinder from the door. The bolt goes through a plastic fitting that even has two little retention ears to prevent the bolt from falling down inside the door, which otherwise *would* then require disassembly to recover. With this arrangement the bolt and washer simply remain captive right here. |
|
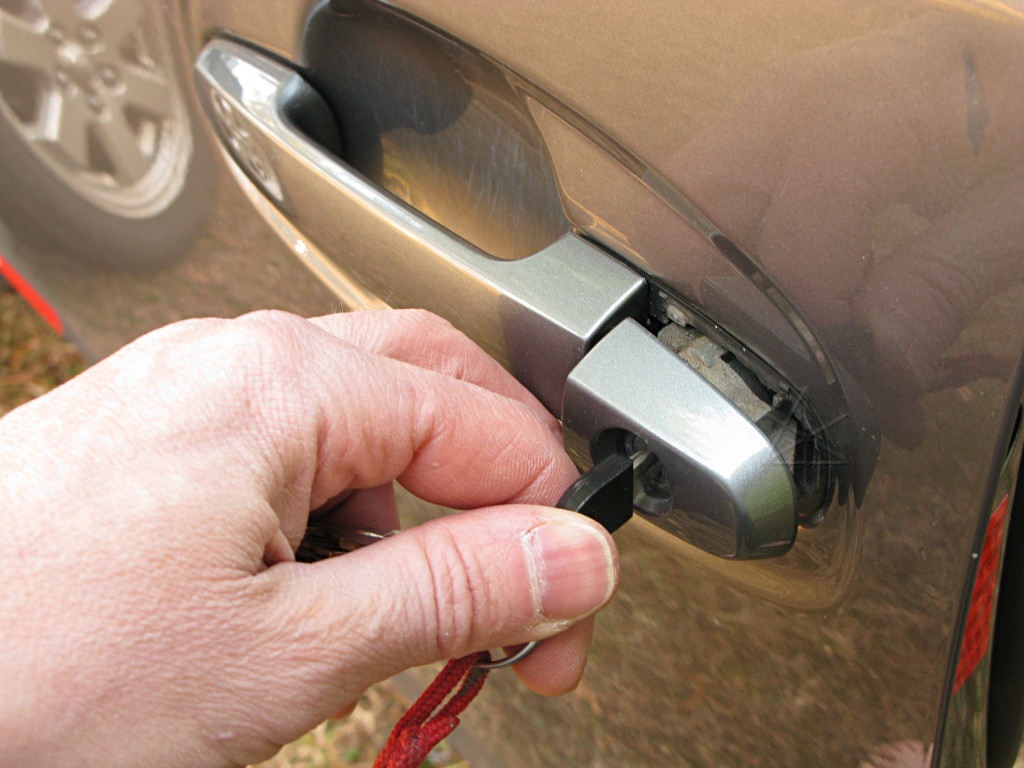
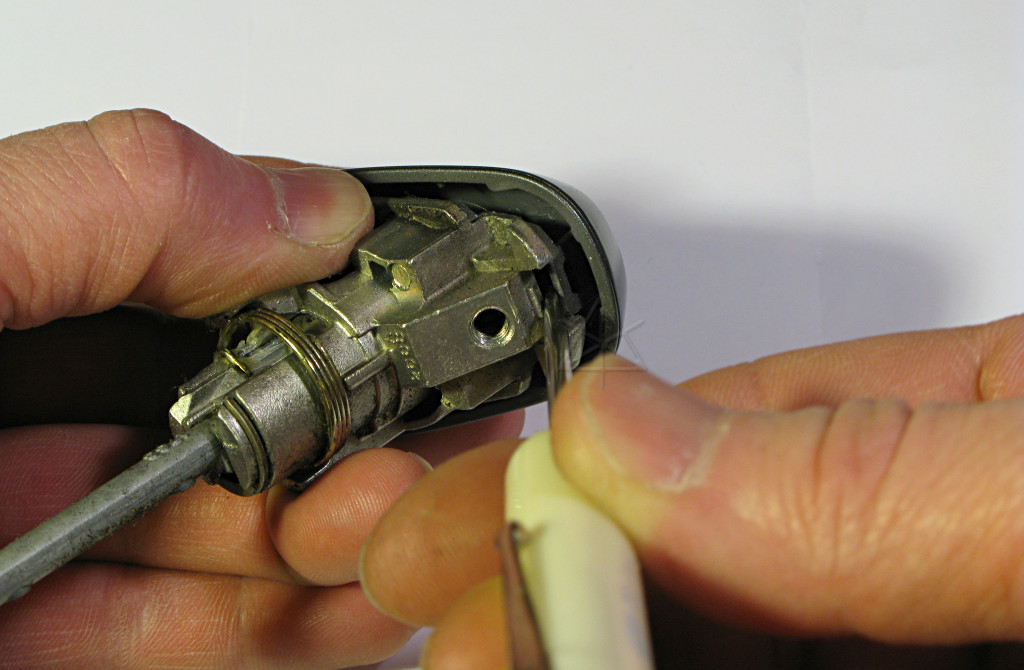
It's easiest to use the key as a handle to crack the cylinder assembly loose from the gasket. Turning the key slightly captures it and allows pulling outward. |
|
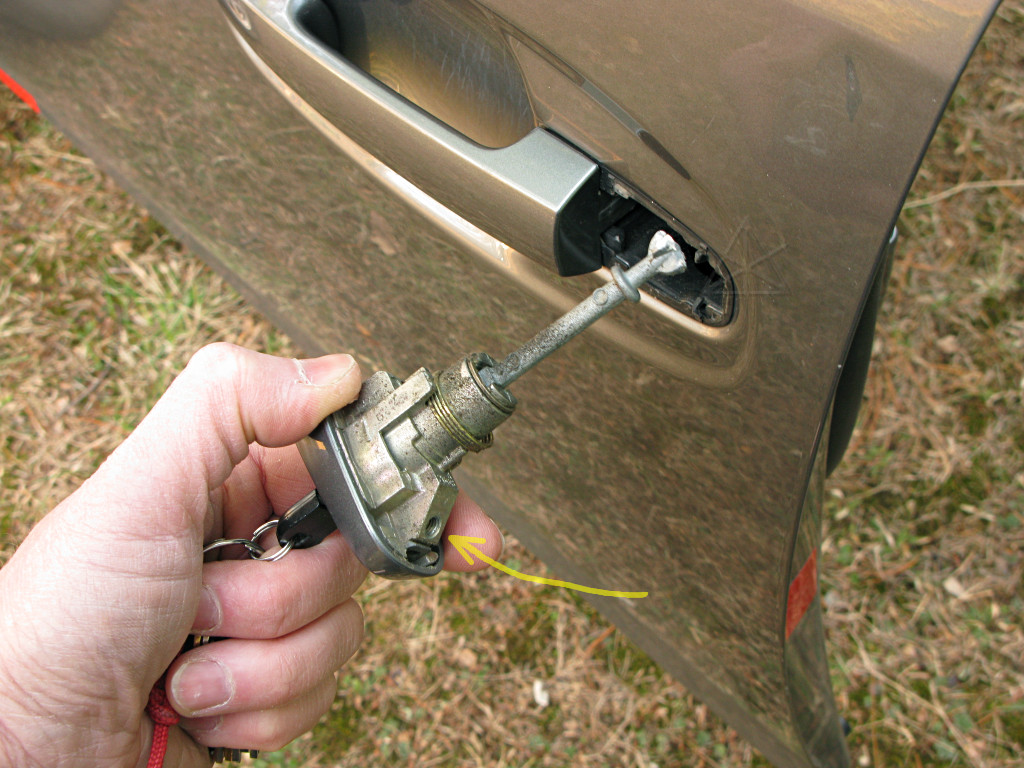
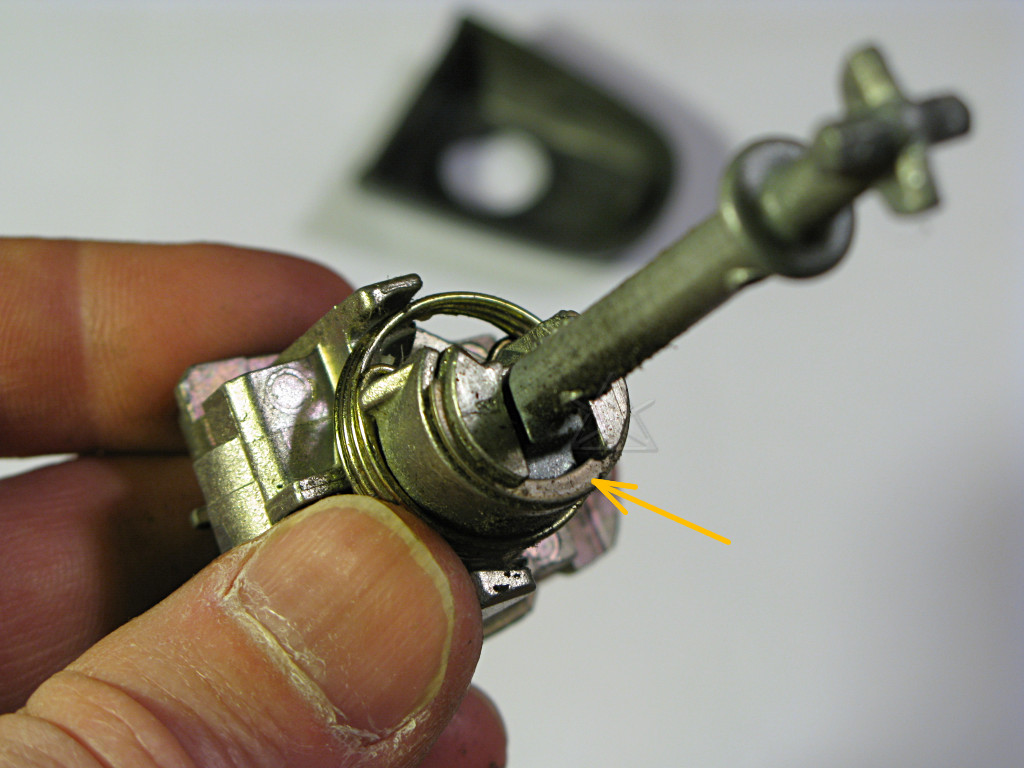
Out it comes. The indicated hole is where the torx bolt goes diagonally into the cylinder body to retain it. |

|
The underside of the cylinder has an open hole under the tumblers, presumably so that water and crud can fall out rather than getting trapped in an enclosed space. Note the big yellow wad of grease under the return spring -- this stuff is *everywhere* all through the cylinder, including around the disk tumblers. This is what's been preventing the tumblers from settling to the right position when a key is inserted -- and we can even see one of them a little misaligned right here with the key in. |
|
Here's what's left behind in the door: the plus-shaped fitting that the
cylinder tailpiece fits into, the retention bolt, and a piece of the window
bracket.
If the key is used as a puller, it is advisable to return the key to the neutral upright position before really removing the cylinder, so that the lock and switch assembly behind the "plus" doesn't stay turned toward one of the lock or unlock positions. The return spring is on the cylinder, not inside the door. |
|
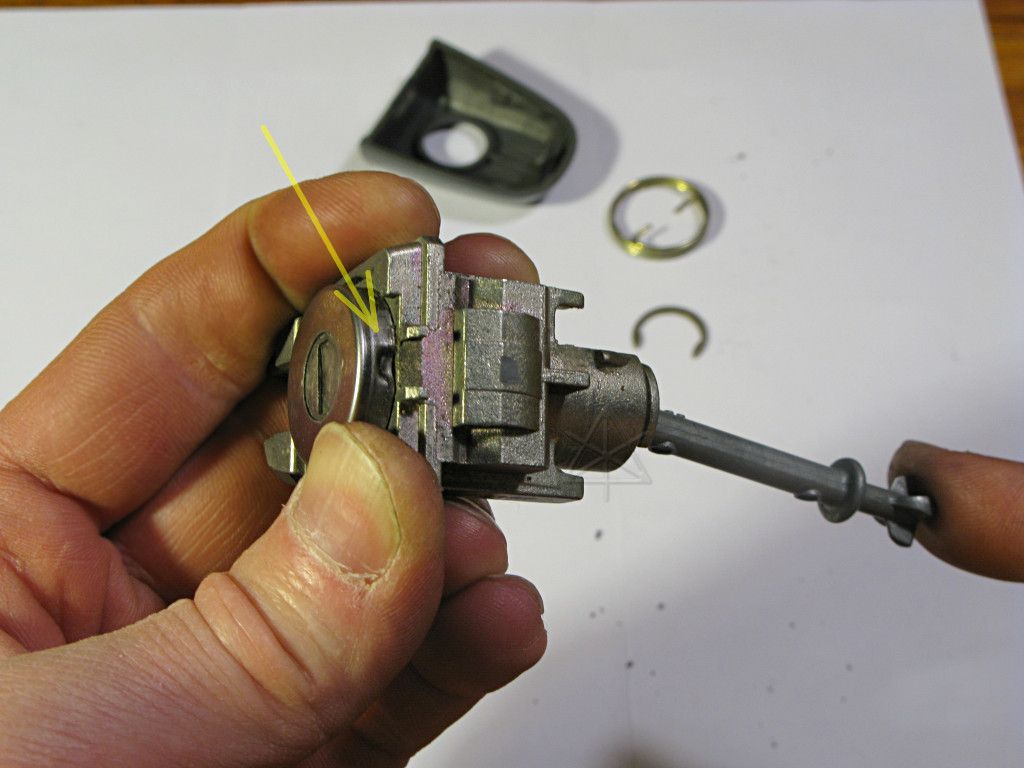
The outer plastic cover pops off easily once the smaller claw is released. |
|
The cylinder plug is retained at the back by this C-clip. The return spring is also relatively easy to remove. |
|
Here we see two things:
|
|
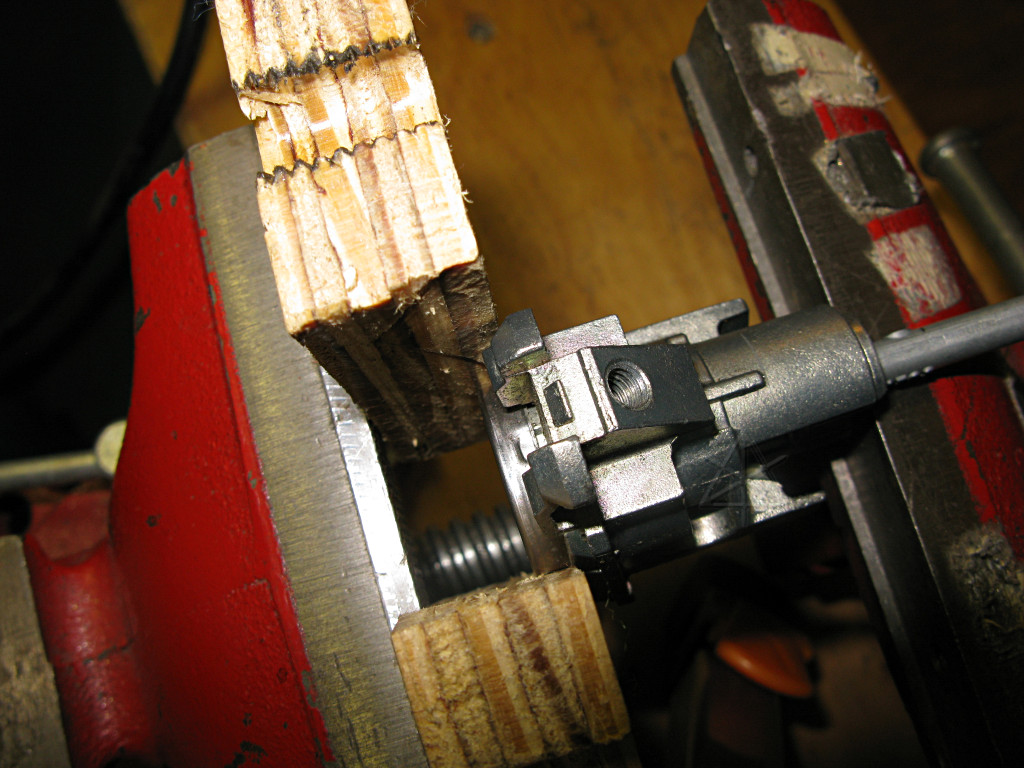
However, we've got a convenient and nicely aligned flat plunger to press
against it from underneath, in the form of the plug itself. The assembly gets
clamped into a vise, with two bits of wood bracketing around the faceplate
leaving it free to move, and the other jaw exerting pressure on the back of
the plug.
With a fairly gentle squeeze, the faceplate is already starting to move off. |
|
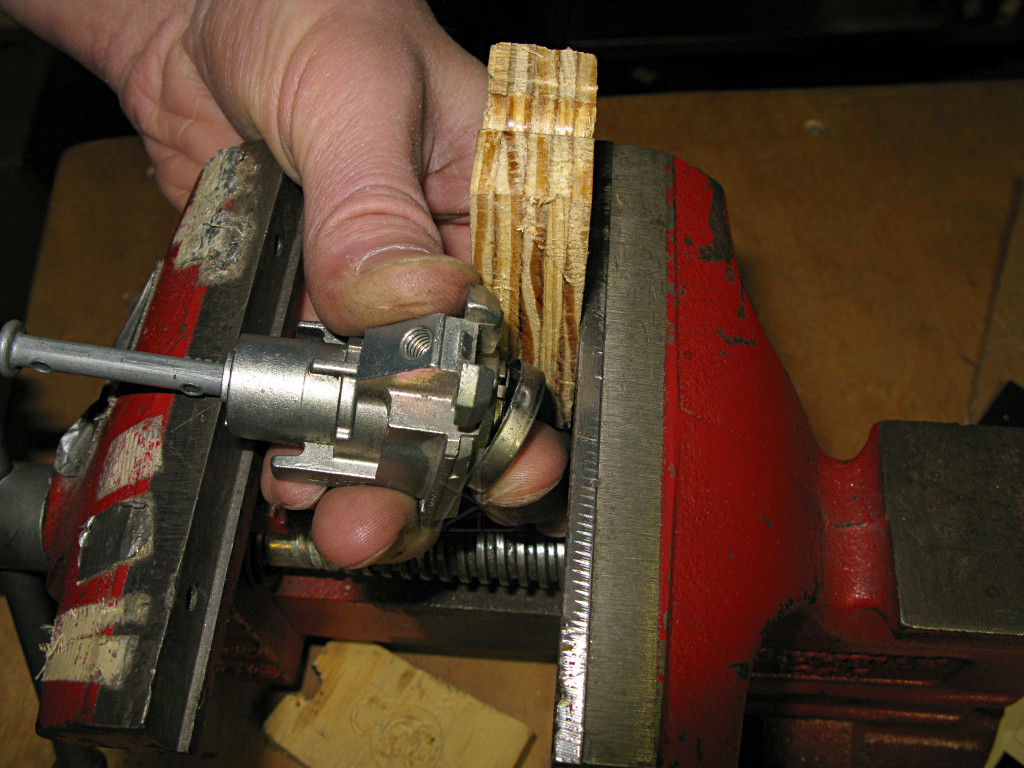
Pop! Off it comes, without damage. The metal is fairly springy, and for the most part retains its shape. If it needs a little fiddling to hold better once reinstalled, it'll be easy enough to just tap the dimples back in. |
|
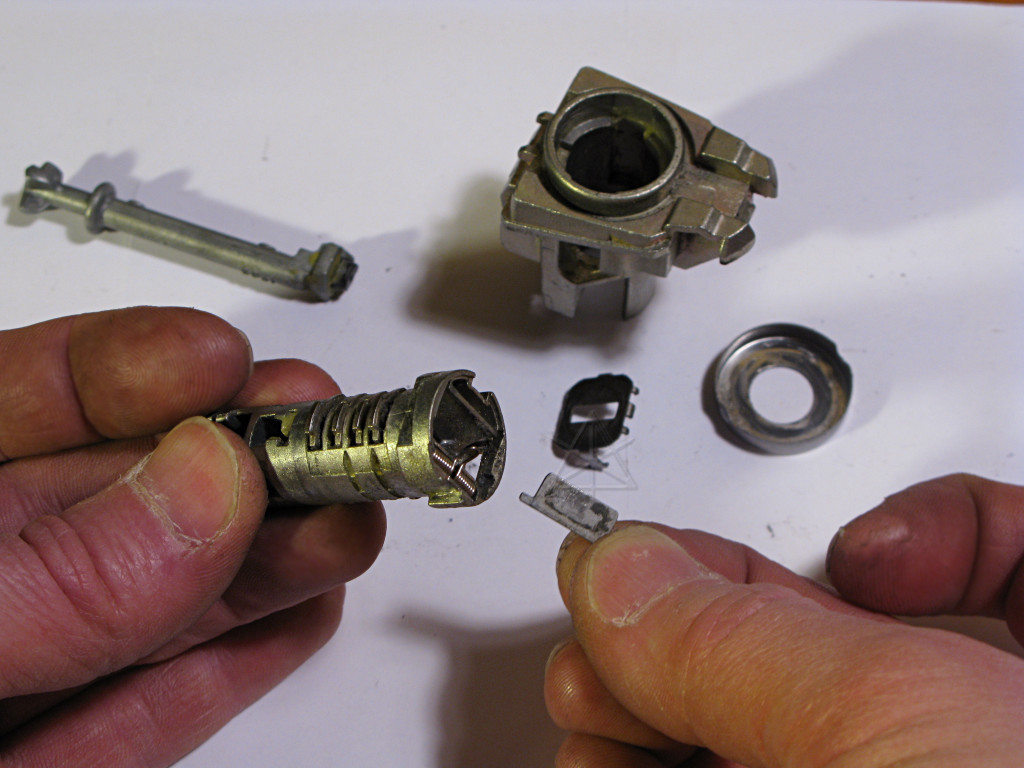
With the faceplate off we can also remove the keyhole plate and its little spring cover. This keeps crud and water out of the lock, but not if the crud was already put inside at the factory! With the plug held up like this, the lower tumblers should be *raining* out of it, but they're all stuck in with stiff grease. |
|
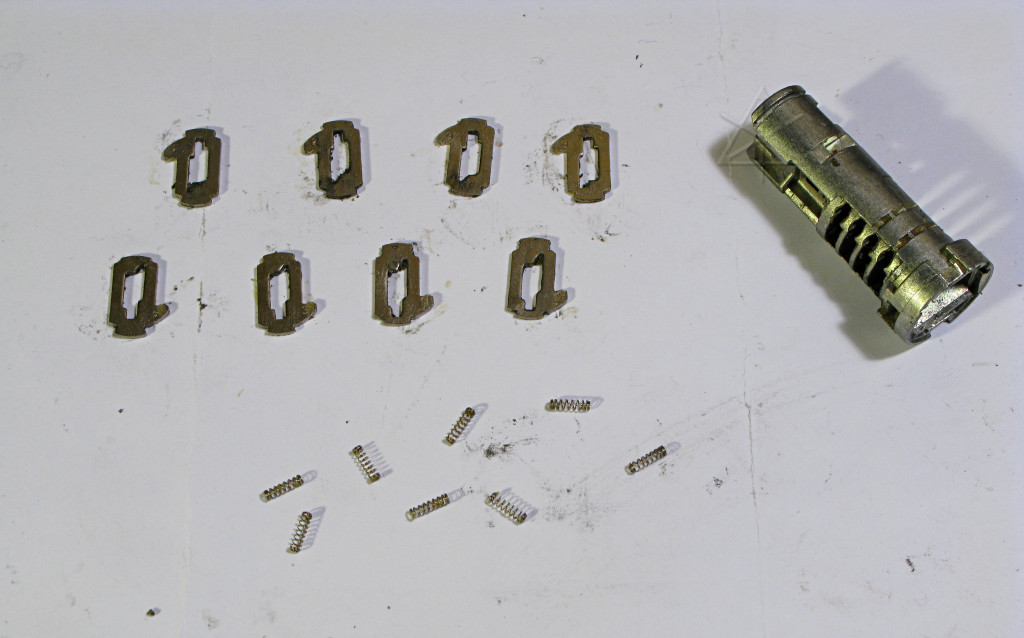
This is why you don't lubricate a lock with grease or even normal oil. These
things are a mess, and had to pretty much be manually dug out of the plug
one by one [especially the springs]. At this point I gave up on meticulous
hand-cleaning and dumped the whole collection and the plug into some paint
thinner. Ooh, shiny.
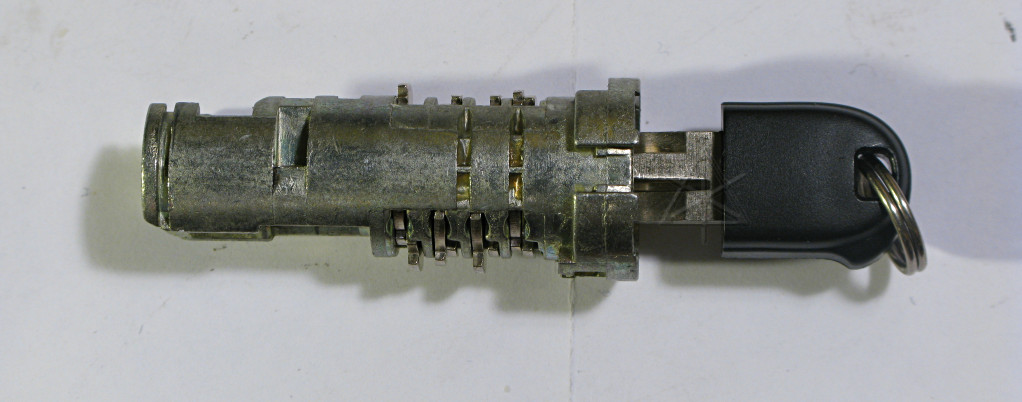
There are eight tumblers, in pairs, with each pair having an "up" member and a "down" member as far as which way they're sprung. The key has eight identical cuts on both sides. This is how the "insert either way" feature works -- alternate-side key cuts simply hit whatever tumbler is on the up or down side at a given position. There's a thin spacer between each pair, so the cut spacing along the key isn't strictly even. From what I can tell, there are four possible cut heights, with numbers stamped on the spring tabs. No, you can't make a key to my car from this -- they were permuted before the picture was shot. Nice try. |
|
Wrong key. Much easier to play with now that everything's cleaned up. While technically the right lubricant is graphite, that wasn't ready at hand and a thin film of very light oil was simply rubbed over the tumblers before insertion just to help ward off corrosion. They'd work fine dry, too, but most locks aren't left out in the weather like this. |
|
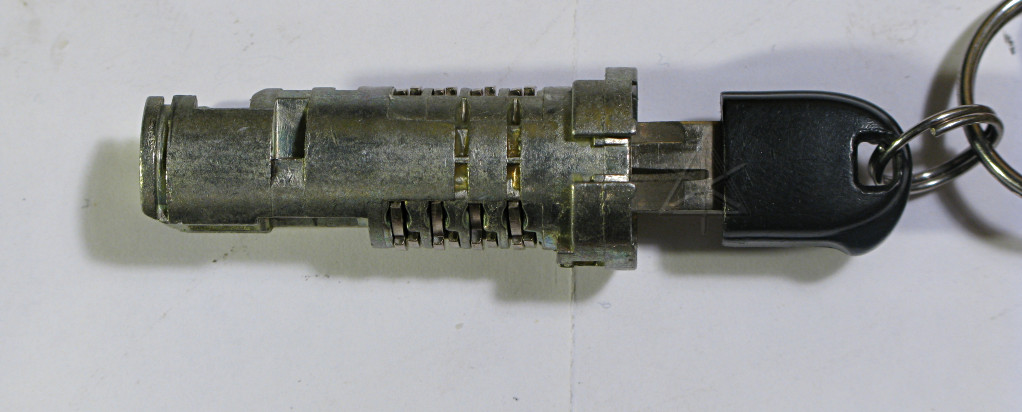
Corrrect key. Well, almost. See how a couple of disks are still sticking out just a wee bit? This was because the tip of the key, which is the insertion stop, was just a little too long and some of the cuts were only just barely getting under their tumblers. Filing about ten thousandths off the end fixed that, and it's all much happier now. |
|
At this point, all that's left is a no-brainer reversal of the above to
reassemble the cylinder and put it back in the car. The faceplate is a
tiny bit looser than it was before removal, even with the dimples re-peened
a little, but it's not about to pop off especially with the plastic cover
reinstalled over it. The faceplate actually rubs against said cover, so
that helps keep everything together.
My key now works better than it EVER has since I've owned the car. |