As we head into winter, mileage plummets for a number of reasons.  Winter
gas formula has less energy per gallon.  The engine has to run more to
provide cabin heat in addition to motive power.  And the ambient air is
denser, which is not only harder to push aside on the highway but also
mucks noticeably with the running air/fuel ratio.

The idea here is to avoid drawing in cold air from the stock intake behind
the headlight.  It is true that cold, denser air gives more *power*, because
more fuel must be injected to compensate and maintain stoichiometric burn.
That's why intake plumbing in most modern cars begins in front of or on
top of the radiator.  But if it's economy we're after in cold weather, we
need to bring our intake air temperature back up toward that of those halcyon
high-mileage summer days.  One way to do this is to try and recycle the
BTUs we've already created, and pull air from near the hottest part of the
engine.  There is prior art on this in the Honda Insight community, which
has already done a lot of groundwork that Prius owners can benefit from too.

Carbureted engines used to do this automatically -- they had a hot-air
"stove" wrapped around the exhaust manifold and this very same sort of
flex pipe bringing hot air up into the air-cleaner throat -- but after
warmup, it was switched back to cold air!  Why?  Because it's all about
having more *POWER* on tap than the other guy, right?  To pass anything
except a gas station, and all that?
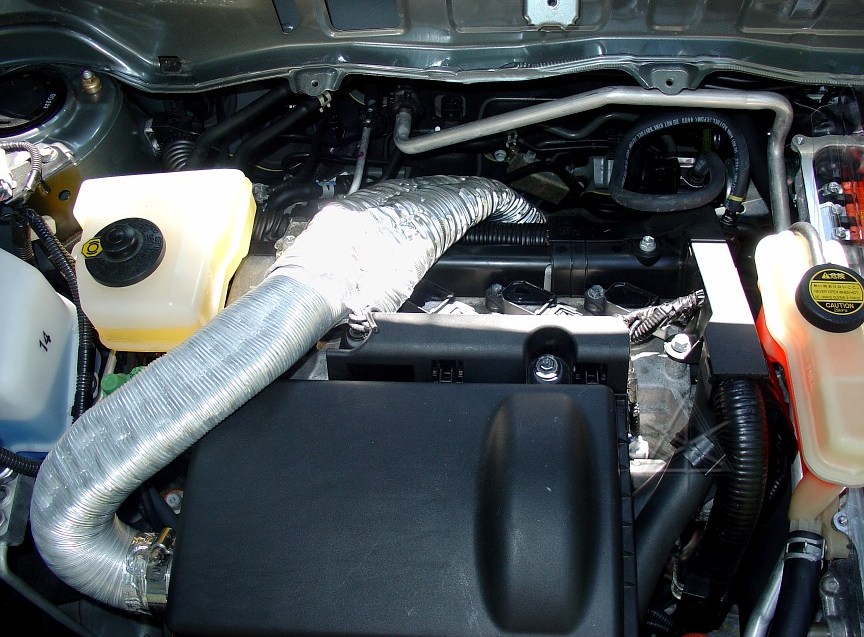
The first part is a NAPA warm-air riser hose -- a cheezy bendable
not-quite-metal piece of 2" flex pipe.  Since the air-box fitting is
really about 2 1/4" OD, the NAPA hose is slit slightly and wrapped in
aluminum tape to expand it but fit fairly tightly.  The hose clamp
holds it all on.  And it's flexible enough to make the tight turn and
head back over the valve cover.  The second part is the real kludge -- a
piece of 3" dryer exhaust hose, flattened somewhat to fit under the
cowling and down behind the engine.

Note that the top cowling that holds the wiper assembly and the relay box
aren't installed here, giving a much better view of everything behind.
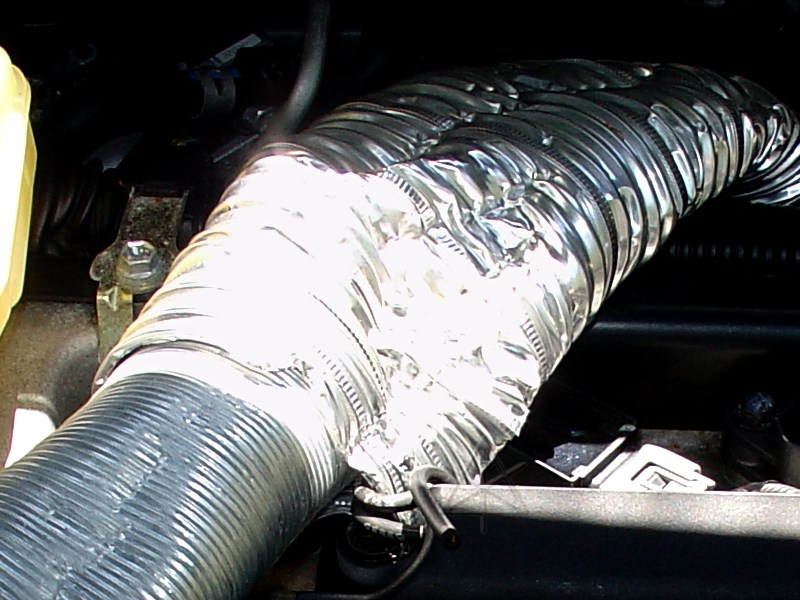
The top end of the big hose is crimped down to fit around the NAPA hose,
and retained by a wire twisted through a small hole drilled in the plastic
air-box bracket.  It's not a perfect seal, but it's good enough.  The whole
thing is in these two separate parts because the project evolved in two
halves -- I didn't realize the really hot part was way down behind the
engine and heat shield until the cowling was out and I could see back
there.  I even found that the heat shield itself is easy to remove through
here, via 4 bolts -- something to consider in a future rework.
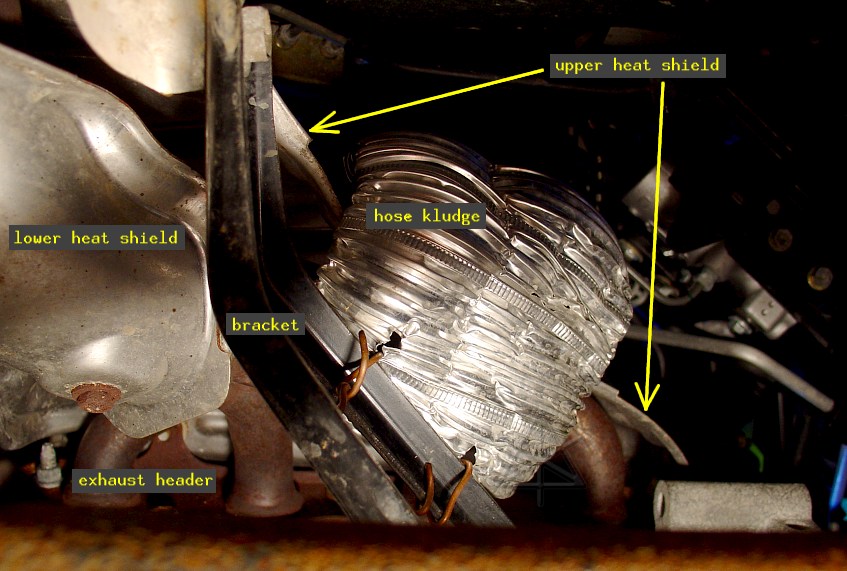
The bottom end of the hose curls up under the edge of the upper heat
shield, and is retained by more wire twisties stuck through it and wrapped
around a very convenient bracket attached to the engine.  This way, the
hose and bracket and heat-shield and engine all vibrate together, prolonging
the time until inevitable failure from abrasion.  If the hose was mounted to
something stationary, failure would occur much sooner.  It, like the exhaust
pipes and air-box and everything else in the path, should ideally move with
the engine, relative to the rest of the car.  In fact, the hose is already
showing a few holes because it was simply dangling back here for a few weeks
before being wired down.  I could hear it rattling, which was one reason
for diving under here and doing something about it.

The hose is aluminum.  The bracket is steel.  The wire is copper.  All of
this will spend most of the winter covered in salt solution -- a perfect
recipe for a corrosive, electrolytic nightmare!  This may not survive the
season, but at least it's proof of concept.  I might figure out a more
robust way to rebuild it next summer.
_H* 051110
[And some test results are detailed here.]