House energy retrofit project 10a

    Day 3,   part 1

With the exterior mostly stripped, it was time to start some actual construction. We had a big stack of materials, a ton of tools and talent on hand, and the guys had a fairly clear template in mind as to how to do the retrofit, but it felt like there was still input they they'd need from me that I hadn't had a chance to provide yet. I figured that time would come.


[Click any image for a larger version.]
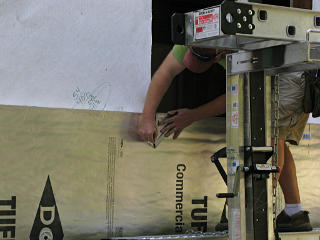
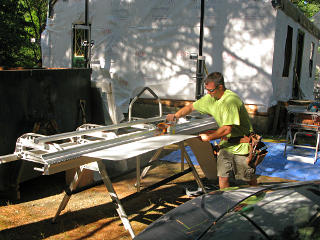
Bending brake with roller shear Today they brought in their pride-n-joy bending brake, to form up a whole lot of trim metal out of coil stock. This has become pretty standard equipment on a lot of jobsites, because it's relatively easy to custom-bend a bunch of metal parts on site for whatever's needed. This one, besides having a generous throat capacity to handle larger pieces, came with a roller shear attachment. Now *there's* a sexy tool: you just position it at one edge of a clamped piece of metal and run it along the rail, and it slices a perfect edge. The only caveat is that it doesn't cut right at the bending area, so various measurement adjustments need to be made between cutting and forming.

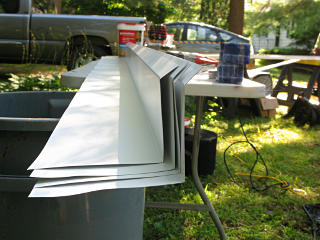
Pre-bent sill flashing pieces Fairly soon, the guy working the brake had cranked out a bunch of metal flashing pieces that would skirt the bottom of the sheathing.

Flashing layer at roof-to-wall The main project for today was the front wall. The many details of this would also apply to everywhere else, so this sort of shows the template for how these builders approach retrofits for this type of house.

The first step was to complete a first layer of air-seal at the roof-to-wall transition, tying the Tyvek to the roof layer and the Grace that would eventually stick down over the subsequent layers on the wall.


Air seal at transition While the foam would get its own sealing as it got built up, this was a belt-n-suspenders approach to help entomb the old structure inside a fairly continuous air barrier and close off any major gaps along here.

The first window to be replaced had already been pulled out of the rough opening at this point.


Sill caulking Building would proceed from the sill upward, so the first step was to mirror the air-sealing at the top with a run of caulk at the bottom where the metal flashing sits.

This house is a little funny in that it doesn't have a typical band joist at the foundation -- the heavy 4x6 mudsill sits on top of the blocks and the wall studs sit directly on it in a sort of pseudo-balloon-framed setup, so the exterior run of plank is simply the lowest piece of 1-by sheathing which comes down flush to the sill.


Not a continuous bead Caulking went between that lowest wood and the block, and between the wood and the metal flashing to be applied, theoretically completing an exterior sill-area air seal. This looked a little odd but I figured it would all squish into a continuous bead once the metal was nailed on.

Bug screen strip Screen caulked to metal
A run of insect screen was then applied, and its inner edge caulked to complete its seal against the wall.

While bugs won't *eat* polyiso foam they will tunnel through it and basically make a nice insulated playground for themselves and eventually be able to reach vulnerable wood inboard of that, so it's imperative to keep them *out* of the exposed foam edges. The metal was formed much like downward-sloping termite guards, that discourages some insects from crawling up around the edges to head higher up. Doesn't keep all types of bugs from climbing the walls, but evidently termites specifically don't like to expose themselves to that much daylight so it seems to be a good deterrent for them.


Finding original stud lines Transferring stud lines
With the tarpaper off the sheathing, it was easy to see where the original framing studs sit in the walls. As they worked the flashing, they made sure to mark the centers of these locations and transfer them to the outer edge of the metal so that they would still be findable after foam was applied. This is one of a thousand reasons everybody carries a "speed square" in their belts.

Sill area detail Sill detail. The Tyvek got folded back down over the vertical part of the metal later, thus flashing the innermost water barrier toward the exterior.

The lowest sheathing showed evidence of prior water issues and a little carpenter-ant dust, but it wasn't really decayed per se and we were about to bury it under multiple new layers of water control. Not worth trying to replace at this point, especially as the sheathing isn't structural.


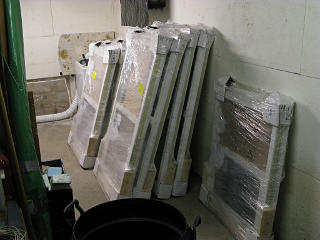
Stack of new windows The new windows had also been delivered that morning, and got temporarily stashed in the basement. They wouldn't remain there long.

Window frames with thermal break While these were still Serious Windows 725 units, they looked a little different from the ones I'd looked at already and the project manager echoed this by saying that every time he ran into Serious products there was always something a little different about them, like the basic design kept changing or something. Similar to the cutaways I'd seen at the local vendor these had a break in the outer edge to reduce thermal bridging, but it was a slightly different configuration.

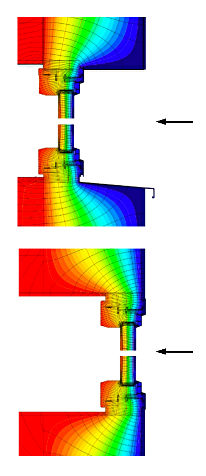
The new units had nailing flanges, which can basically only be installed in an "outie" configuration at the exterior plane of the assembly. In a thicker wall a window has to sit in a recess on one side or the other, and given a choice my initial thinking was that seating the windows at the original framing as "innies" and building exterior water-shedding jamb extension boxes around them would provide better weather-protection and bring them a little closer to the warm side of the thermal gradient. [Mostly-theoretical assembly gradients are shown here; specifics would depend on the surrounding materials.] Some people think a house with windows that are inset from the outside surface looks weird, sort of fortress-like; I thought it might be fine and possibly lend a more "modernized" look to the place as well as maybe reducing potential condensation.

The GC countered that during some of the project preliminaries, suggesting that placing the windows at the same plane as the rainscreen would make the flashing/sealing details far easier to implement -- it's the way the guys do it the vast majority of the time and they're good at it. At the end of the day it's not such a big deal as it's only a 4 inch difference in position and the point is to get a really reliable water and air seal with them, so ultimately we went with outies.

innie vs outie thermal profiles

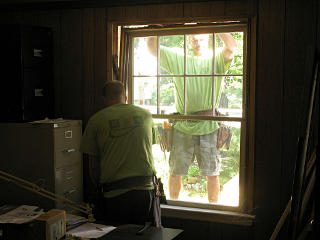
Pulling old windows Meanwhile the other big front window got pulled, so now we had two giant holes in the wall to fill.

Down to rough opening These were new-construction type windows as opposed to "replacement" type, e.g. intended to be installed into the equivalent of a rough opening instead of piggybacking off old frames. The rough framing is obviously the right place to start from when considering an airtight structure, and here we were. The next few pictures document the fundamental window installation process, sort of using these first two as a model, and all the rest were done the same way.

Caulking around window opening Foam would go on around the opening first, and as a first step of air-seal a bead of caulk was run all the way around the rough opening to seal the Tyvek to what would come next.

First piece of foam goes on Here was the first piece of polyiso foam to go onto the house. [The rain hat from the other day didn't count.] I jokingly called out "hey, it feels warmer already!"

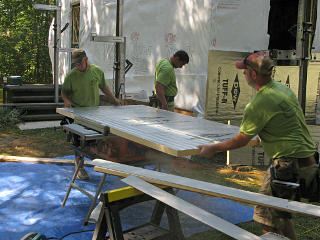
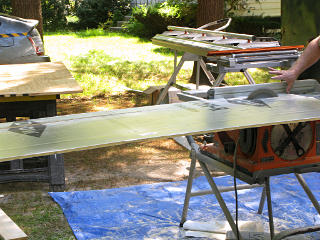
Ripping foam on table saw When foam panels needed to be pre-cut, one of several ways was to simply rip them on the table saw.

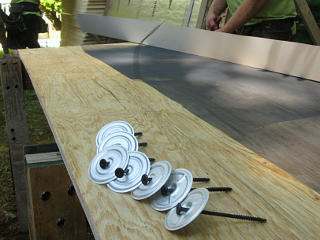
Insulation washers, aka buttons Here's how foam gets initially attached to the house: HeadLok screws through large flat "insulation washers" which the guys universally called "buttons". These would bring the foam reasonably tight to the surface underneath without unduly crushing it. The screw lengths were always chosen to just match the thickness of layers they were holding -- at the first course of foam, through from its surface to just into the sheathing.

FastenMaster provides these screws in a large selection of lengths, allowing appropriate match for just about any point in a structure.


Foaming the outside corner With the foam near the window also near the corner of the house, they started to construct the turn around the corner as well. All these joints would need to be air-sealed too.

Button placement was never particularly precise, as they were just an initial hold-down and subsequent layers and strapping would be the real structural elements installed later into the main house framing.


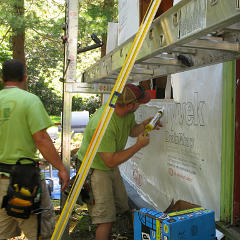
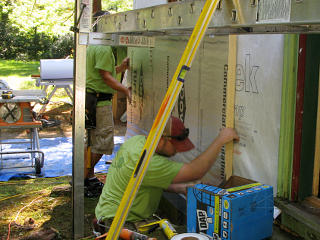
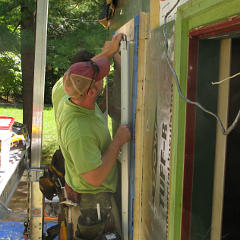
Marking window opening Next was to mark the window opening, and cut the foam around it with a long-blade utility knife. Everyone carried one of those as there would be plenty of foam-slicing to do.

Rough opening from inside Before the foam had gone up, extra wood had been added at the bottom of the rough opening. This was to not only shrink it vertically a little, but to also give a larger area of "meat" to fasten into.

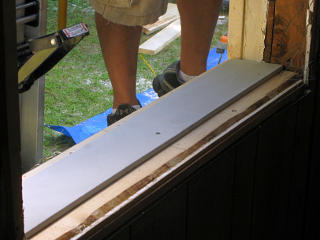
The leaning piece of tapered clapboard was already cut to fit, and would become a slanted back-dam under the window.


Taped foam seams First layer opening
All the foam seams were taped, even on the first layer. There's a little debate going on in the building-science community as to whether it's worth taping anything but the outermost layer, as the "purist" theory is that the air [and to some extent water] control layer is at the outer face, but since in real life tape doesn't always stay sealed down as it should it couldn't hurt to have more sealing farther in.

The tape is Dow Weathermate, designed specifically to stick to the foam foil-face and remain chemically neutral in contact with it and other Dow products. It's basically like clear plastic shipping tape on steroids, with really aggressive adhesive. Unlike gaff tape it can't be hand-torn, as the plastic substrate just stretches and wrinkles up; it has to be cut to get a clean end. With due care in application, particularly along the upper edge on horizontal runs, it makes a waterproof/water-shedding seal.


Sizing half-inch foam The next layer would add wood to the exterior, but in a way that prevented a thermal bridge from inside. For this, a bunch of half-inch foam needed to be cut down to match 2 x 6 lumber.

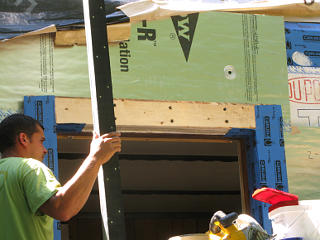
Buck construction Around any windows or doors, these bucks were constructed to match the 2 inch outer foam layer -- 1-1/2" from the wood plus the half-inch of foam. The buck in turn was lag-screwed all the way in to the original framing studs, structurally connecting it to the house. This gave a very slight compromise on insulation thickness right around an opening but a solid outer "nailer" surface to attach things to.

This is *not* the type of "buck" more commonly seen in the literature, which is basically a 4-sided wood box built into the original rough opening and hanging out of the wall 4-1/2 inches to hold the window. The method used here provides a more generous area of nailing surface, is structurally plenty strong, and most importantly doesn't create a wooden thermal bridge back in to the original framing. So the typical "plywood box" approach for outie windows actually has quite a few disadvantages.


Screwhead countersinking Screw pits on the fly
Screw heads were all countersunk to be flush with whatever surfaces they were holding. A quick kiss with a spade bit is all it took -- either in advance while parts were being constructed, or on the fly as things went up to make sure the screw placement matched the framing underneath.

Trimming buck end If bucks weren't pre-cut precisely to match the opening, they could be trimmed on the fly.

At this point the front of the house was becoming a big advertisement for a whole assortment of building product manufacturers: DuPont, Dow, Grace, and Carlisle.


Excess caulk As the bucks were tightened down the foam layers squished out some of the plentiful caulk that had gone around the opening, so some of the excess needed to be scraped off. The PM was saying "get a picture of *this*!" as it demonstrated generous application of sealants.

Sloped backdam on sill The clapboard backdam was tacked down, not at the inner surface but farther out toward where it would be under the seating plane of the window.

Sill pan goes in Then the clapboard and buck assembly was pan-flashed, to send any water that, however unlikely anyone thought it could be, got past the window toward the framing. With this in place it would roll back toward the exterior without soaking into any wood underneath.

The guy on the left is addressing a critical detail here, where the membrane has to be pushed fully into the corner to avoid leaving a small channel where air could sneak underneath along the framing to the inside. While skipped here, a preceding bead of caulk along that junction can help seal things.


Flashing down the bucks The side bucks were then flashed in, down over the ends of the pan. This was only a first layer, though.

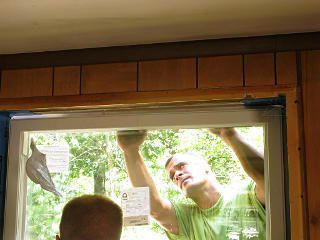
Installing the window Finally, the window unit could be installed. With the large size this was a little fiddly and having several hands on it helped.

Clapboard shims They tried to shim it up with some pieces of the clapboard, hoping that would center it vertically in the opening.

Top gap is too big But it was sitting way too low, leaving too large a gap at the top to safely nail it in.

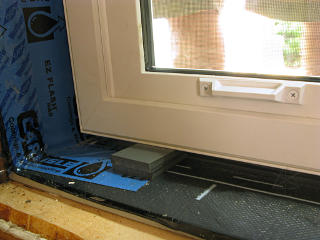
Cutting PVC shims I had an inspiration at this point, realizing I had a stock of something a little thicker and stronger than their clapboard. There was still quite a bit of the grey sheet PVC on hand that I'd used on the basement-window blockoffs since the company I got it from would only sell me the entire sheet, so I offered some of that up as shim material. They thought it might do nicely, although found it fairly hard to cut -- gave their skilsaw a real run for the money.

PVC shims raise window higher A couple of these stacked up placed the window perfectly for fastening and didn't squish under the load of these fairly heavy large ones.

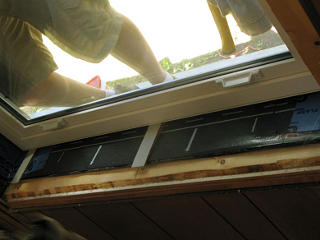
Next flashing layer With the window nailed into place, the next flashing layers could go on. This layer covered the whole nailing flange and integrated the surface at the foam face to the window. This is why they like outies -- the water management details right here are much simpler to construct.

Flashing the window head The head flashing then went over all that and was tied back to the *first* layer of foam and taped with more Dow, so that any water that happened to get between the foam layers would, again, be sent outward. The second layer of foam would integrate with all this as it got built up around the window bucks. But here it's easy to see why foam application and window installation had to be a single procedure here, as all these layers and flashings work together as a unit.

Windows deployed around house New window in my bedroom
Other guys on the crew had sorted out window sizes and were deploying them around the house where they'd need to go, and I wandered back into my bedroom to find a couple of units sitting there.

Window installation proceeded this same way over the whole course of the project, including using my PVC for the majority of the shims. It pleased me to be able to contribute to workflow in some small way, as the guys for the most part didn't seem to want homeowner help on anything. I certainly didn't push that point, as they were being paid to be there and do the work, but it was sometimes a little odd to be standing right next to something they needed and they'd send another one of their guys over to fetch it instead of just calling to me. They understandably didn't want to get into any potential liability concerns. About the most "work" I put in on the main project, other than detailed photojournalism and pulling some of the interior trim in advance of where they were, was handing up an occasional dropped tool or bit of material if nobody else was nearby.


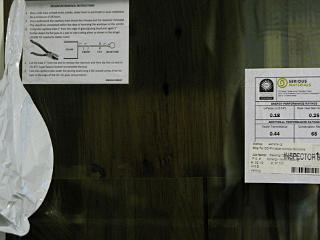
Interesting window labels The various labeling on the windows was interesting, especially the instructions for sealing off the pressure equalization bag. With an inert-gas fill permanently between the panes, bringing the windows to a different altitude from where they were made would probably cause a 100% sealed unit to explode from the pressure difference. They account for that by connecting the glass unit to the ambient pressure with a tiny tube and a flexible bag, to let the pressures match but not let regular air into the system. Once stabilized where installed, the tubes can be pinched off and sealed and the bags removed.
I had actually called Serious and asked them about this before, having a sudden physics-geek thought about what might happen to these things when someone installs them in their cozy mountain retreat overlooking Denver. I had some experience with high altitudes and pressures on my '08 road trip where I probably saved my Thermarest from rupturing, and an assembly made of glass probably wouldn't be so forgiving.

But what the heck is "877 Super Spacer Sealant"?? Sounds like something I'd use on my rocketship.


Next section   (10b)
Index

_H*   121128