House energy retrofit project 18

    A brief lull

Whew!! The main construction was finally over, and I could have just a little bit of my life back. The crew hadn't entirely moved out yet; they still had a big stack of scaffolding stuff in the backyard and the brake was still in the basement. They came back a few days later with the trailer to pick that up.

They had really provided an inspiration of sorts, encouraging me to keep going on my own followup side projects and and pay more attention to the quality of work I was doing. What they left me was really well done -- excellent fit and finish over solid assembly, albeit maybe not perfect in every way as all the theory I'd been reading about. As you consider that, remember that I'll be the first to admit that I'm fussy.

Possibly the hardest part for me, besides chasing the guys all over the premises with the camera, had been riding that delicate balance between calling out points I thought were genuinely missing versus being a pain in the ass. I really tried to stay out of the way as much as they wanted, but every so often I'd pop out of the house for more photos and catch a couple of rolled eyeballs and averted glances. Being watched clearly made some of the guys nervous at times, which puzzled me because they should all be really proud of the work they're doing as well as having an appreciative, albeit critical at times, audience. Frankly I think a lot of the shots I grabbed tells a great story about *them* and what they do best even if there were one or two low points along the way. It's apparently impossible to get everything absolutely 100% on these jobs simply due to human factors and a few bits of mis- or non-communication, and I simply have to accept some amount of that. What's important is for everyone involved to learn from those things.

An amusing observation was that it seemed to be the *more* experienced guys who could have done without my hovering around, and the ones lower on the totem pole were more personable, willing to talk and joke about the ongoing work. I would have expected it the other way around, with the long-time crew having greater self-confidence and the new guys being the nervous ones. It was all an interesting dynamic to observe and become a small part of for a while.

Therefore, the obvious Angie's-list question: would I hire them again? Sure, if I needed the same type of work done. [And assuming they'd take someone like me on again as a client.] They're one of the very few crews getting into the energy-retrofit game in the earlier stages with a good understanding of the benefits, and are driving a lot of everyone else's learning process. They taught me a ton of stuff, much of it simply by example. Various ups and downs aside, that is why this writeup is here. Now I know many more of the expectations to have and the right questions to ask.

The high-performance building field and its construction techniques are rapidly evolving, not to mention turning the building code on its ear, and it takes time for everybody to get up to speed on all the subtleties involved. Air and water management has to be one of the foremost big-picture things in mind, and not everyone is necessarily used to all the details yet. Would having real *drawings* to work from on my fairly ordinary house have helped us and smoothed over some of the indecisive points? No idea -- some other jobs come with complete sets of drawings that rarely get looked at. The crew had been trained up on the somewhat unusual techniques where the foaming and "energy stuff" is concerned, and with several go-rounds worth of experience on it by then knew in principle what to do for every retrofit and how to adapt to every building's quirks. But stuff can and does get missed and sometimes it takes the picky and recently building-science-self-educated homeowner to catch some of this too.
The interval of calm was punctuated by the arrival of my replacement camera. I had taken advantage of the fairly good "loyalty discount" pricing that Canon was offering to upgrade from the shorted-out G9 to a newer G12 at a somewhat discounted price, and early playing around with it discovered that the smaller-megapixel sensor is *far* cleaner at higher ISO and would thus have much better low-light performance without the noise. Yay. When I wasn't playing with that I also made some time to research finding a different HVAC tech to come out and give the Daikin the once-over I still wanted done. It's surprising how long it takes to find someone to reply in the positive or even at all, let alone actually schedule a visit. Well, maybe not so surprising from a far more jaded view I have of that particular industry now, but it still sucks for the customer base.
[Click any image for a larger version.]
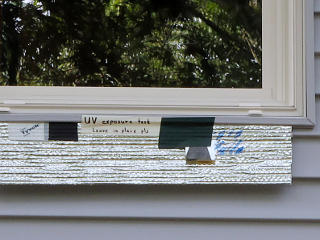
Ultraviolet exposure test Near the end of the construction period I got the silly idea to collect a handful of the materials used on the site and just hang 'em out back where they'd be exposed to the most sunlight for a long-term ultraviolet durability test. The reflectix, some foam, some of their tape, some of my tape ... A lot of materials break down after a long time under unfiltered sunlight and not everything has clearly stated UV resistance figures, so I figured I'd leave this test panel up here for at least a year. I labeled it clearly so the guys who were still on site wouldn't helpfully "clean it up" on me; they were amused.

At some point I wanted to make before-and-after wall section mockups, too.


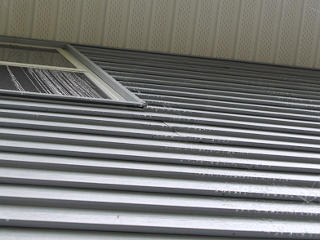
Rain still coming down the wall One problem still persisted: every time it rained, water would dribble down the walls and windows. I had *overhangs* by now FFS, that were supposed to be keeping water away from the house.
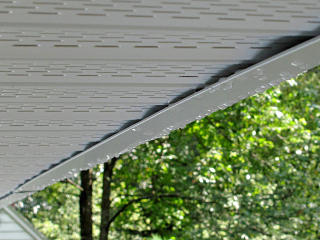
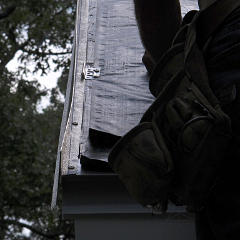
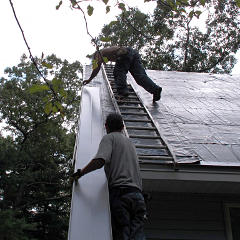
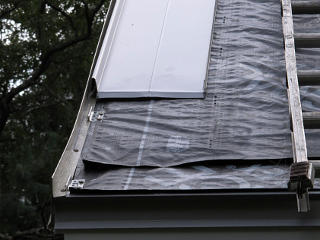
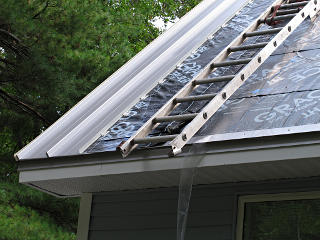
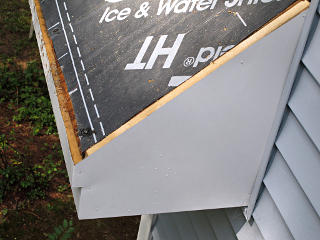
Open roof edge The cause was pretty obvious: a reverse-flash situation at all the roof edges. This was how they intentionally left it, and there must have been something about it that I wasn't understanding. For all the "watertightness" the builders kept espousing, for reasons still unexplained when they did the final edge trimming on the plywood they cut the Grace with it and *then* put the shadow boards on flush with the edge of the ply, so a significant amount of wood and the fascia metal were just hanging out in the weather. At front and back, the full brunt of roof runoff was soaking the whole edge.
Water bridging to soffit Since water could drop down in between the overhang sub-fascia and the metal, it could then travel down and show up *on top* of the L-bend and easily transfer onto the soffit vent plastic. Note that my little water-kicker lip idea wouldn't have helped here either, since the water was already on the wrong side of the metal and in contact with the vent pieces.
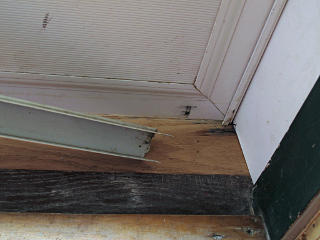
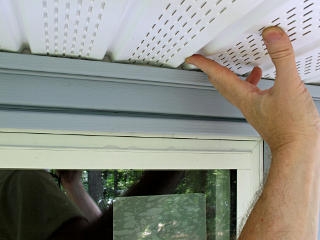
Inner soffit edge It could then easily travel along the soffit, either on top or clinging to the underside, in toward the house and drop off wherever convenient -- on the J-channel or even all the way in at the other metal L-bend behind all this and onto the foam face in the rainscreen.

Rainscreen robustness or no, I was smacking my forehead here.


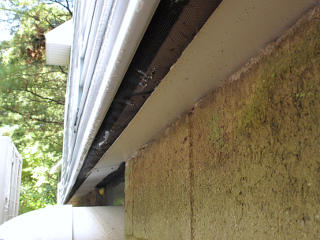
Water on rainscreen channel Basically in a straight-down rain, water should *never* get behind the siding and show up on the bug screen at the bottom of the air gap, but here it was.

Leaving just an inch or two of extra Grace to flop over the open edge, either temporarily with the release paper still on it or even stuck down over the metal, might have mitigated this whole problem. It could even be left on and integrated with the eventual roofing and drip-edge for a really solid water management detail. But the entire perimeter of the roof was left vulnerable to this for as long as it would take for the roof to get on.

What was I missing?? They must have had some reasoning behind this; I couldn't think of why to not maintain good waterproofing all the way to and over the edges. I was really glad they'd used plywood decking, because exposed OSB for that long would have been a freakin' *disaster*.


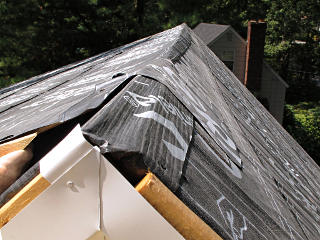
Swayback ridgeline Various open bits could be seen at the peak too but except for the very edges it was all covered and arranged in the proper water-shedding way. The material bulk under the ends of the ridgeline, a little higher than the foam-edge meeting in the middle, left the ridgeline just a little swaybacked despite the fact that the ridge beam is razor-straight.

I looked at all these voids under the new transition assembly and figured that every wasp for miles around would want to come live here.


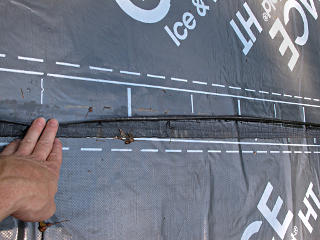
Grace getting ratty This Grace had been up for a couple of weeks by now and was already getting kind of ratty, with the membrane starting to roll back from the bituminous goop underneath. What if it had rolled back far enough to uncover the overlap?

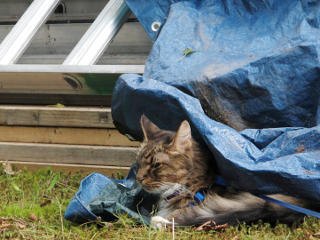
Tarp the kitty During this interval a friend from in town came to visit and get the tour, partially motivated by having her own place bug-bombed that day and she had to vacate her premises for a few hours. She brought her cats along to also get them out of the house and give them a little vacation to suburbia, and we all just hung out in the backyard for a while. The cats made themselves right at home in the pile of construction equipment out back, mostly crawling under scaffolds and tarps to find little hidey-spots to snooze in.

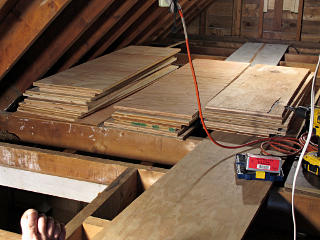
Plywood rips stacked in attic While she was here she helped me move a whole bunch of the plywood cutoffs I'd saved from the dumpster up to the attic. These were mostly from the over-roof work, and most pieces were 4 feet by whatever. I figured I could make something resembling a floor in the attic out of them, leading toward better use of the attic as a real storage area instead of a dusty no-mans-land like before.

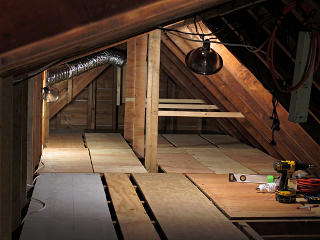
Attic floor and storage crib A bit of time and puzzling later, I had a pretty pleasing result. It's enough of a floor to safely walk on, all screwed down but leaving gaps to see the joist bays underneath, and I added a nice little storage rack for some of the lighter long stuff. It was a little fiddly bridging some of the longer 16-and-something joist spacing near the center of the house, but a couple of blocks here and there helped. The attic was now a fine resting place for remaining construction materials. I re-ran the HRV ducts from the ex-chimney tee all the way out to each end, so that air from the hatch would fully circulate through the whole space before getting collected. Now fully inside the conditioned-space envelope and even properly ventilated, the attic could almost be used as a spare room with a funky ladder up to it.

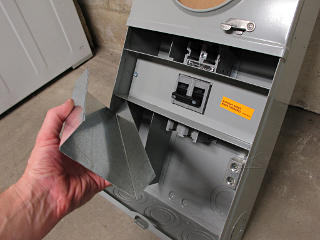
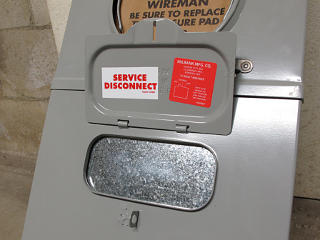
Simple breaker cover The big meter box with the outdoor main breaker was still bugging me a little, but planning ahead produced a quick-n-dirty solution that would eliminate needing an extra padlock. A simple galvanized cover could fit over the entire switch area before the lower lid went on.

Access denied! This is what some mischievous kid looking for the breaker would find. Access DENIED!

For those who would immediately counterargue "but what if there's a fire", in the unlikely event it comes down to that kind of emergency [remember, no more combustion appliances here!] then responders can just do what they usually do
anyway -- break the seal on the upper lid and pull the meter.


    Roofing, day 0

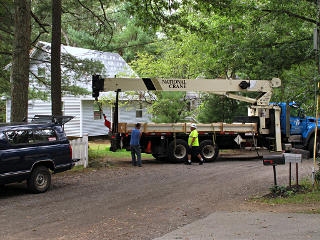
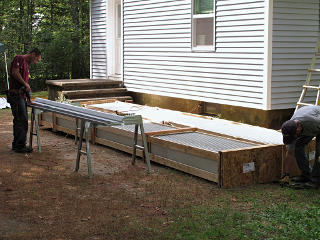
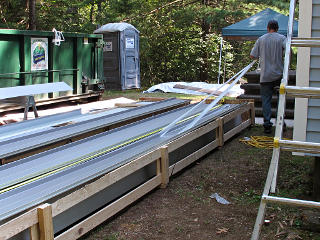
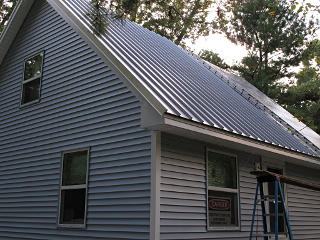
Roofing delivery The roof remained in its water-vulnerable state for another week and a half while we were waiting on the roofing material delivery. Apparently the color I picked is one of their popular ones. A large crane truck finally arrived one day and completely blocked the street for about ten minutes while swinging in two crates of roof panels.


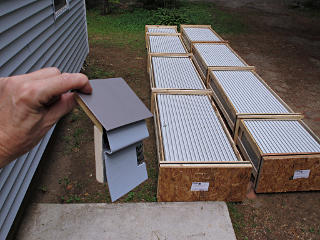
Roof panel crates I'm holding the little sample "house mockup" I threw together one night to entertain some friends at dinner, using some of the siding that had been going on at the time, half-inch foam modeling the way the real layers got Graced and air-sealed, and the swatch of Silversmith roofing I had. The color in the top of the crates is the *underside* of the panels which is why it doesn't match my sample -- we can see a little bit of the real color through the side of the crates, and the big real-life aesthetic matchup between siding and roofing was finally about to happen.

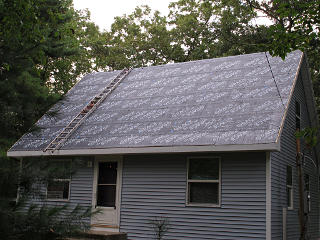
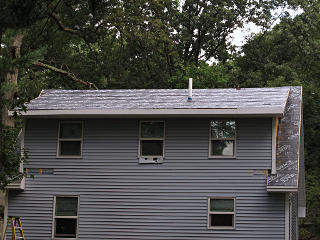
Clean roof deck front Clean roof deck back
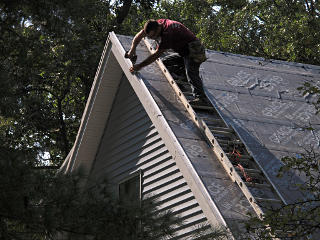
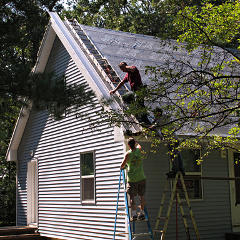
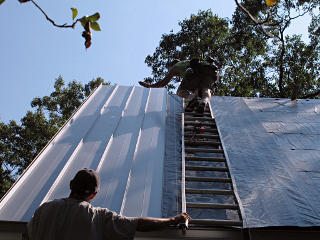
The roofer was there to oversee delivery but wasn't going to start work until the next day. He set up his hook ladder over the ridge just to have it out of the way. The builders had left him a fairly clean slate front and back, albeit a bit dusty here and there. He was another Synergy subcontractor who knew how to work with standing-seam metal, but when had come by to survey things he admitted that it had "been a while" since he'd done metal at all. We also had a discussion about underlayments, or more accurately something to go under the long metal panels that lets them slide a little with thermal expansion. He figured he was going to just plop 'em down right on top of the Grace HT and not worry about it. Well, remember all that sticky stuff in back where the membrane had rolled away? Last thing you want a metal panel grinding over that, slowly sawing its way down through the waterproofing layer.

So I had called ATAS in the interim, and asked them. They were *adamant* that a standing-seam installation needed an extra layer called a slip sheet, either rosin paper or yet another Grace product called Tri-flex, and should *not* go straight onto regular old ice & water shield. Okay, so maybe my roofer was a little out of date on proper materials usage -- I'd give him that, but note that it wasn't him double-checking the manufacturer's recommendation, it was that nitpicky building-scientist-wannabe homeowner again. I had relayed all this through the GC and on delivery day, the roofer assured me he'd bring and use Triflex.

A little math around aluminum's coefficient of thermal expansion shows that over the extremes of temperature a roof is likely to see, a 20-foot panel can shrink or grow up to half an inch. That's quite a lot, and even with less movement over years of cycles it can definitely affect whatever's underneath if it presents excessive friction.

The oddest thing about standing-seam metal is how *uncommon* it was at the time in the residential market around the immediate Boston metro area. Commercial, sure; the typical green mansard-style facades of many gas stations or red on the fast-food chains was almost an institution. It was therefore perplexing that around most of New England, even nearby like NH and VT and even western MA, standing-seam is all over the place -- barns and houses alike, but not right here. I touched on this in the intro, and at this point still didn't have a good explanation after talking to several construction folks. I mean, we get the same kind of weather as they do a little farther north and west, so wouldn't a roof that nicely sheds snow and is durable be desirable? Things were slowly starting to change in this regard as more local roofers seemed to be including some metal offerings in their skillsets, but mostly of the shingle-lookalike type that nails down similarly to shingles anyway. Standing seam was a bit of a different beast but would be the right solution for a roof that would probably outlive me.


    Roofing, day 1

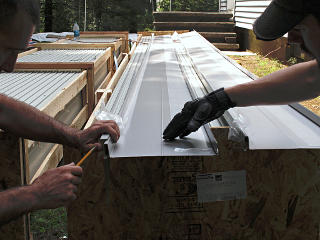
Uncrating roof panels The roofer actually picked a Saturday to start, which was a little unusual but I was fine with. Like the bad stand-up comedian, I'd be around all week. He arrived with a couple of helpers, and they started uncrating panels and pre-drilling some trim pieces.


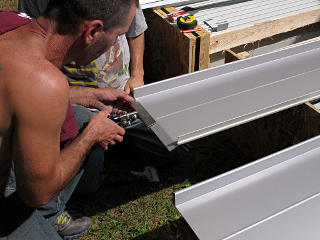
Marking panel ends Bending drip-edge tuck
Each panel would get marked, cut, and bent to form a little fold at the end that would hook over the drip-edge. There was no special machine to do this; it was all field mods to be done by hand as detailed in the product manuals.

First attempt at gable end The roofer applied what he best remembered as the correct gable-end starting piece, a generic Z-bar screwed down along the edge.

Having not really absorbed every attachment detail in the ATAS manuals I'd looked over, I didn't realize that he was starting off completely on the wrong foot here.


First SSM panel goes up Then he tried to attach the first panel, but began to realize that there wasn't any good way to hook it to his gable piece. Strike one.

Oops, forgot something... As he was trying a slightly different approach I looked at the roll of Tri-flex on the ground and realized we'd all completely forgotten about it, so the panel had to come off again to get a strip of that down ahead of the roofing.

Second gable attempt Now he could try a different attachment, but couldn't figure out how to get that correctly anchored down either. Strike two.

The detail sheet for the Tri-flex says it's supposed to install horizontally, but perhaps this was a special application since it was vertical movement we were concerned about. Oddly, the Tri-flex didn't seem all that slippery but at least was tough and likely to withstand many small movements of panels on top.


Assortment of gable cleats He came down and we started picking throgh the extra boxes of stuff, and finally discovered the official "gable end cleats" -- which just get thrown into a kit as random pieces that aren't color-coordinated with the actual roofing, as they are intended to get completely hidden by the end cap. Either way, his erroneous Z-bar was just plain wrong and had to come back off the gable.

At this point I was thinking that it was going to be a very long week. This guy was fishing around trying to figure this out at the expense of yet more screw-holes through my ice & water. At least he was actively engaging me in the process.


Guessing how it goes together I popped inside to check a couple of PDFs from ATAS and try to help figure this out. After finally seeing all the pieces laid out in front of us, we could see how the recommended installation would look something like this with the end cap sheltering the cleat and the end of the first attached panel. The remaining problem was how to clip all that down; the recommendation included pop-rivets through some of the top surfaces placed in a way that could create a water path bypassing the roofing surface.

The whole idea of modern standing-seam is to have *no* exposed fasteners at all, or only where water around them will definitively drain away and not seep into anywhere bad. The roofer and I were in total agreement on that, and were scratching our heads trying to reverse-engineer what ATAS was thinking.


Cleat attached Getting the edge cleat on was pretty straightforward; almost like it had been designed for the purpose, eh?

Clearance from clip edge The screws for the cleat were pretty clearly into the shadow-board strapping underneath, but the next problem came when trying to place panel clips at the correct distance away to accomodate the first panel and the end cap. The screws were landing in the crack between the real rake and the shadow board, where of course they wouldn't bite at all well. A solid hold here is critical for edge uplift protection.

His solution was to screw down through the clips somewhere other than their stock holes, backing the attachment point onto the solid plywood without moving the clip. This allowed presetting a line of them all the way up. Easy to do, by zipping the screw points right through the solid areas on the thin aluminum clips.


Third end-panel attempt Now the panel had to be painstakingly slid endwise up under every clip in turn, requiring careful assistance from below as he went up with it to guide the end in.

Re-sliding This required unbending the pre-formed drip-edge match a little to overshoot the final position and make sure the bottom clip was engaged. Then it could come back down and get re-crimped over the edge.

A little unorthodox, but the panel was finally really on and we had a better solution already brewing for the end-cap attachment.


Second panel finally on Another line of clips was added up the other side of the panel in the normal fashion, and then dropping the second panel on was a piece of cake.

Phew. Third time was the charm to get things going, but this thrashing on *one* panel had burnt up half the day already.


Banging down SSM panels The nice thing about ATAS' "dutch seam" and similar snap-down systems is that the panels simply clip together with a firm thump from above, rather than requiring a special seaming tool to run all the way up forming a crimp. Once hooked, it should be every bit as strong.

And this time they remembered the next run of Tri-flex before proceeding...


Peeling film off panels Now we could actually get moving, but there was a little more prep to be done. Each panel needed its protective film peeled off, and the down end given the standard drip-edge crimp. The roofer prepared a bunch of them and then went back up to start receiving them from the ground.

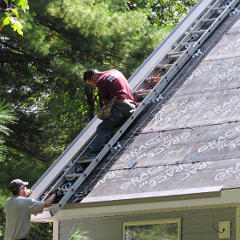
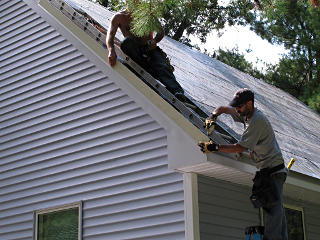
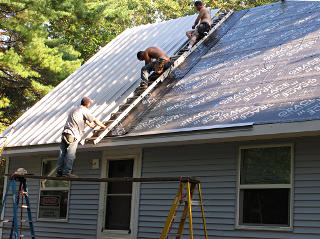
Three guys workin' it A fairly efficient workflow soon formed. With three guys already in the air aligning panels and screwing down clips he actually seemed a bit short-handed so I wound up helping quite a bit on the ground work. It was nice to actually be able to *participate* in the process for a change, as the roofer was much more laid-back about things and seemed to welcome the help. I just had to watch for where "laid back" might turn into "lax".

Still, I was fine with someone *else* standing up on that fairly sketchy plank rig with the ladders...


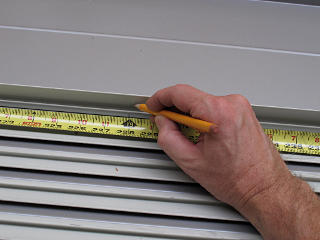
Foot markers He wanted to pre-mark ticks on the panels one foot on center, to indicate where to place clips, so I wound up doing some of that and then handing the panels up when they needed the next ones. At 21 feet long, care was needed to turn them 180 without hitting things nearby...

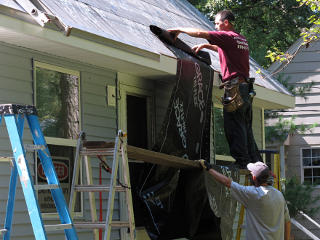
Cutting triflex I could also cut more Tri-flex when they needed another run. The roofer was trying to minimize staples into this stuff, only putting a couple in at the top and maybe one into each bottom corner, as each staple was a potential metal-to-metal contact to the panel.

Max Headroom house The front wasn't finished by the end of the day, but the house already had a rather Max Headroom look about it. In the fading daylight, the siding and roofing almost seemed the same color.

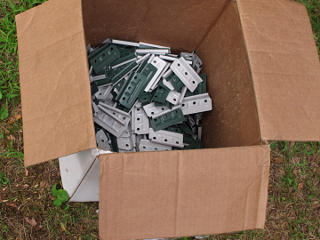
Half box o' clips They had already gone through almost half the box of clips, and we were starting to wonder if the foot-on-center spacing was a bit overkill. If either of us had reviewed the ATAS documentation we would have found that they recommended one foot spacing around the edges for greater uplift protection, but two foot nearer the center of the roof. Well, more clips could always be ordered.

    Water management

Sill discoloration There was no forecast for rain that night, which was good because the problematic gable didn't have its cap yet, but I had a different little water problem to chase down. Backsplash from drip off the front overhang onto the stoop had been bouncing back up all over the storm door and then soaking down into its various parts at the bottom, which was retaining the water along the untreated oak sill. What happens to oak when it stays wet? It turns dark and eventually starts to rot, and this was already starting to happen. Something needed to be done about this, probably a combination of things.


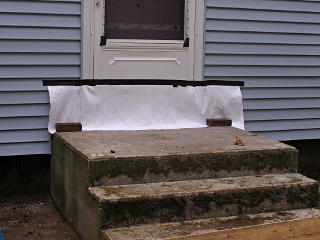
Temporary front sill protection For the moment, though, I wanted to just the the area protected so it could dry out some. A spare bit of Tyvek and some gaff tape would do as a quick redneck fix and also keep water out of that critical slot between the stoop and the house.

Next section   (19)
Index

_H*   121208