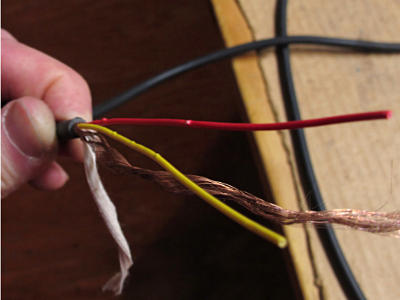
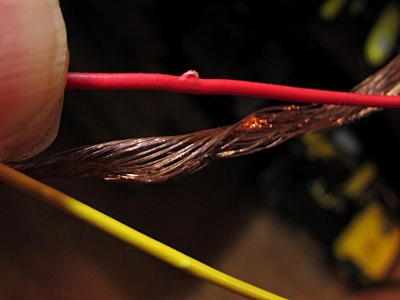
Both heads were cut off and the ends stripped to expose and separate all the conductors, and yet the short between the red signal lead and the shield remained. At this point most folks would simply save the heads and throw the rest of the cable away, but the engineer and QC guy in me were like "WTF?" and I needed to figure this out just for hack value. The cable had no apparent physical damage along its 20-something foot length, not even any visible distortions or kinks. The obvious first approach to localization was to connect a fast-acting continuity tester and go along to wiggle and bend every part of the wire and hope to temporarily break the short to narrow down the bad area. This wasn't productive, as the wire stayed hard-shorted no matter how I massaged its entire mysterious length.
No, I still wasn't ready to pitch the damn thing yet.
The next idea was to inject some kind of more sophisticated tracer signal across red and shield at one end and go along with a suitable detector, trying to find where any notable characteristic changed. A couple of initial efforts failed, and since things were at this point getting even more technically interesting I posted to the mailing list of my usual production-tech buddies:
Subject: weirdass cable problemTo clarify, the circuit finder is a current-based system, drawing sharp pulses of load from the circuit and detecting the little spikes of the resulting *magnetic* field around the wire. Ideally the line and neutral leads are physically separated so the field doesn't get canceled by the return-side current; there's generally enough separation at a distribution panel that leakage from current passing through the breaker is enough field strength at the panel face to identify it. Very limited detection can work along a power cable containing both leads, simply because the wires generally spiral around and at various points one is slightly closer to the detector than the other. I was hoping to exploit that minor difference, despite having current in both directions in this cable.I've got a low-to-mid grade XLR cable with one of the live leads apparently shorted to the shield. Both connectors are off and it's been cut back a little with all leads visibly isolated, and there's no visible damage anywhere along and yet one lead remains solidly shorted to the shielding *somewhere* along the length. The obvious approach of connecting a beeping continuity tester at one end and wiggling/bending the thing all the way along hasn't turned up the slightest deviation from shorted, and in headscratching about it some more I thought "I need a thumper!" ... Because, y'know, I don't own a TDR.
A thumper in the heavy-power business is something akin to a rack of car batteries and a switch, to fire high current pulses down a length of failed cable while you go down it with an inductive probe to see where you lose signal [or physical motion!!] from the pulses, a la the famous story
http://www.jwz.org/blog/2002/11/engineering-pornography/
I figured I have the moral equivalent, in the form of my fox-n-hound for circuit breakers. That applies short-duration load pulses when plugged in, allowing the sniffer to pick out that characteristic signal amid a rats nest. I hooked it up in series with this piece of wire and plugged the whole mess into the wall. It was passing current as expected, and with both the sniffer and a generic inductive probe I was detecting the clicks *all the way along*. Right out to the other end with the three conductors splayed away from each other.
However, the distinction next to a wire this small and effectively coaxial didn't seem to make enough of a difference. When that wasn't productive I took a generic audio inductive probe along the cable, not exactly sure what I was listening for but hoping *something* would change in the tracer clicks picked up at the point of the short. But no, it sounded the same all the way along out to the other end so that wasn't doing the trick either. So much for my "thumper" idea; tactics thus far were apparently falling victim to voltage effects and capactive coupling rather than finding changes in current flow. Either that or it almost seemed like the wire was shorted all the way along its length, which given that the active-lead insulation appeared to be in acceptable condition where I could see it didn't seem too likely.
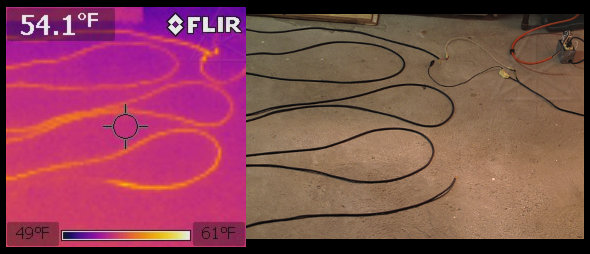
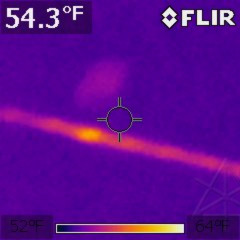
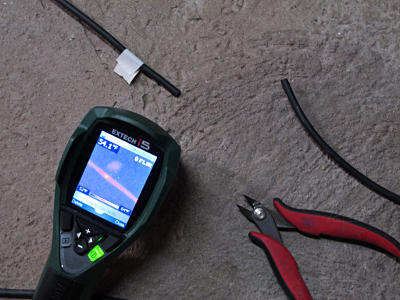
Magnetic fields aren't the only side effect of heavy current flow. The one we're more familiar with is heat! And I had an infrared imager handy, purchased in large part because of all the energy-audit stuff I was doing on my own home and a few others. If the fault was at a specific place, simply getting it warm enough with resistance heating should reveal something. The test gear would be a "series outlet" -- a duplex with the two outlets wired in series instead of parallel so that a protective load-dumper can be used to limit current into a device under test, and a rack of light bulbs I already had in which different wattages could be screwed in and out to vary the load. I laid out the cable in a flat serpentine so I could image the whole thing at once, hooked everything up, and began adding load in hundred-watt steps.
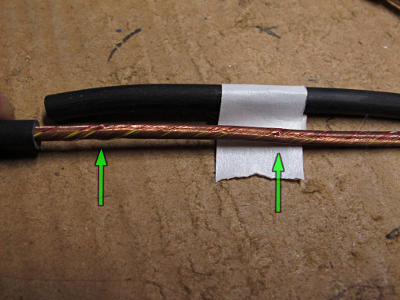
That didn't take long to totally nail it:
[this pic is linked to a larger view of the test setup]
The box at upper right is the series outlet, and the orange wire goes up to the rack of lamps. A simple suicide cord is alligator-clipped into the defective cable, and I went into this realizing that the clipped connections were likely to run a little warm themselves.]
We stand by our electrical work! Barefoot on a damp concrete floor...I was up to 400 watts of light bulbs at this point, enough to make the point where current was turning around clearly visible but not actually making anything inordinately hot.
