Small images are linked to larger versions.
|
|
|
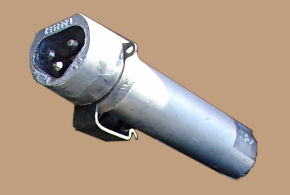
The 2010 and later third-generation Prius engine accepts the same auxiliary
block heater as the second-generation, but installation is a little
different. This is an early account of exploring the procedure, in which
I had the honor of working with "Mr. Block-heater" himself, Wayne Mitchell
aka FireEngineer, who's gone all over the country and done on the order of
150 installations for people in their second-generation Priuses. I'm sure
that the process will undergo several refinements and speedups, but here are
the early discoveries about accessing the new location -- which isn't really
new, it's the same place on the engine block but just a little more buried
under other stuff.
Small images are linked to larger versions. |
|
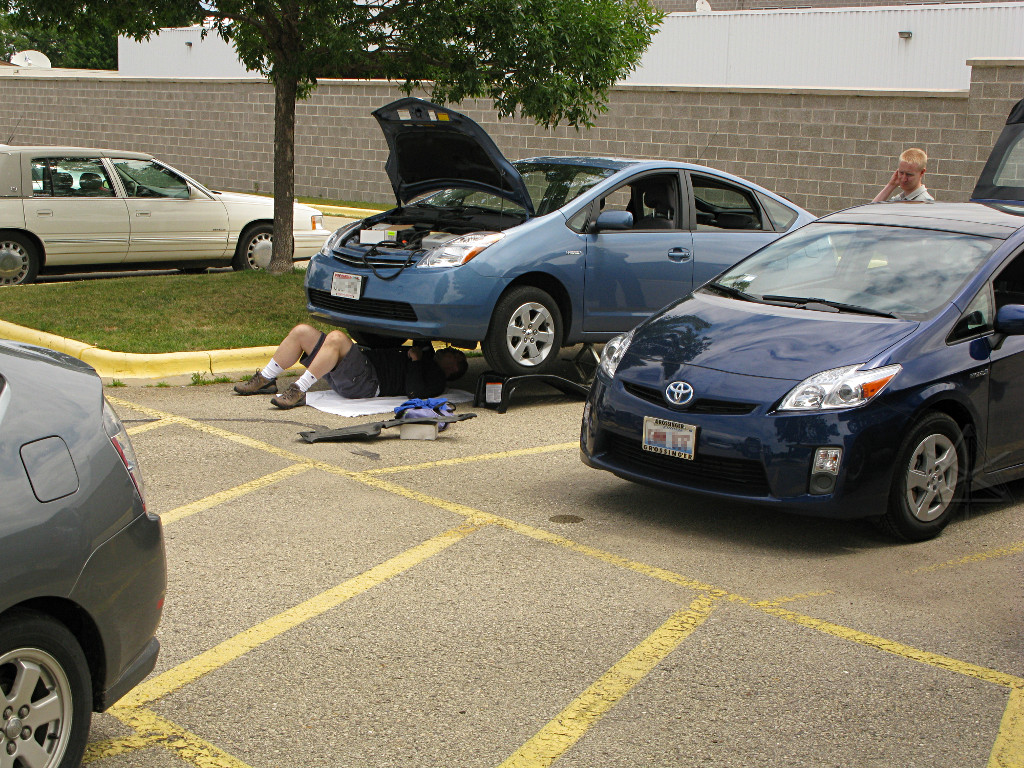
We took the Sunday afternoon of Hybridfest '09 to set up a little operation in the back parking lot of the Alliant. I slewed my own car across two parking spots in the outer row in an attempt to preserve us a couple more spots' worth of space, as people started to pour into the fairgrounds. Wayne started by whipping off about three more block-heater installs for the second-gen owners that had queued up. |
|
Although Wayne intended to put a heater into his own new 2010 anyway, he got
another owner who needed to leave earlier in the day and decided to do that
car first, performing just enough discovery process to get it done, and
then we'd do a more complete exploration and analysis on his car later.
As both cars are that lovely deep blue and different pictures were taken
during each separate job, they are sort of melded together as if we were
only working on one car.
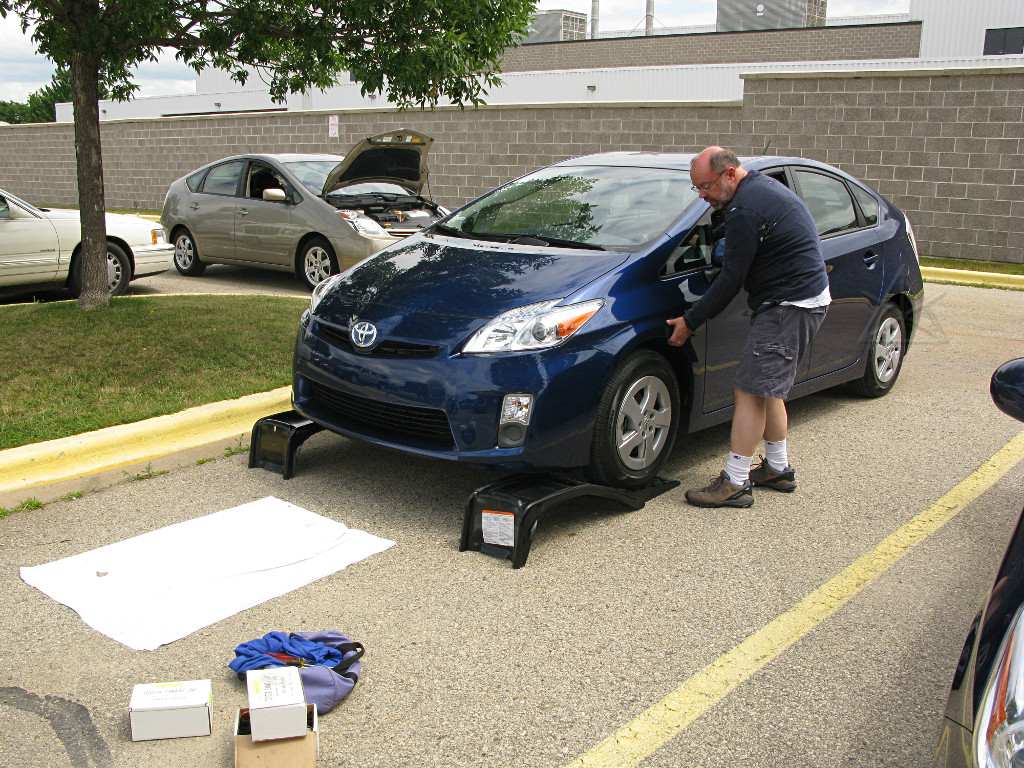
Still, as this shiny '10 eased its way up onto the ramps, we were about to enter largely uncharted territory. Wayne may indeed be a certain kind of superhuman, but I don't think he's actually lifting the car here. |
|
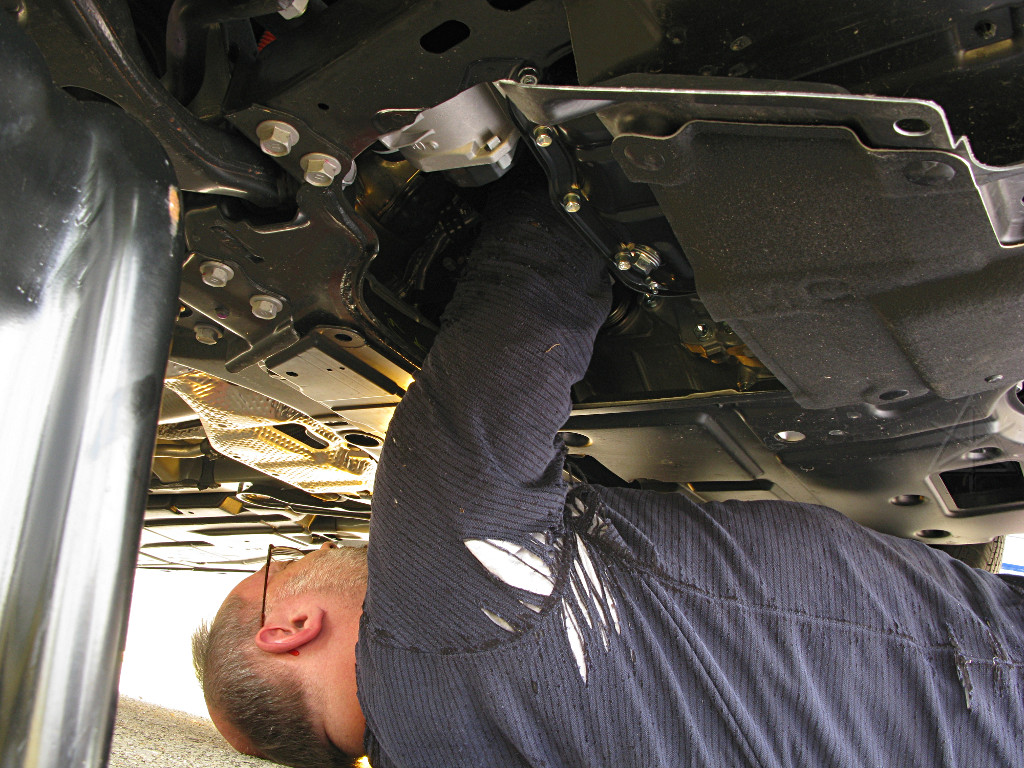
After removing the three fasteners from the access door in the underbelly panel and flipping it open, time to explore the rear corner of the engine block and determine how accessible the heater hole is. What's just out of the picture is my toe, holding the end of the door up because as it's just a flexible bit of plastic for the hinge, it really wants to flip back down and get in the way. A suitable clip or string to hold it fully open might be useful. |
|
Wayne and I actually muddled our way through doing the first car without
removing the wipers and cowl. Installation was successful, but when it came
time to do his own, for completeness and better access [and pictures!] we set
to and tore his car apart quite a bit more. Wayne did most of the necessary
steps himself, so he'd learn the process, while Mike Sirach and I buzzed
around with cameras documenting it.
Many comparisons are made to cowl removal and heater installation in the second-generation cars, which are described here for reference. There's also a long-running thread on Priuschat about different methodologies and subtleties for the second-gen with many pictures that other people have contributed. One of the great things about the Prius in general is the knowledgeable online community that comes with it. Metro Toyota is still the best place to order the heaters from. It may be necessary to contact them [e.g. Jesse who works there] and ask specifically about it. The Priuschat online store also offers them, subject to availability. |
|
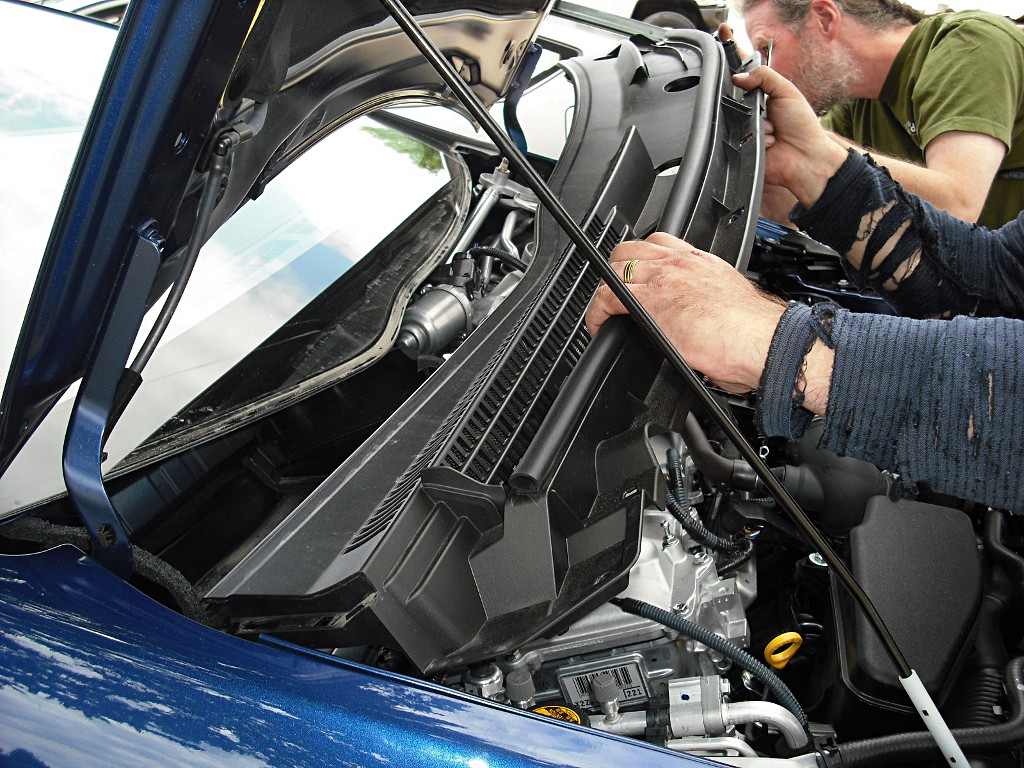
The new cowl cover is a little different. First, two little pieces at each side by the hood hinges need to be unclipped and removed -- uite easy. The wipers need to be unbolted and pulled off too, of course -- very similar to the second-gen. |
| image : msirach |
|
The long center plastic part is now one piece, avoiding the second-gen problem of having a seam in the middle that water could drip down through, missing the gutter piece and landing on the engine block below. The panel has claws that unclip from the gutter edge and the removal path unhooks downward and away from the windshield edge and then up, just like the second-gen version. |
| image : msirach |
|
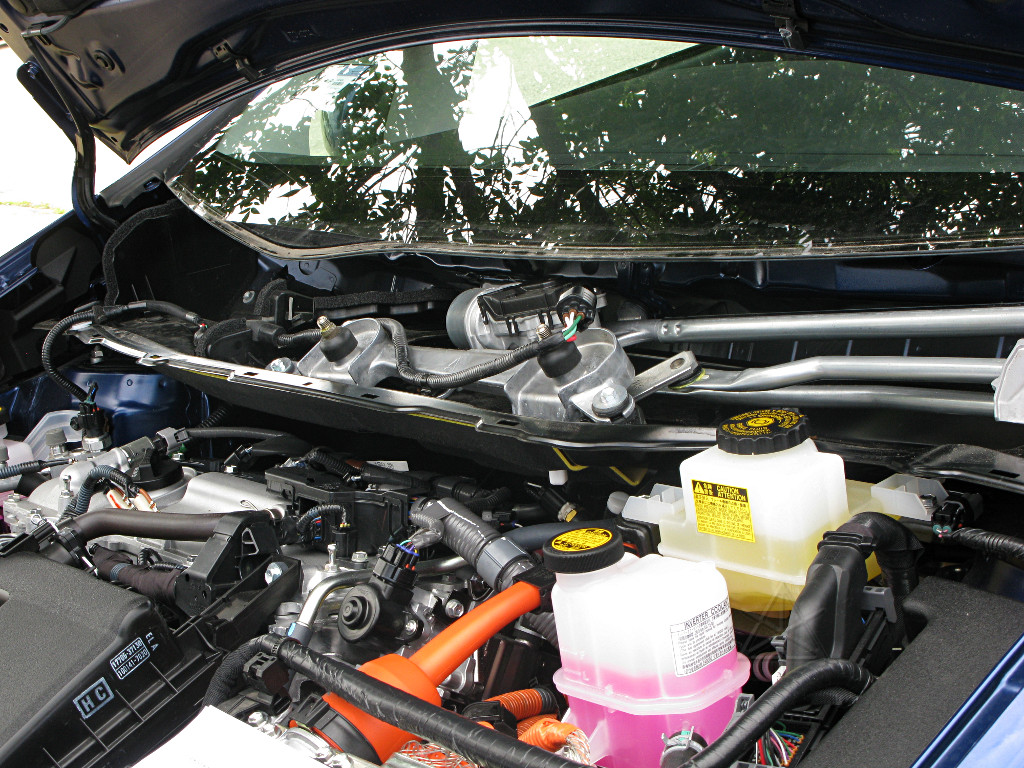
The wiper mechanism is a little different, but similarly bolted in with rubber spacers to give the whole assembly a little flex. The wire to the wiper motor goes up at the right side now. |
|
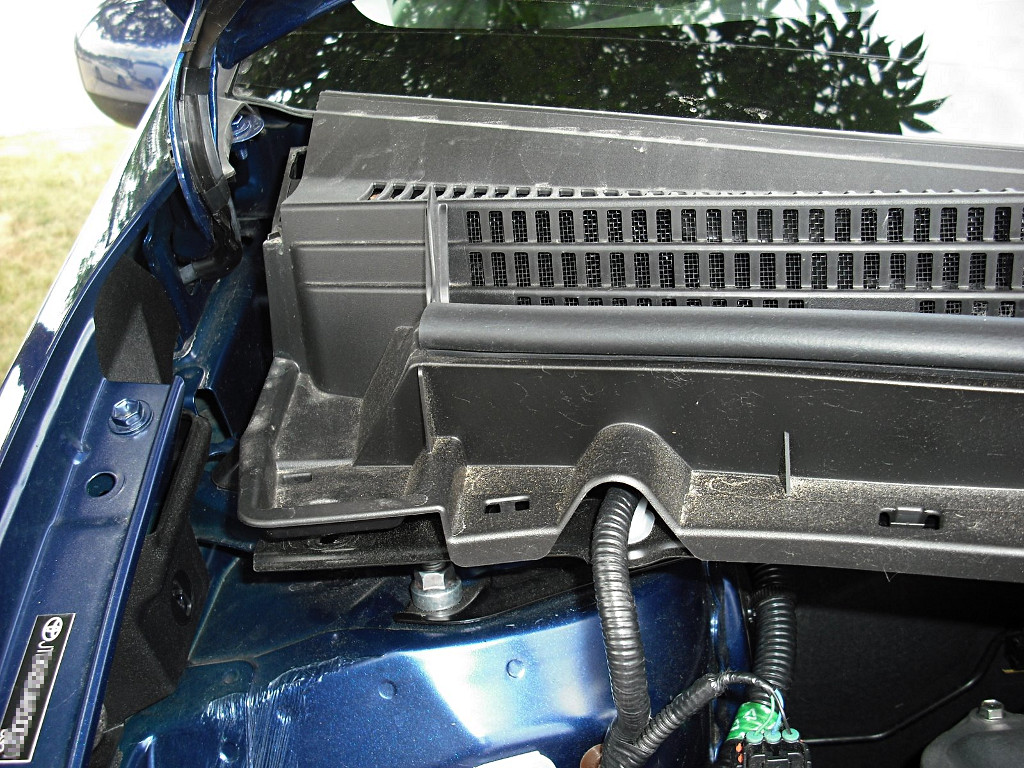
The 2010 gutter tray is much deeper front-to-back, and held in with several
more bolts. There's also an extra bracket in the middle that helps hold up
the wiper linkage, that needs to come out. After only 3000 miles there was
already quite a bit of gunk in the tray, implying that routine removal of
the cover and a bit of clean-out is a good idea especially if the car is
parked under trees.
The windshield glass has a funny shape, with a little bump shape on the right half. |
| image : msirach |
|
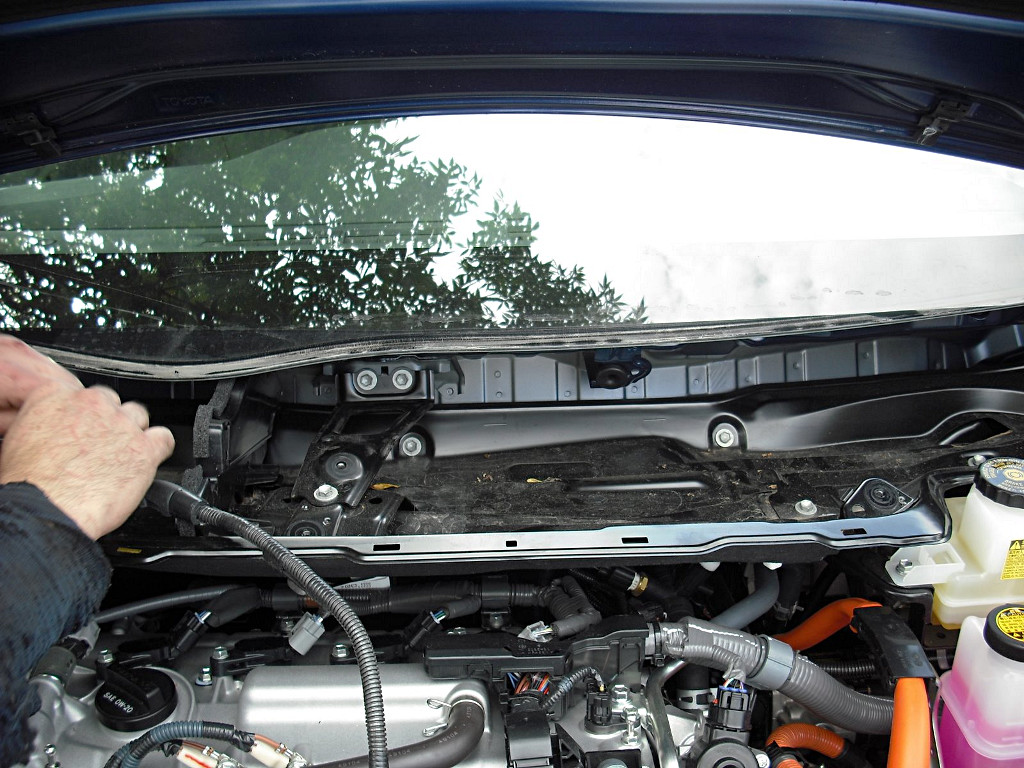
With the tray out, access to behind the engine is nicely opened up and it's
fairly easy to reach down around the fuel line and heater hoses to the rear
corner of the block where hole is.
Just under the windshield-edge bump, perhaps a little hard to see here, is the opening for cabin-air ventilation intake which is *much* more accessible now. Since this firewall doesn't have the same dual-layer welded construction as as in the second-gen body, which is one reason this cowl tray is deeper in the first place, it means that it is now possible to install some mesh over the intake hole and keep those pesky critters out. The stories of mice nesting in the heater fan are some of the forum favorites, and it's hard to prevent in the second-gen cars since the intake is tucked in deep behind an extra layer of non-removable steel. |

|
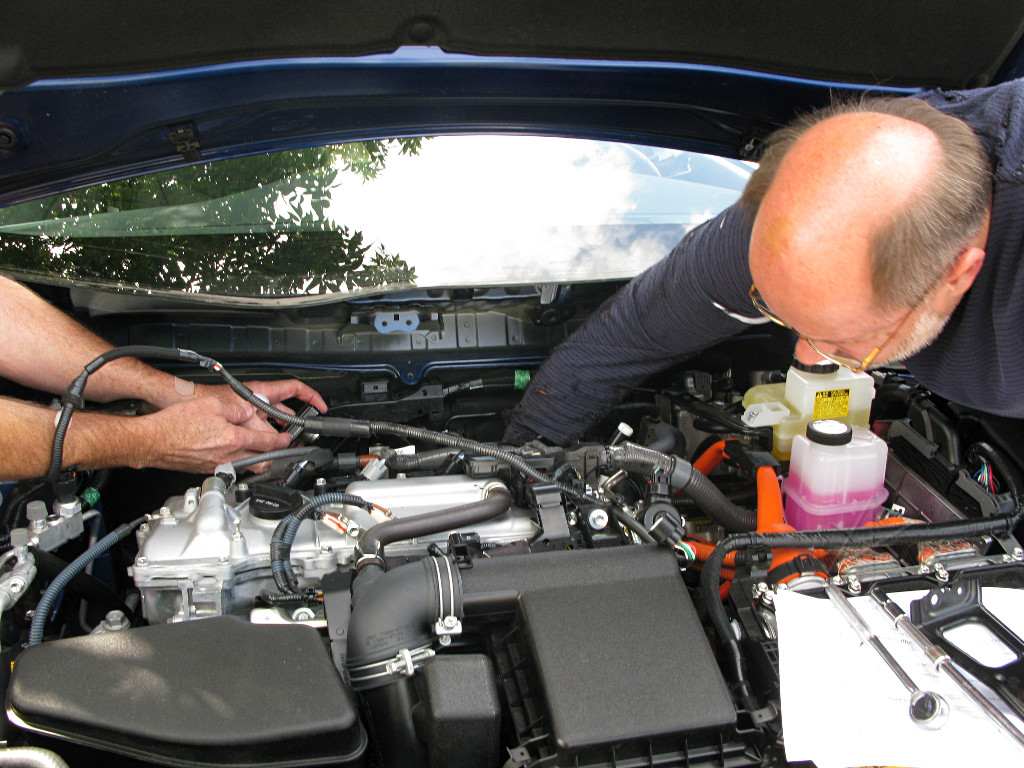
Both visual and physical access to the block-heater hole area, however, are
somewhat flummoxed by a mess of cables in the way -- including the big scary
orange ones for the battery and transaxle motors. Some of these need to be
displaced a bit.
The car's powered down, right? These are perfectly safe to handle. They're shielded and insulated, and we don't need to actually disconnect any of that stuff. |
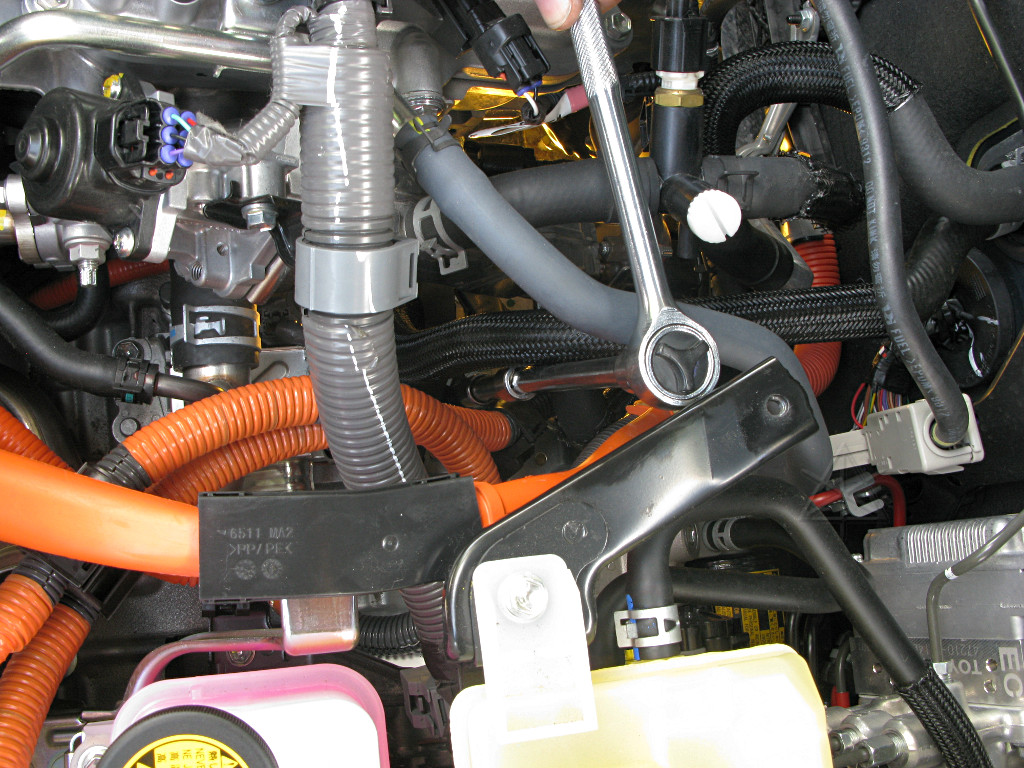
|
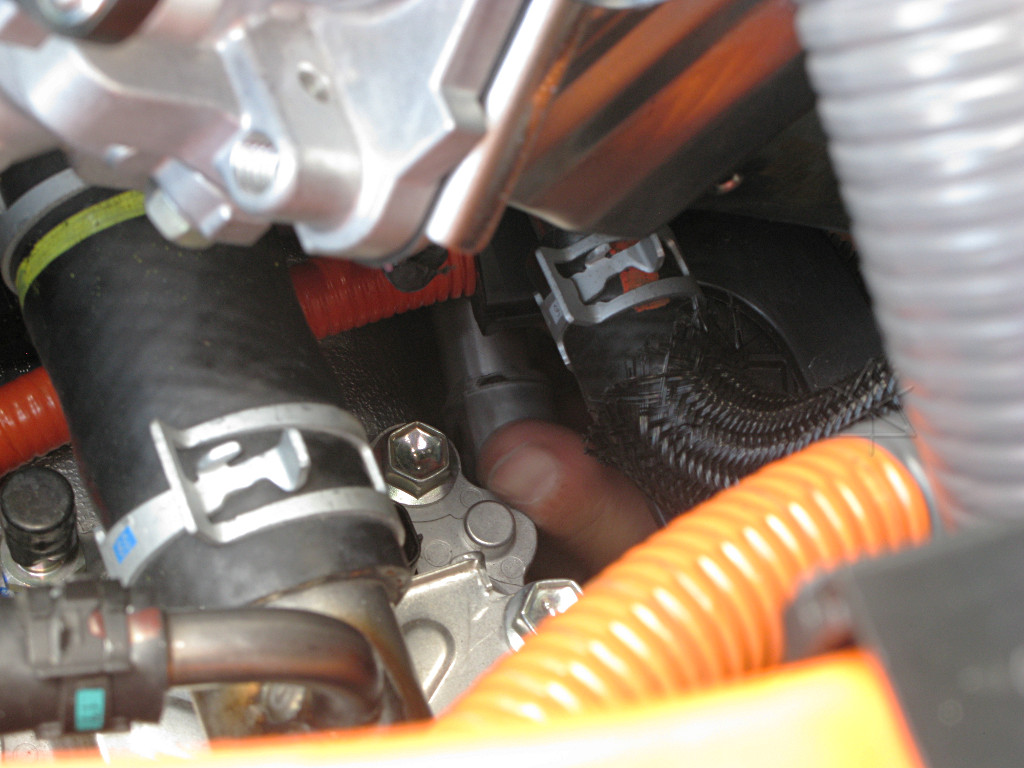
The front of the car is leftward in this picture, as though we're leaning in over the left fender. There is one magic bolt to get at, way down in the jungle which for us took TWO socket extensions in series to get the ratchet high and clear enough. Where the socket is shows pretty much where the 10mm bolt is; it holds down a small flattish black piece of plastic which is a retainer bracket for various cables that pass by there near the top of the transaxle. Said cables pass *right* in front of the heater-hole and block the space needed to line the heater up before sliding it in. |
|
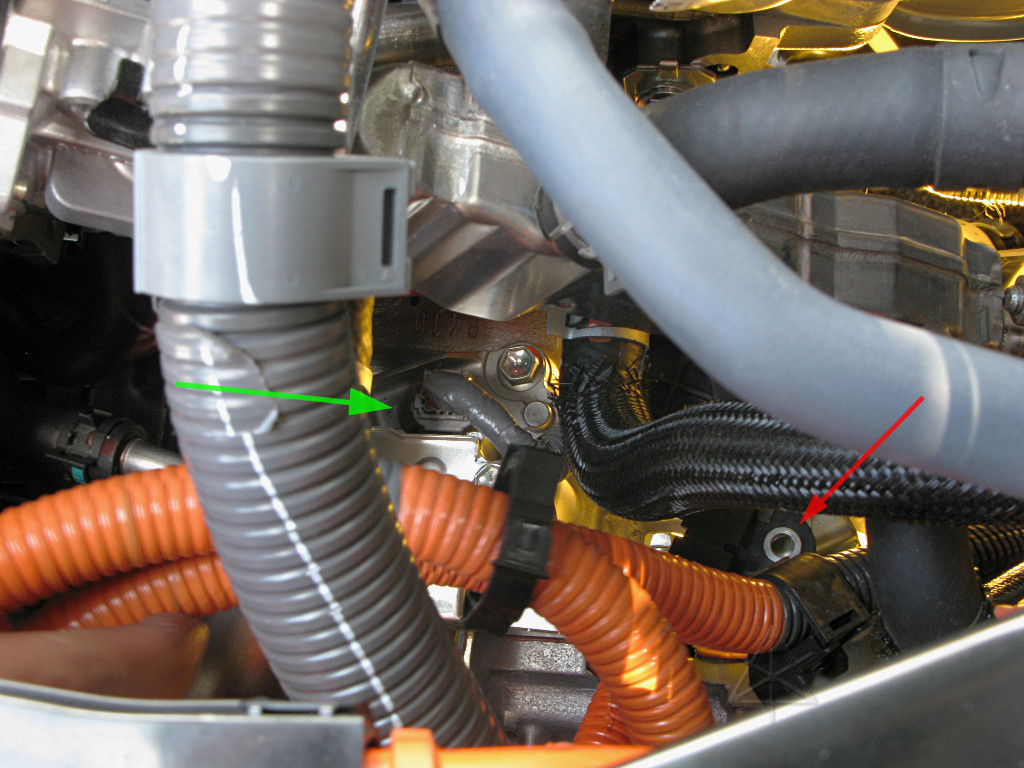
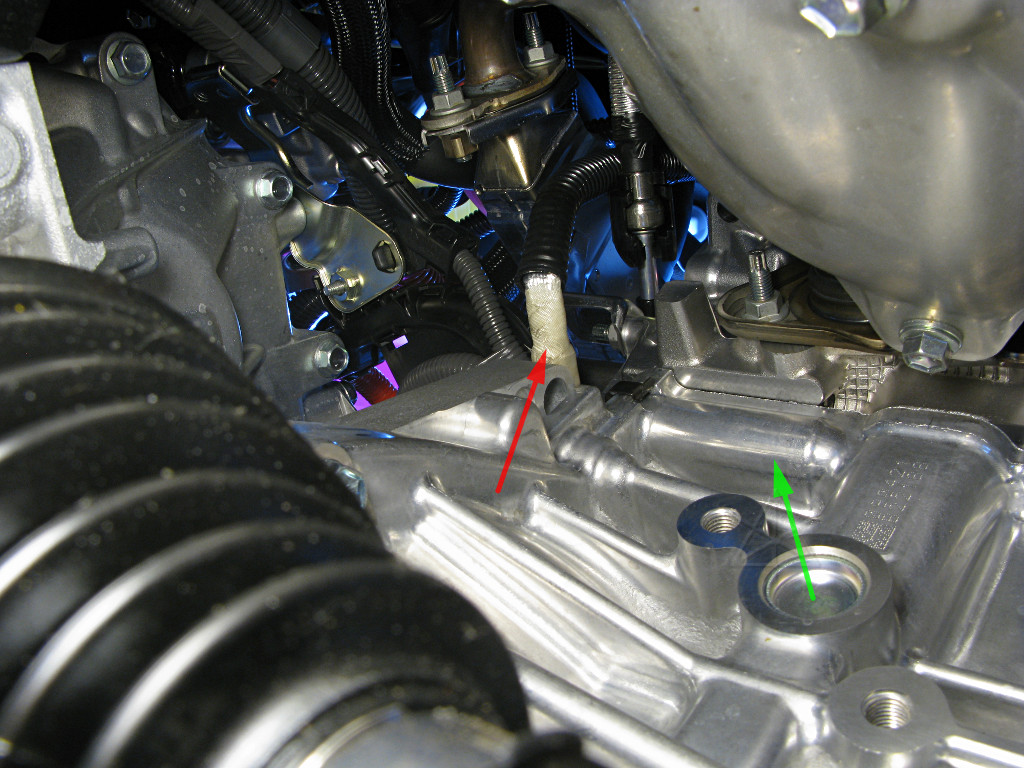
The bolt passes through the eyelet shown by the red arrow; part of the
plastic bracket can be seen here on either side of the black braided hose.
Once the bolt is out the whole assembly can float upward far enough.
It also helps to unplug the gray connector [green arrow], since the cable to it is also part of the same bunch. This is most likely the position resolver connection for MG1. Squeeze the retainer tab and gently pull the connector off. This is not strictly necessary, but helps the rest of the bundle move a little more freely. |
|
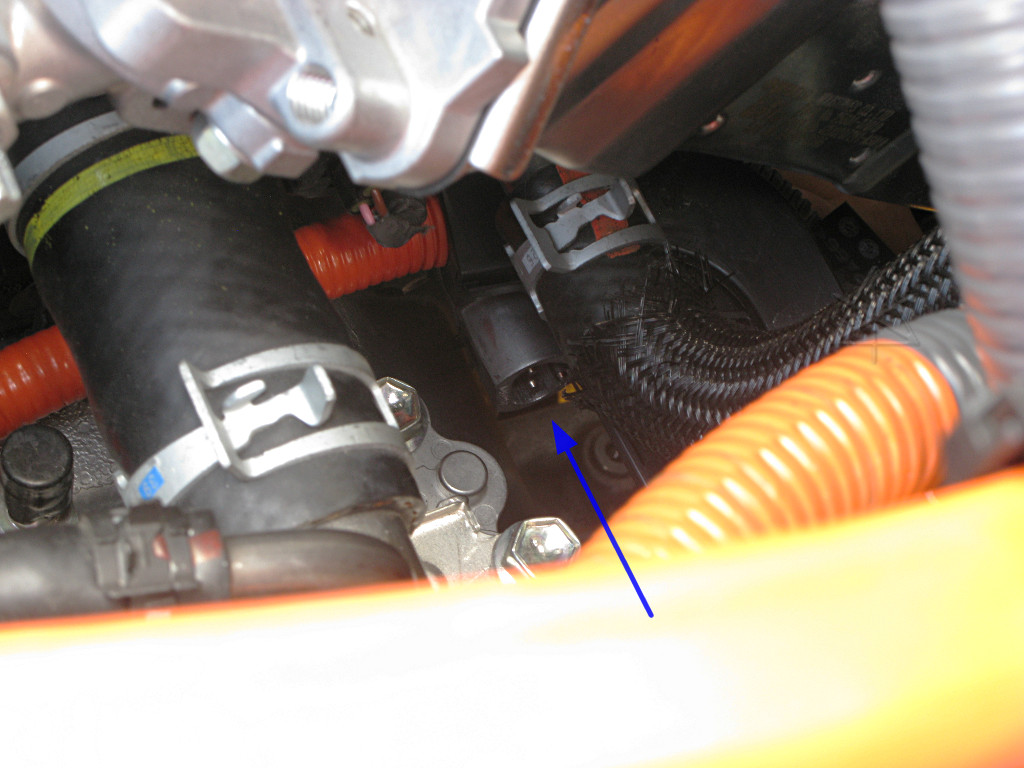
With the wiring sufficiently pushed aside, we can finally *see* the block heater hole. The yellowish light is coming from a bulb behind the engine block, which helps lend a little perspective. It's all about the lighting, y'know. |
|
After a quick test-fit, the heater can be greased up with its included thermally-conductive goo, and inserted for real. There's Wayne's finger sliding 'er home. |
|
Note the orientation of the pins and flat side as it sits in place; flat side toward the front of the car. This is how it needs to sit to have the right-angle power wire fitting coming off toward the back of the car. The retainer clip on the heater also needs to be toward the back, which should be rotated around the right way before insertion. |
|
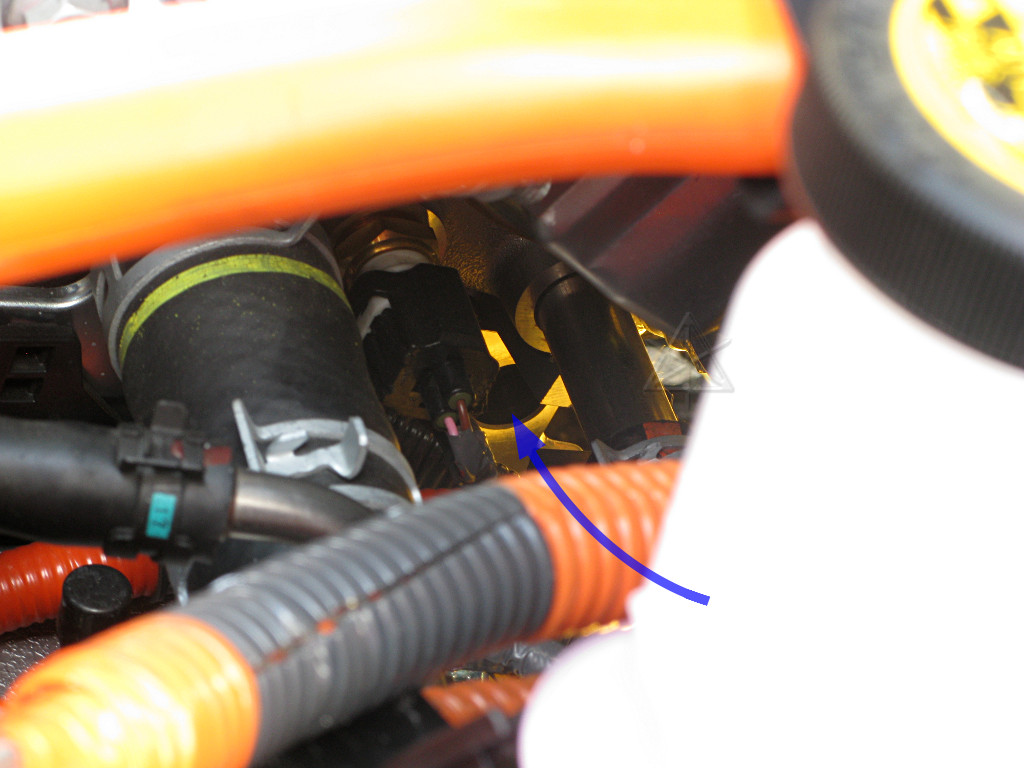
On the back side of the block, from under the car, we can see the part of
the casting where the heater goes [green arrow]. We can also see the
black steel retainer clip gripping around the edge of the hole. The
heater power wire [red arrow] comes down and curves over toward where it
plugs into the heater. It should pass by the fuel line on the *driver's*
side to help keep it away from the hot EGR feed piping farther to the right.
In this case Wayne plugged the cable into the heater from underneath the car,
although it can probably be done just as easily from above with the cowl out.
Remember, the engine block moves relative to everything else, so that final
hop to the heater has to have a bit of flex in it!
The two grey pieces of split-loom to the left of the heater cable are part of the rat's nest that needs to be pushed upward to clear space to insert the heater. Many of the metal edges on the block and various metal brackets are sharp, so move slowly and carefully when groping around in here! |
|
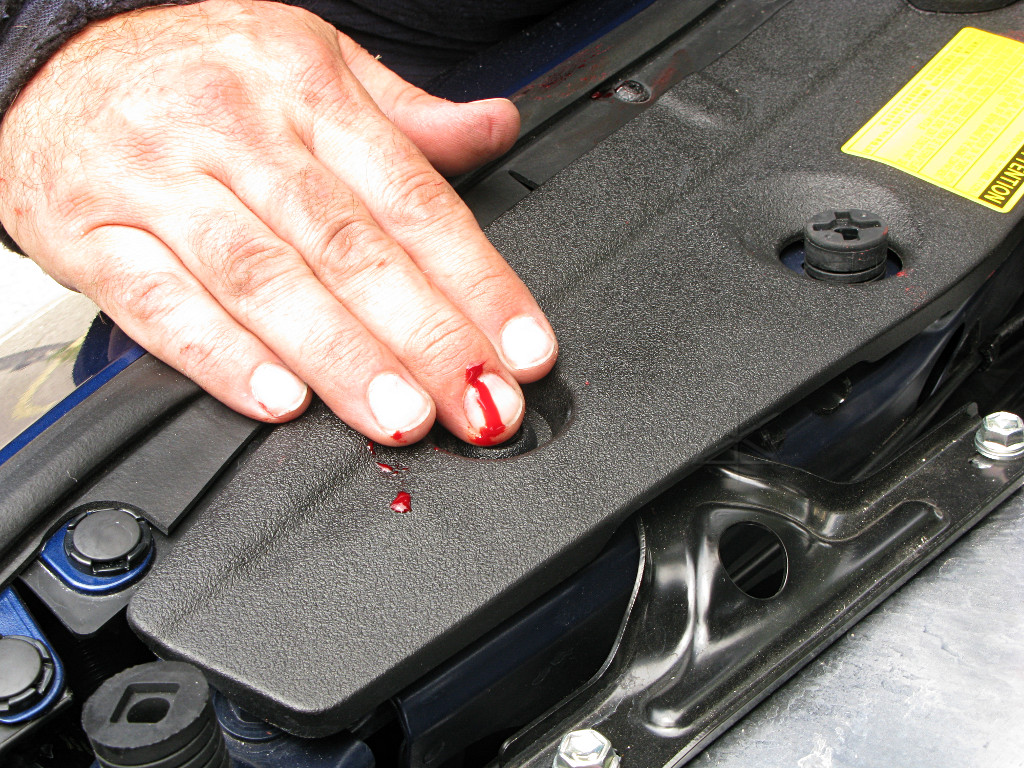
That's no guarantee against getting scraped up by some piece or other, as Wayne proved by once again leaving his DNA all over another Prius as this new 2010 drew first blood. It's traditional by now. |
|
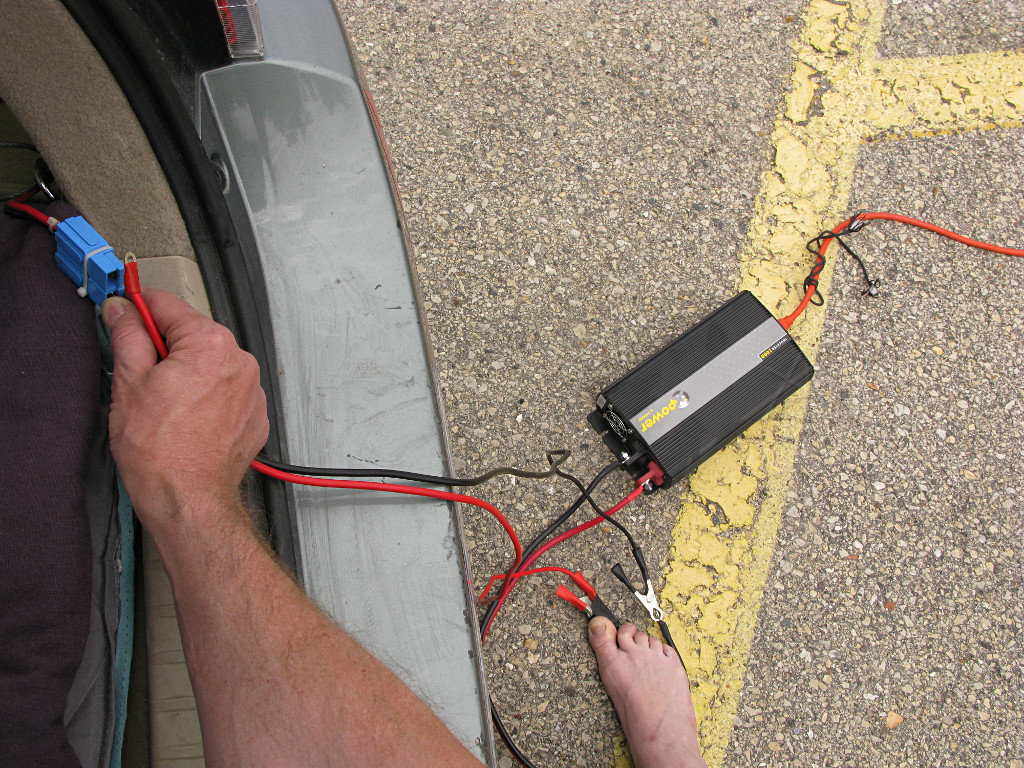
To test the installation, the heater needs to be powered and the boss where it goes on the back of the block felt for warmth. We didn't have utility power out here and my little inverter isn't quite up to supplying 400 watts, but Wayne had a 1000 watt inverter and a couple of clip-cables for it, and I simply held the ring terminals into my Anderson connector long enough to supply power and test the heater with it. Only took a few seconds, until Wayne said "ow, that's hot!" Managed to avoid setting my sleeping bag on fire during all this... |
|
This treatise deliberately leaves out anything about how to route the power
wire. That's a choice totally up to the owner, since there are so many
different ways to do it. The typical path up past the inverter toward
the front, down behind the nosepiece, and out through slots in the front
grille works fine and gives ample tie points. Others may want to keep
the plug farther inside the underhood area and bring the power feed cord
in to that point. It's a wire -- do what you will to it, but also see the
caveat about cordset robustness below.
Disassembly steps can be reversed to put everything back together. Make sure to plug the resolver connection back in, or the car will be quite unhappy! The wipers need to be carefully aligned on their shaft splines to avoid stripping them; wiggling each wiper arm while slowly hand-snugging down the nut makes sure they're seated correctly. |
|
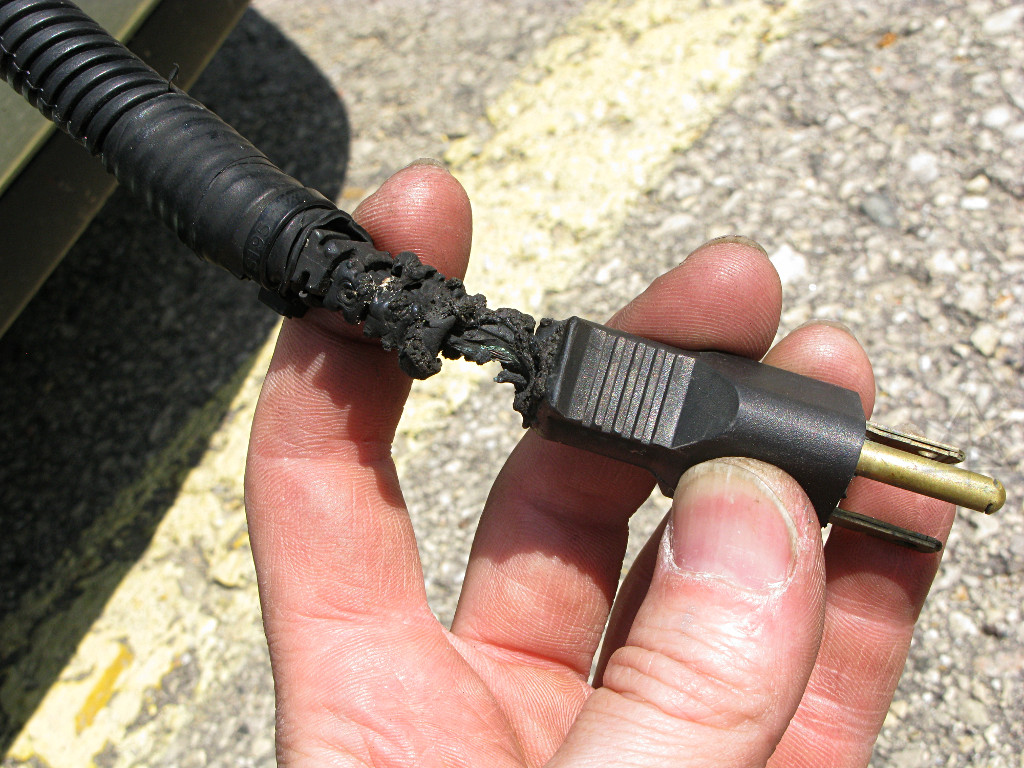
No, this is *not* the result of our testing.
One of Wayne's "customers" from a while back had his heater stop working, due to fairly spectacular plug failure. This is a common problem. The cordsets that come with these things are basically crap, and new installations would likely benefit from having these cheap molded plugs cut off and a real screw-on head from a hardware store put on instead. Fortunately, the specialized end that goes into the heater seems to be molded in high-temp silicone and a little more robust. |