A couple more months went by, bringing us past that time of year I refer to as
the "green car competition" since just every vehicle is about as green as it
gets under the ceaseless rain of pollen.  Not exactly good conditions for
painting outside.  Finally come July, there was a warm but almost windless
afternoon during some of the rare downtime between my events and happenings,
and having already accumulated all the gear I needed to finally do the hood
stripe I seized the opportunity to make it happen.

Small pix are linked to large ones, as usual.
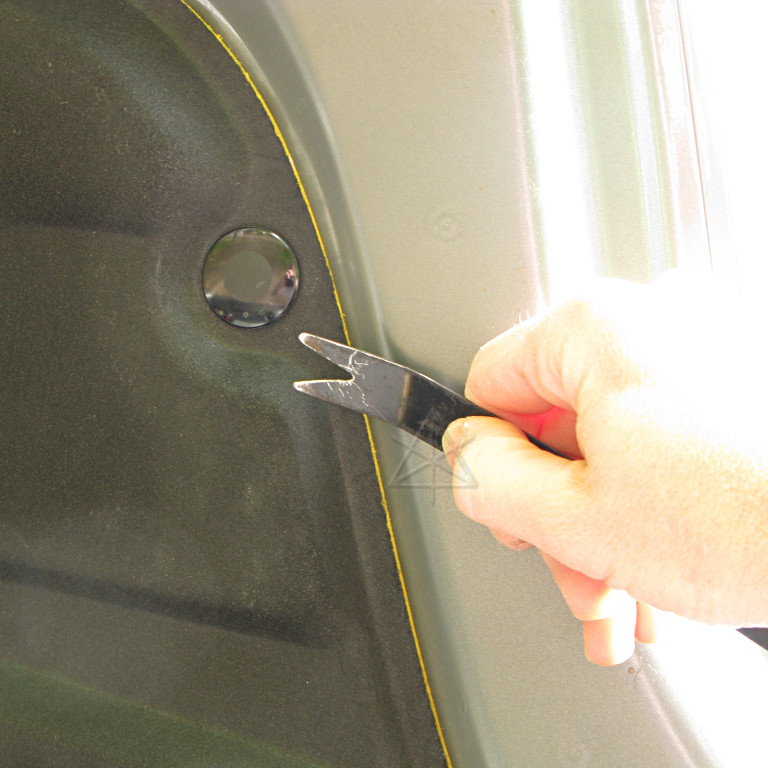
For this I wanted the hood off completely, and the only thing that had stopped
me in the past was the windshield squirter hose connection which I didn't think
I could unhook at either end and have any guarantee of getting it back together
easily.  At the hood end, the problem was that it was buried under the black
fiber liner pad underneath, and early attempts to unclip it had been for naught.

Finally I made myself the rough equivalent of a "snake tool", which supposedly
would pop those annoying little push-in clips out cleanly without damage, but
it was still a struggle and at least one of them, uh, suffered structural
failure.
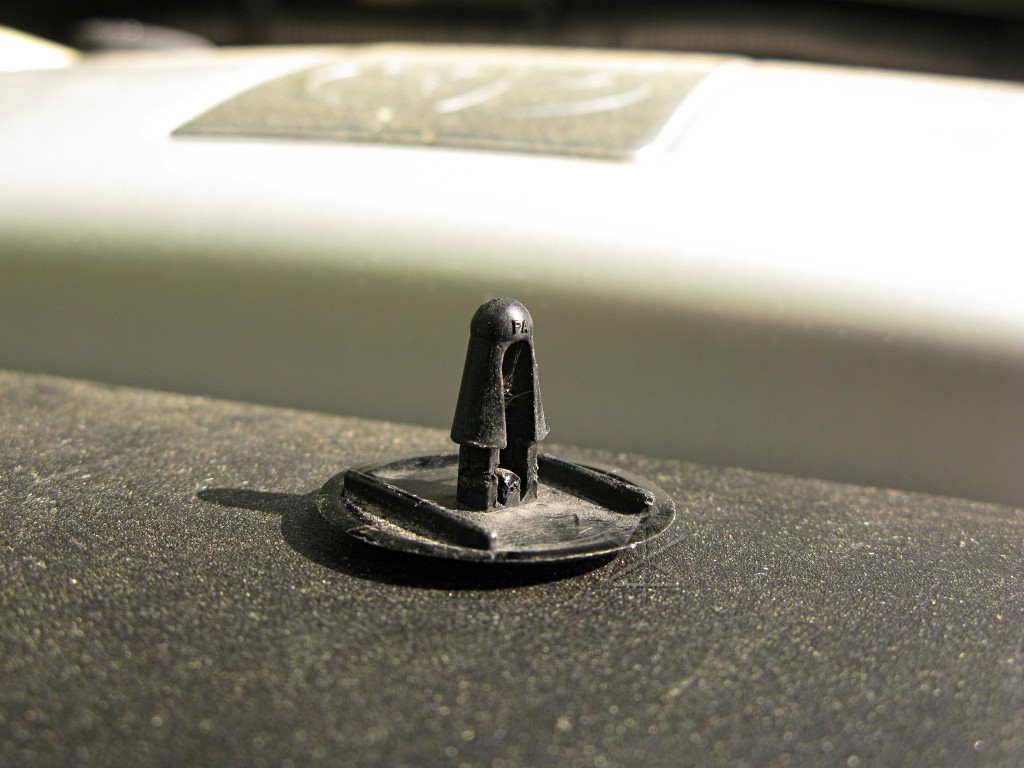
This is what the clips look like; an extraction tool has to come in at the
correct angle [parallel to the ribs at the sides] and squeeze the center part
in just far enough to release the barbs from the hole in the hood.  All the
Toyota manual says is "use a clip remover".
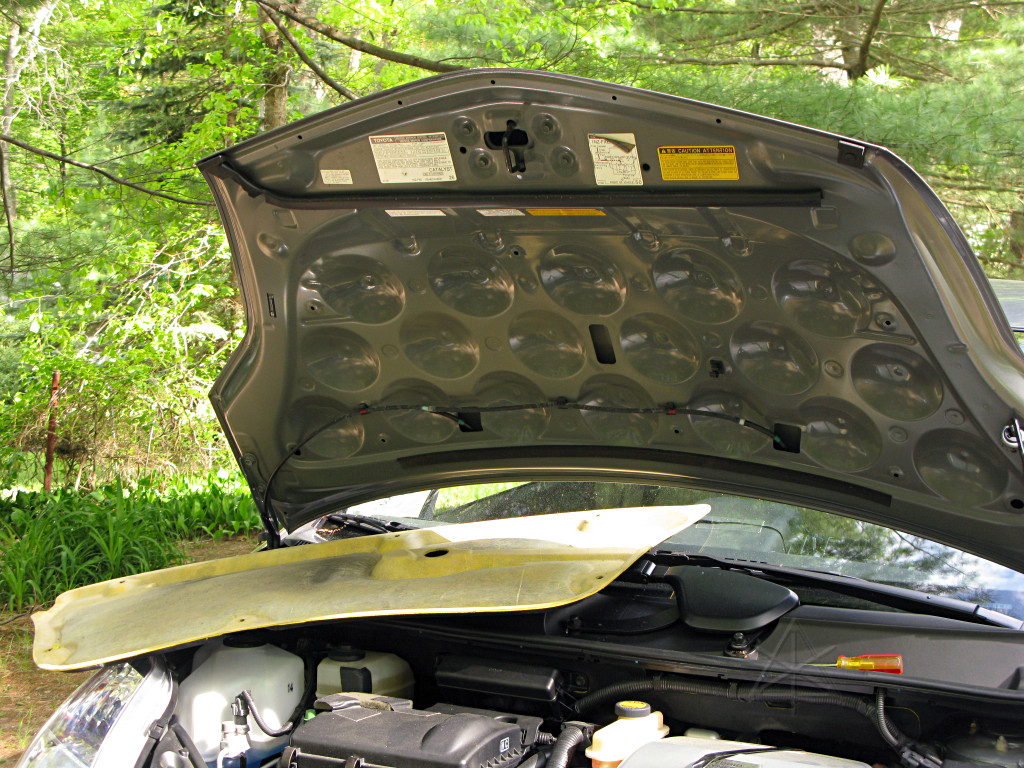
Finally the liner drops off, revealing the interesting "golf ball dimpled"
underside of the hood.
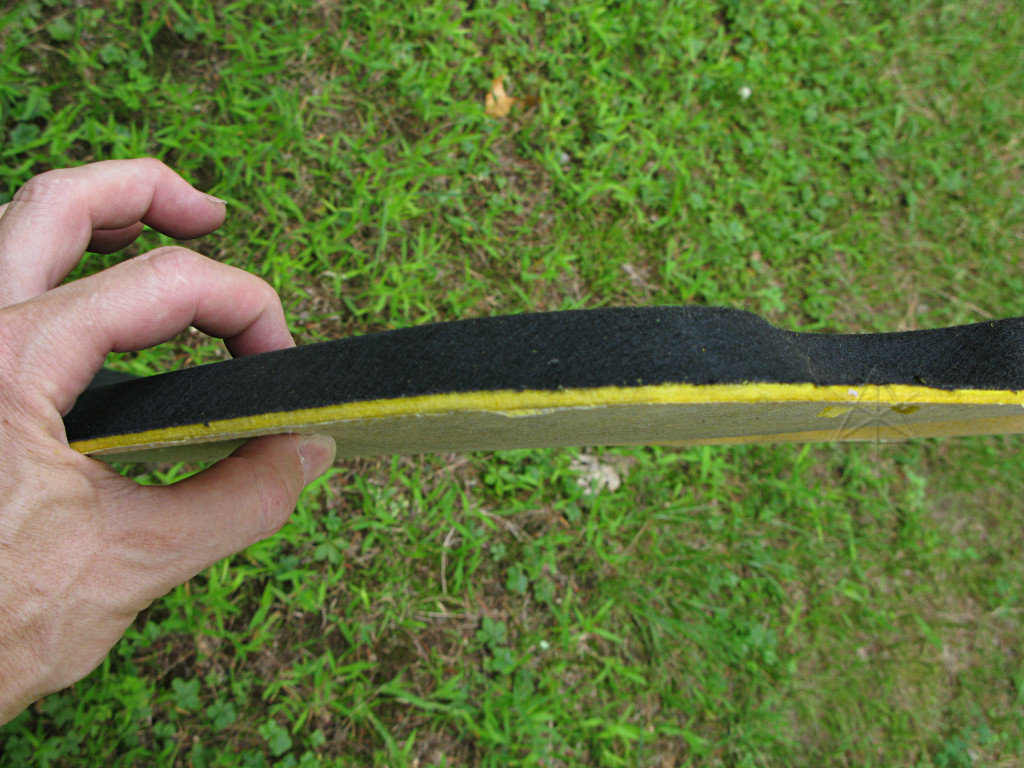
The liner is fairly thick, and is likely designed to help keep heat inside the
engine compartment as well as suppress a little engine noise.  In fact, the
manual refers to it as an "insulator".
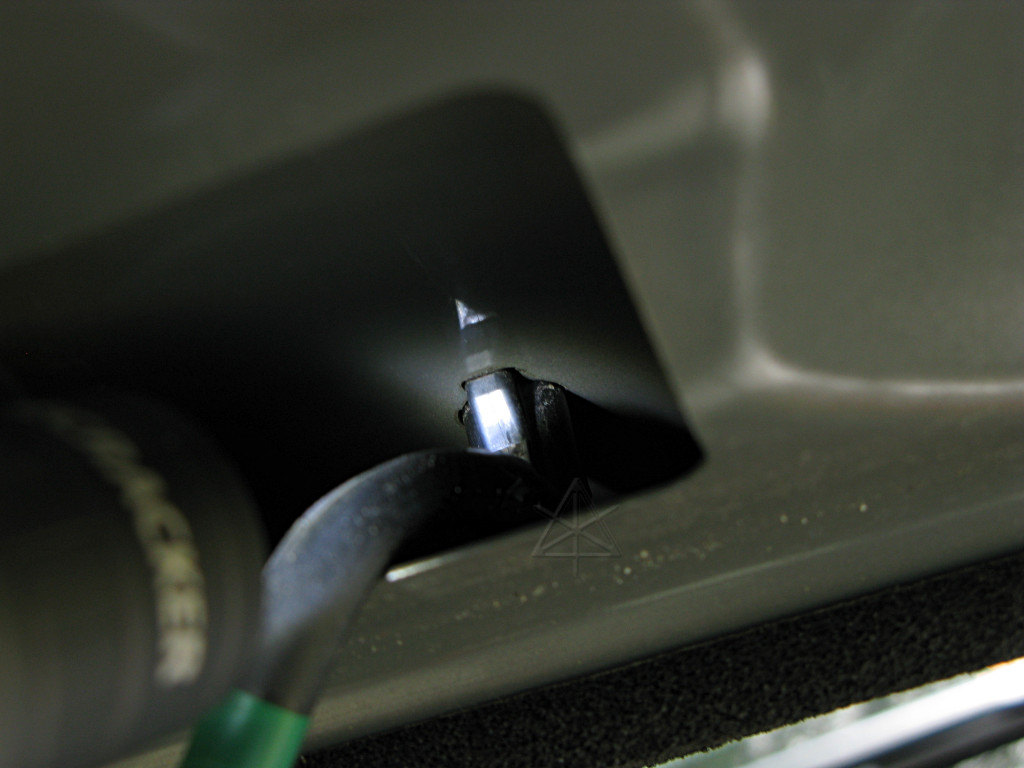
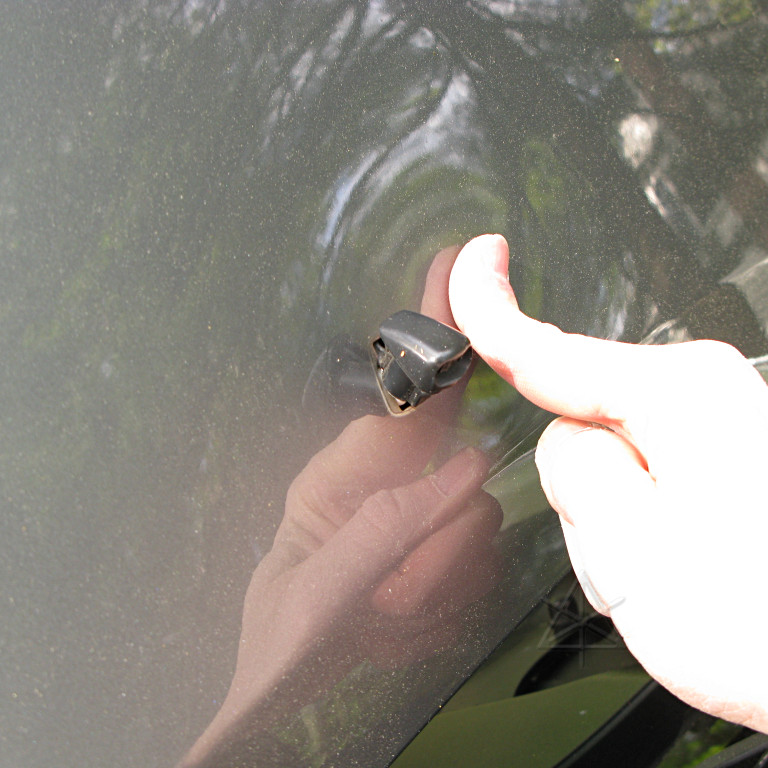
Now the squirt nozzles and hose can be gotten to.  The nozzles clip into their
holes with two barbs -- some sort of right-angle tool may be needed to reach
around behind then and depress the hidden ones ...

... but they pop out pretty easily.  Once the hoses are disconnected, all
the squirter parts can be removed and set aside.
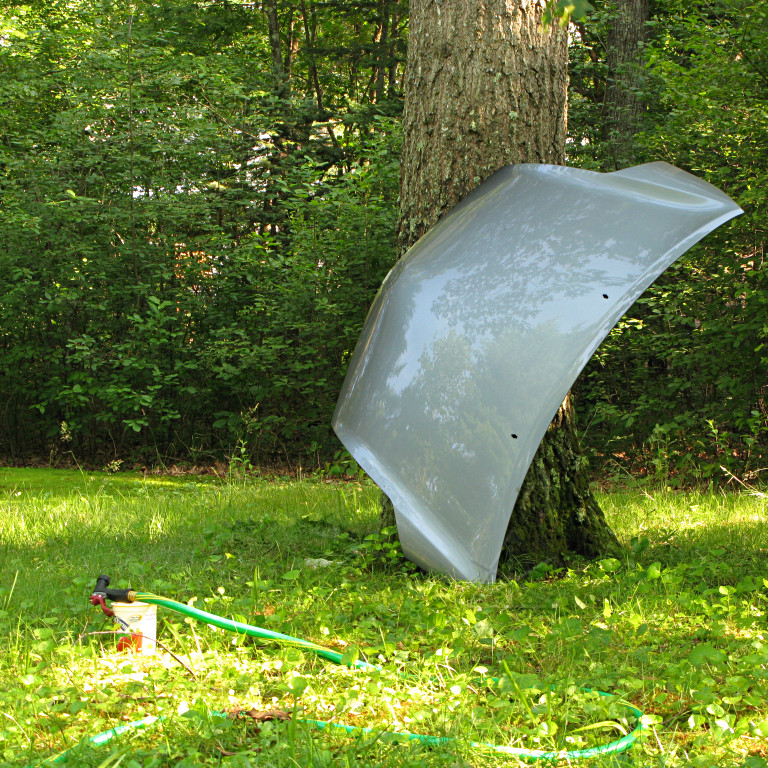
The hood metal is quite thin and bends readily, showing why there's all the
structural weirdness in the stampings.
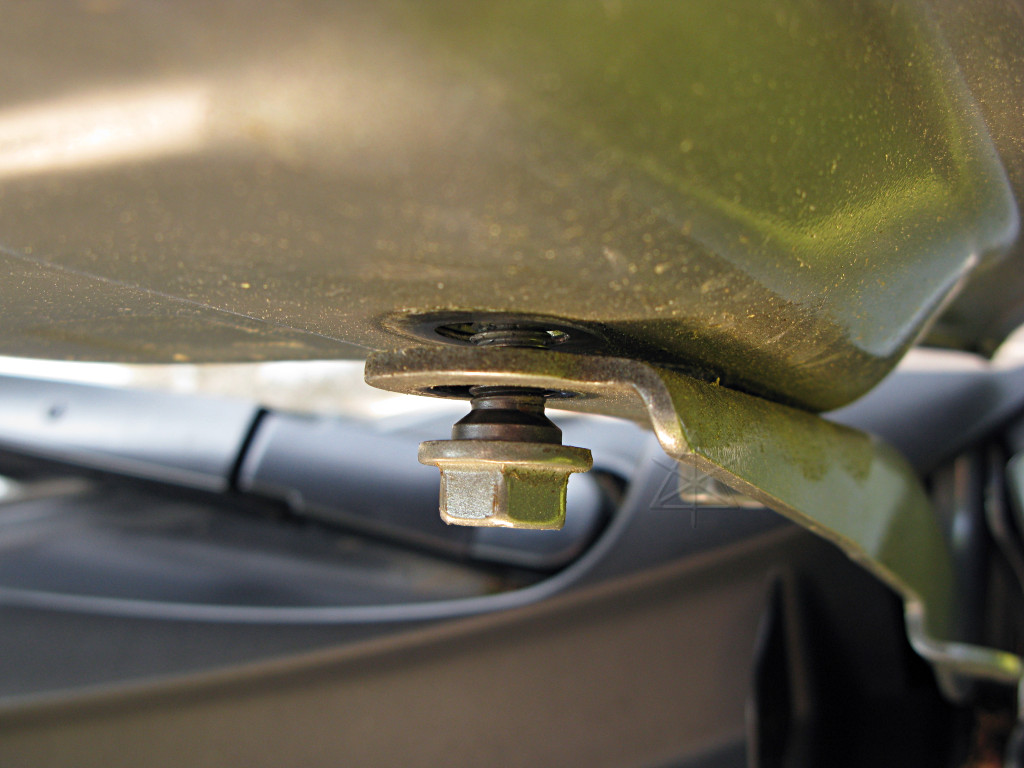
The hood hinge bolts have tapered shoulders to help self-align things during
reassembly.
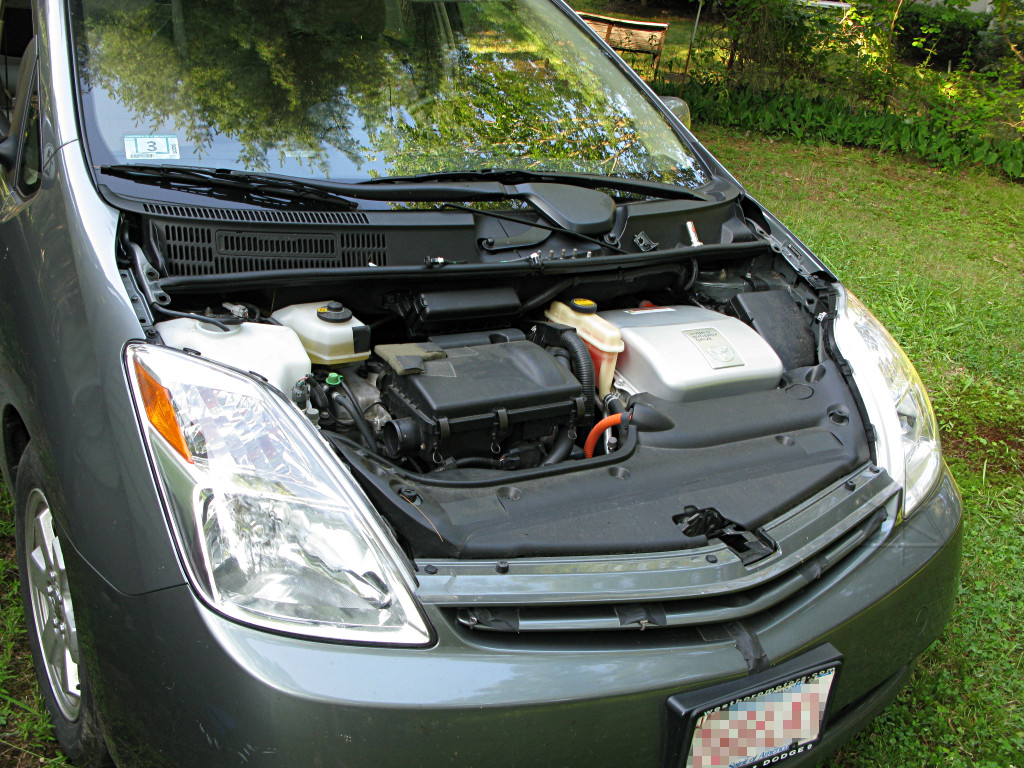
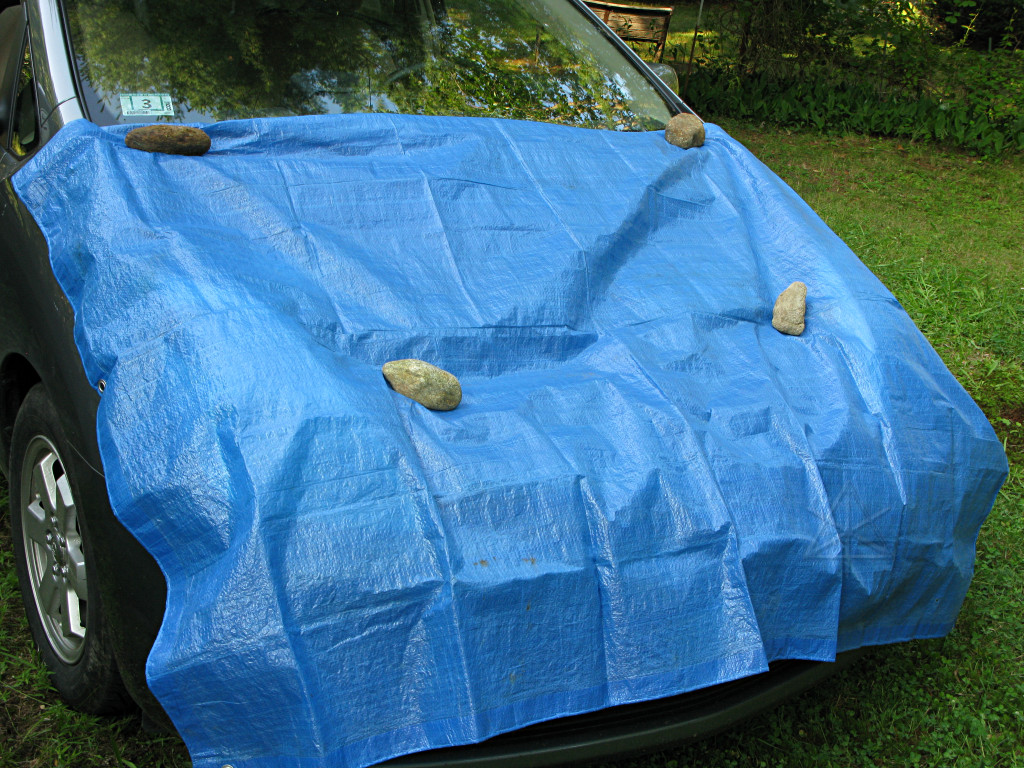
The "hoodless Prius".  [Is that something that galumphs around through the
woods at night, scaring the children?]  Either way, since the job ahead may
take a day or two, we don't want to leave all this exposed to the afternoon
thunderstorms.
"You might be redneck if ..."
First thing to do is wash the piece thoroughly, getting as much grease and
bits of tree sap and bird poo and bugs off.

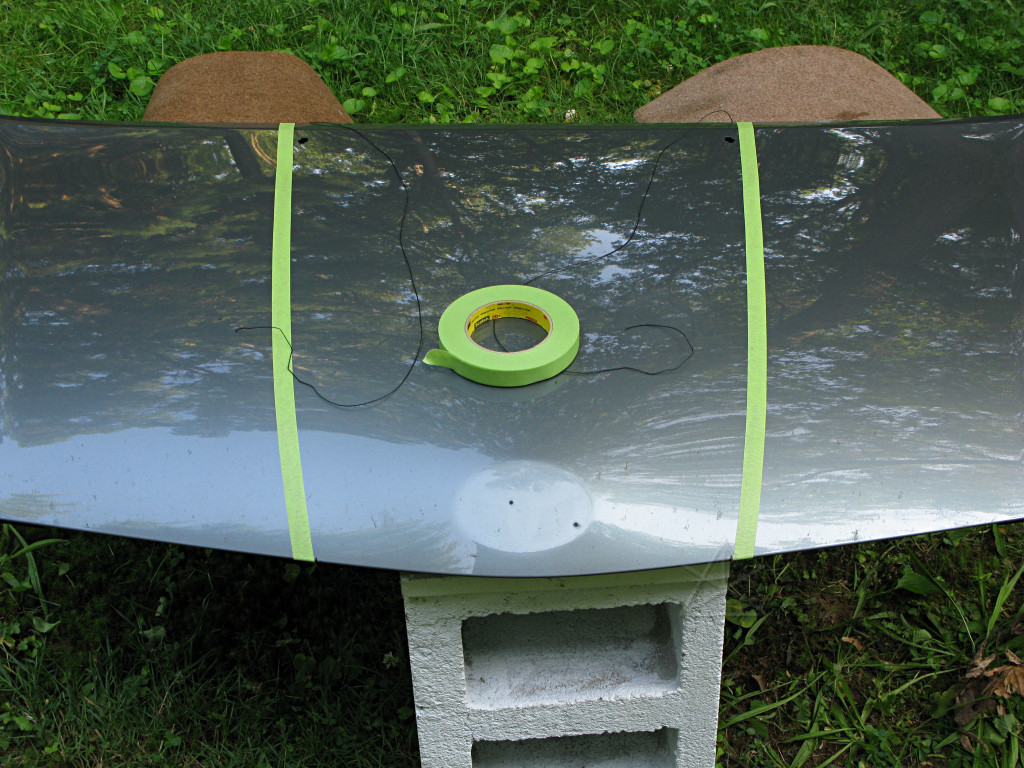
While the hood was still on the car, a couple of measurements were made and
small alignment ticks made with a marker.  I actually found that the two small
struts in the upper nosepiece opening are shifted over one way about an eighth
of an inch from center, and compensated the marks accordingly.  Here, two
strings are stretched across between the marks and the right distance from the
squirt nozzle holes, taped in place on the underside of the hood edge.  This
takes a bit of fiddling and eyeballing since the strings, stretched over a
curve, don't just land in the right place by themselves.
Next, the edge masking tape is carefully laid down just outside the strings,
making sure it goes down nice and straight and curves evenly where it has
to go over the hump.

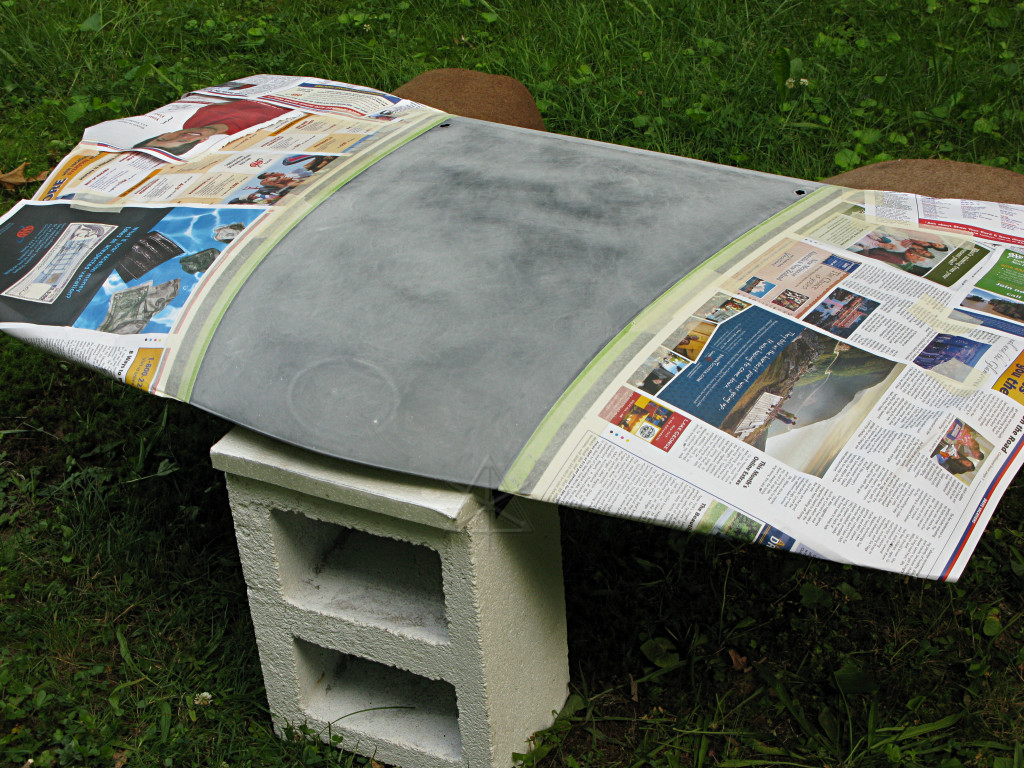
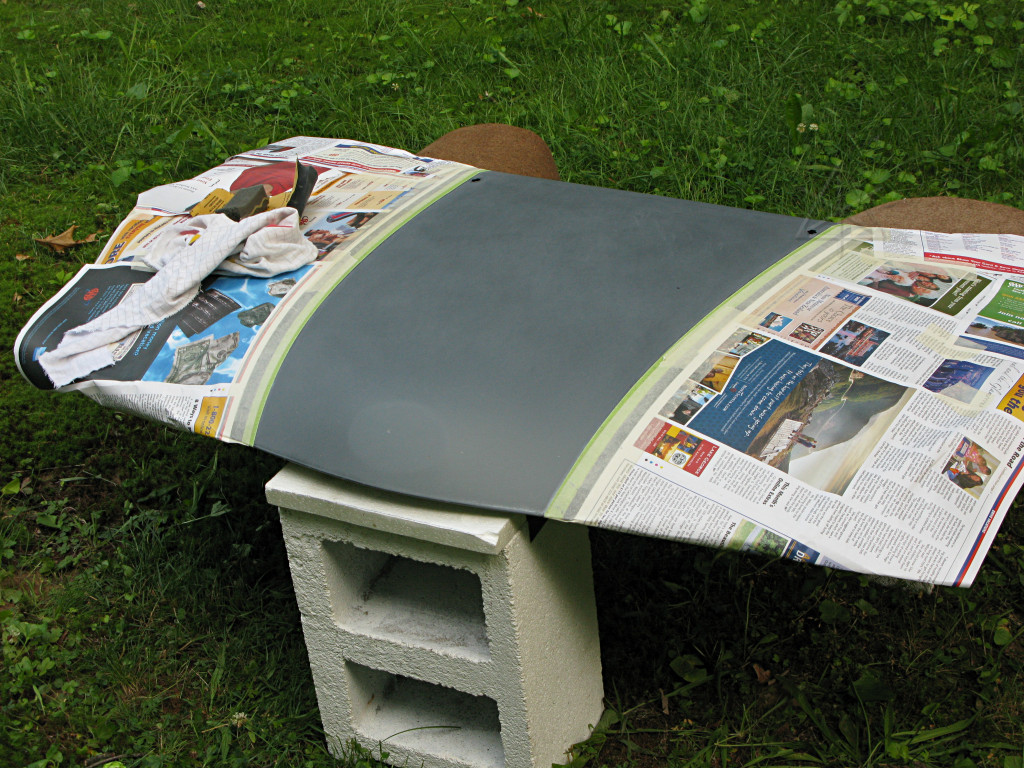
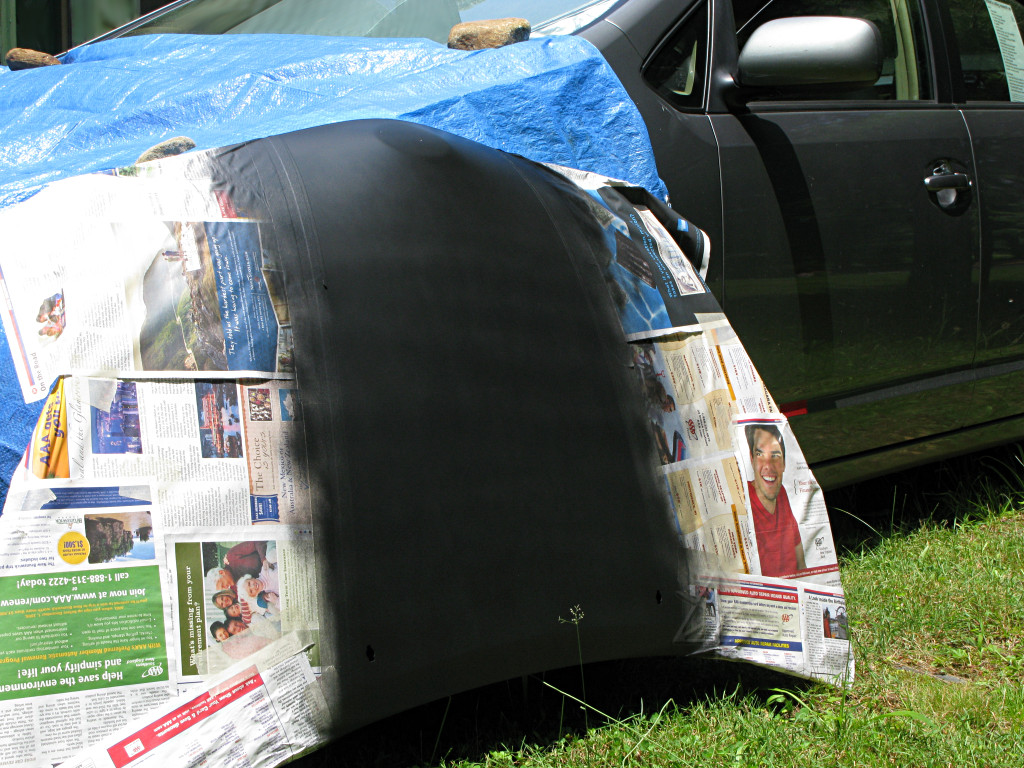
The rest of the piece gets masked off, using pages from those relatively
useless newsletters that AAA keeps sending me.  [And not one single instance
of the word "tailgating" in any of them, the misguided fools...]

Three of my particularly dazzling cinderblocks make a good stand for all this.
The front one has a piece of styrofoam taped on top to absorb the hood latch
loop that tends to press down into it.

Now, if you can tear your eyes away from the cinderblocks for just a moment,
notice how shiny the exposed part [of the hood, silly!] still is?  Paint will
not stick to that very well, so next we have to make it Not Shiny.
Like this, using 400-grit sandpaper on a foam pad, light pressure, and a very
uniform swirling motion.  Special attention must be paid near the tape edges,
since the paper tends to ride up onto the tape and not hit the outermost
eighth-inch unless an edge of the sandpaper is run right along there.
Once a couple of passes of this have been taken and the sanding dust wiped
away with a dry rag, it is definitely not shiny anymore.  At this point, of
course, I've destroyed the clearcoat and am now committed to making this look
decent again.
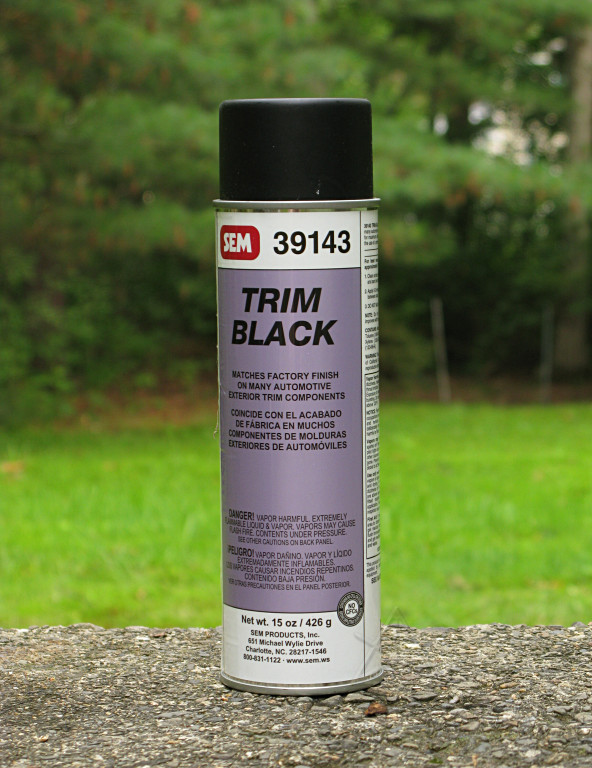
I'm using this stuff, obtained at a local auto-body supply shop.  It seems the
most likely to give the not-quite-flat finish I'm looking for.  For a small job
like this I'm not about to invest in a whole professional air spray gun setup.
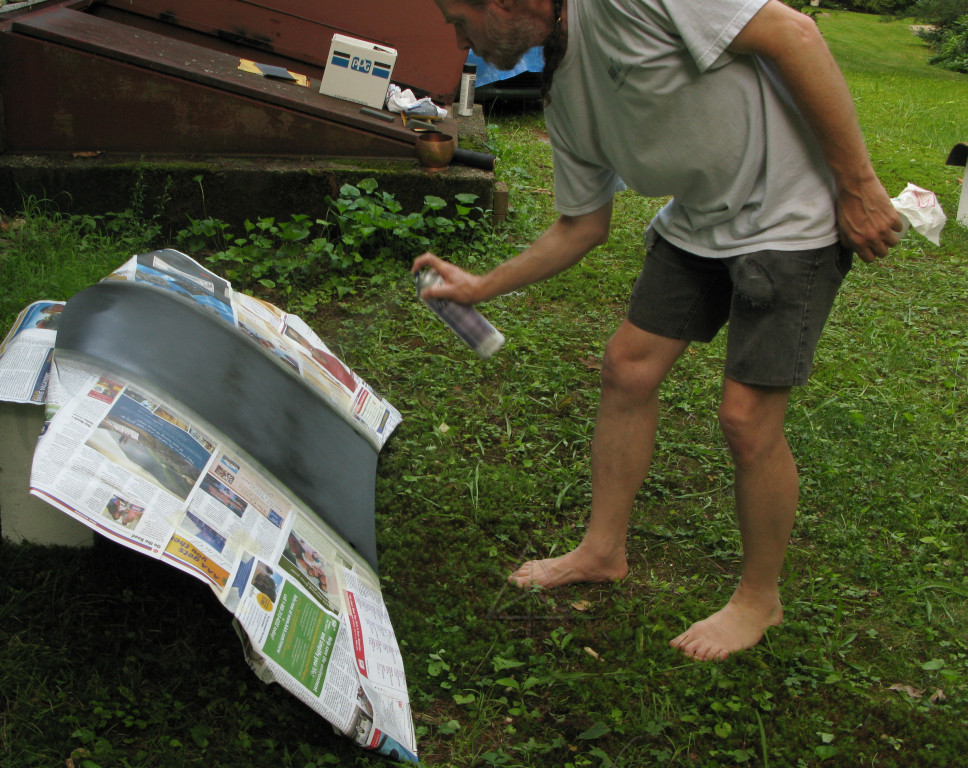
Painting begins, and another sixty square miles of the ozone layer are
obliterated.
The first half-coat is very light along the edges to help seal the tape
border without letting it get too wet and run underneath, with a minute or
so to set, and then the first real coat goes on.  It looks like ass, though,
patchy with some green still showing through.

Here's where the amateur auto-body guy shows his lack of experience: I didn't
realize that the rattle-can nozzle actually tries to spread vertically and
took a pass in an up/down direction, wondering why the paths were coming out
so thin.  The assumption that it would settle down while drying overnight
is totally invalid, and the tracks are clearly visible the next morning.

So clearly I'm not finished yet, and take a wet-sanding pass over this with
1000 grit to try and level it out a bit.
A final coat goes on [in the correct direction this time], and the piece left
out baking in the hot sun for most of the day.  This is about the optimal
surface for collecting solar heat, of course -- matte black over aluminum, it
doesn't get much better than that.

A delicate hint still remains of the last two coat's spray paths, but it's much
smoother and uniform than it was.  I declare it "good enough" for a rattle-can
job and figure that final sanding will hide the rest.
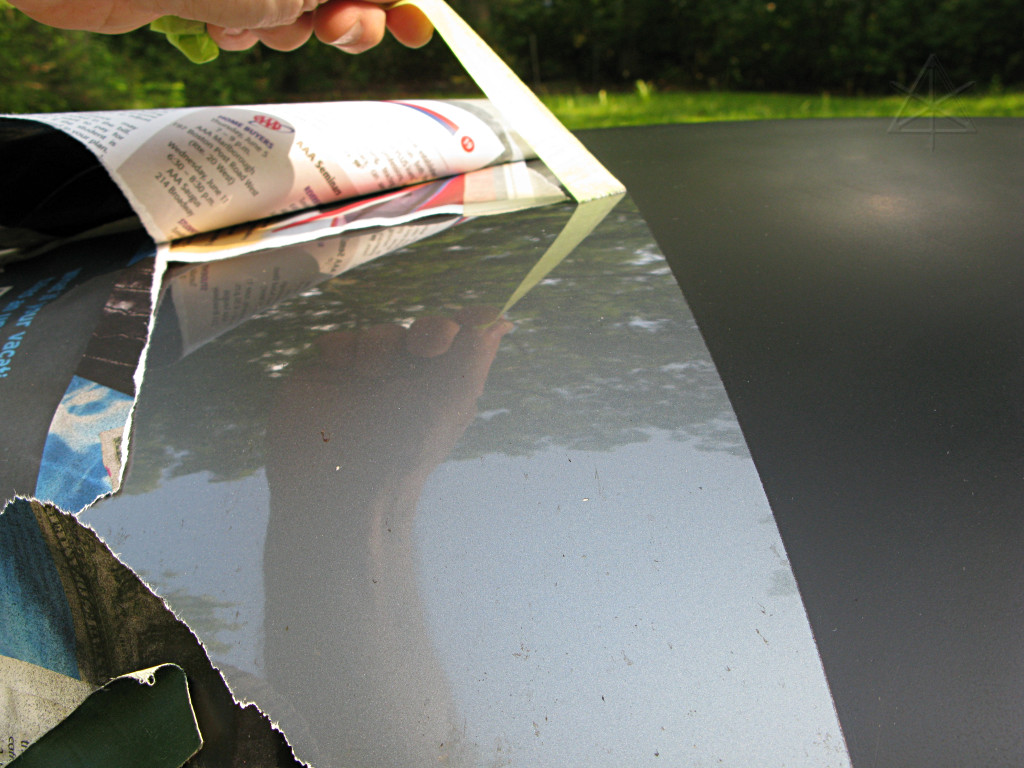
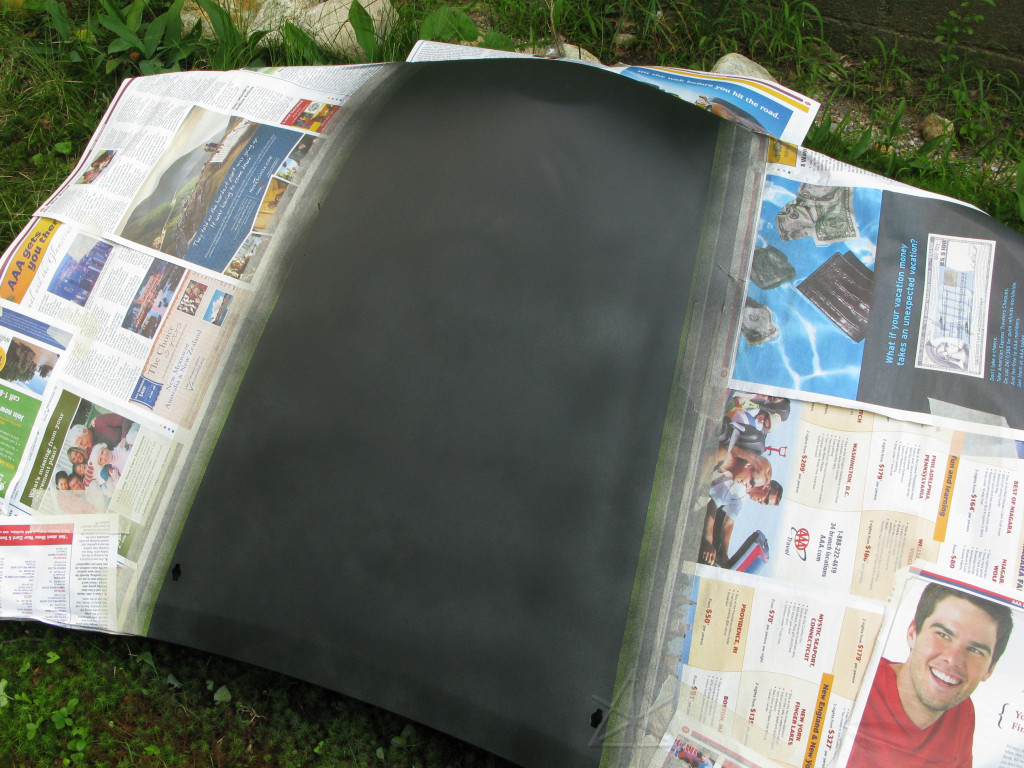
At this point it's time to unmask things, since the final sanding pass will
also need to level down the tiny meniscus at the tape line.
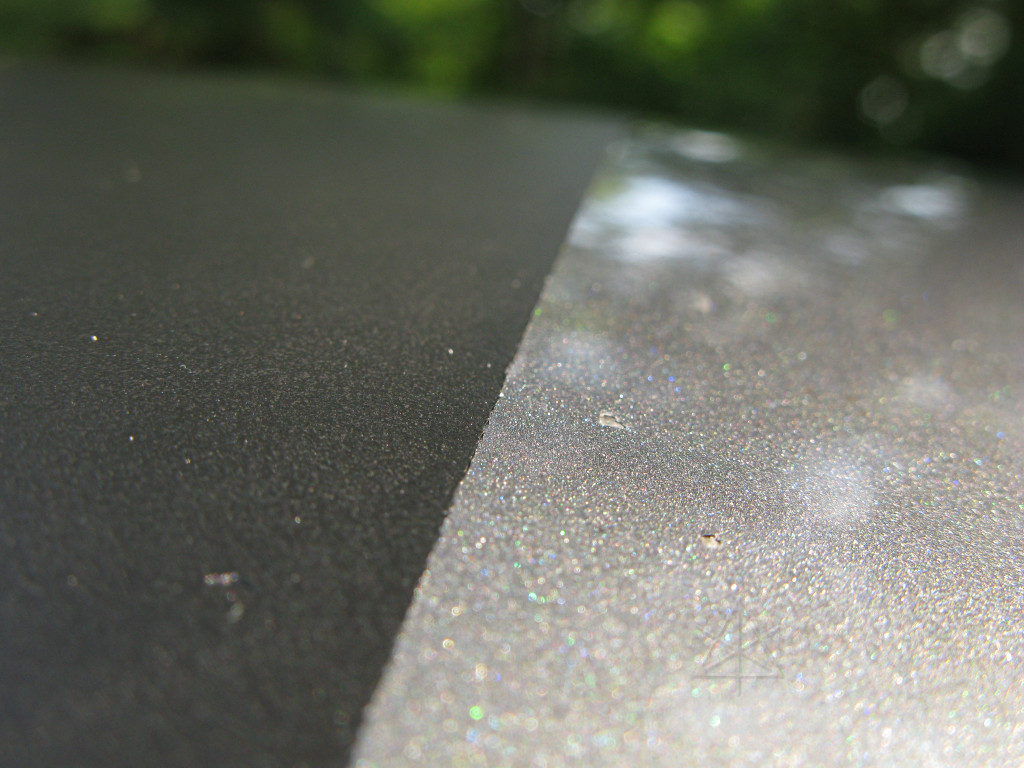
The edges come out pretty well -- the special green tape that the auto-body
place sold me seems to seal against a surface better than regular cheap
masking tape, and there's virtually no run-under to be found.
After a final 1000-grit wet sand to knock off the remaining paint roughness
and a couple of passes with "mildly abrasive" polishing compound, it will
likely never look quite as good as it does right now before going back
on the car.
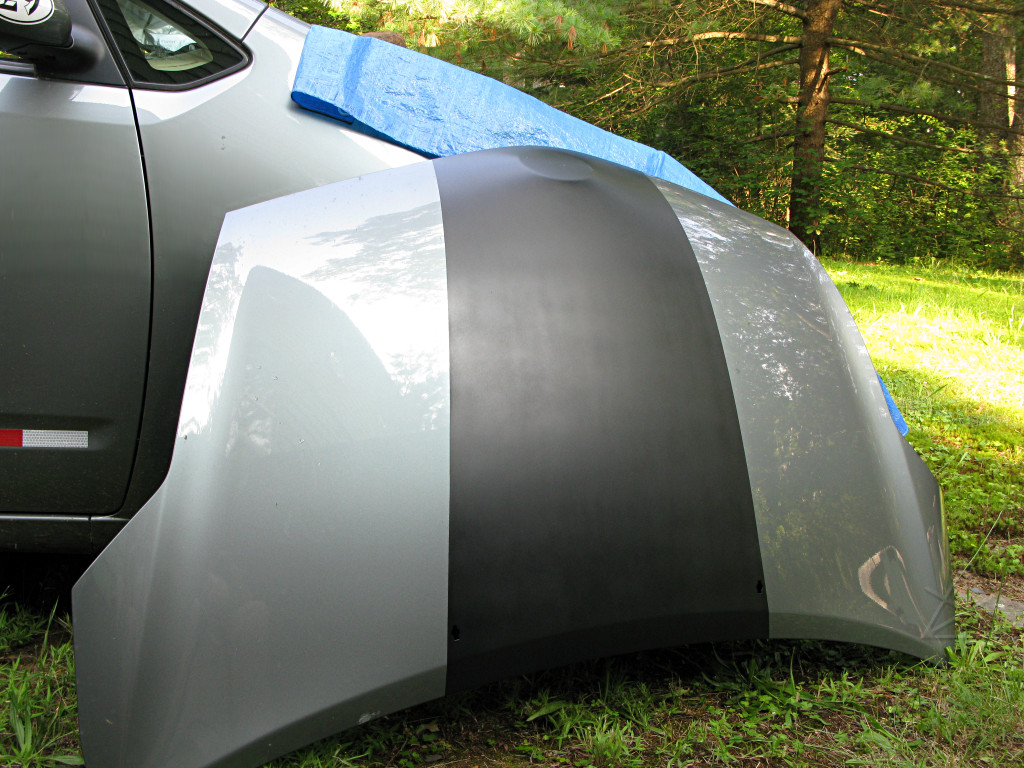
The stripe texture and color match the black trim pretty nicely, so I think
I've accomplished what I was after.
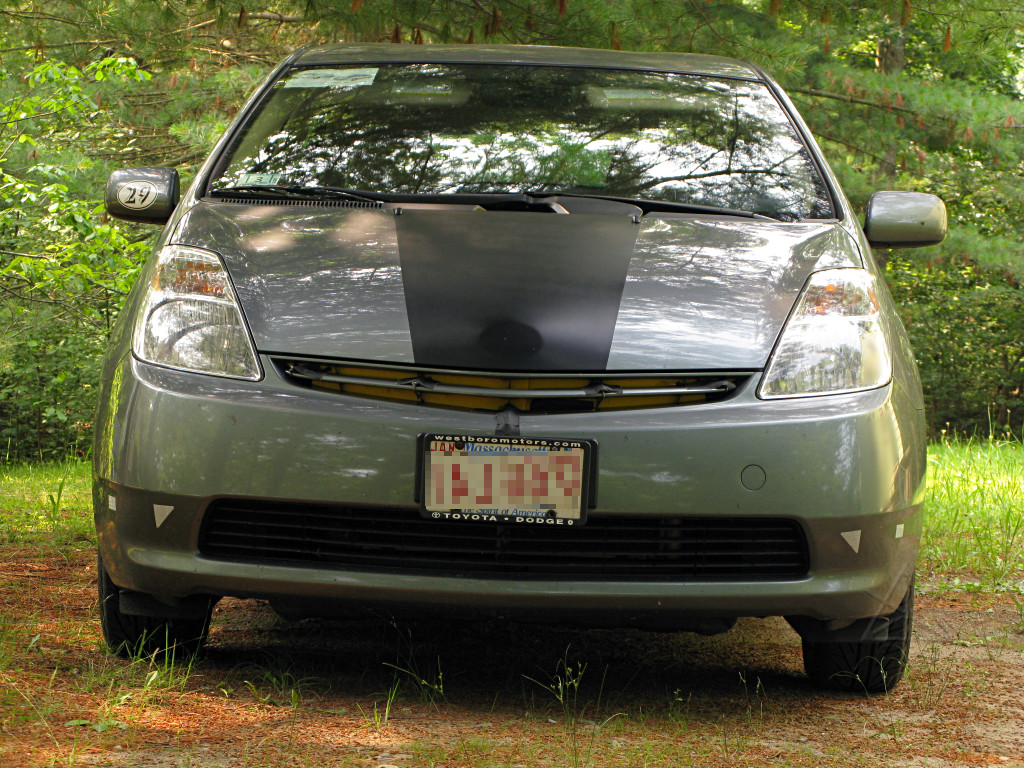
From artist's conception to reality: here's what it looks like when actually
done to the car.
Compare these to the original concept photochops.  A convenient all-in-one
composite of it all is here.  It doesn't de-emphasize the raised oval
bit quite as much as I expected, but it does make the whole area look more
uniform and sort of visually lengthens the front of the car.
_H* 080709